Reconditioning (cont’d)
Bushing Removal (cont’d)
77 - 2
Section E Hydraulics
9803/6410
Section E
77 - 2
Issue 1
Hydraulic Rams
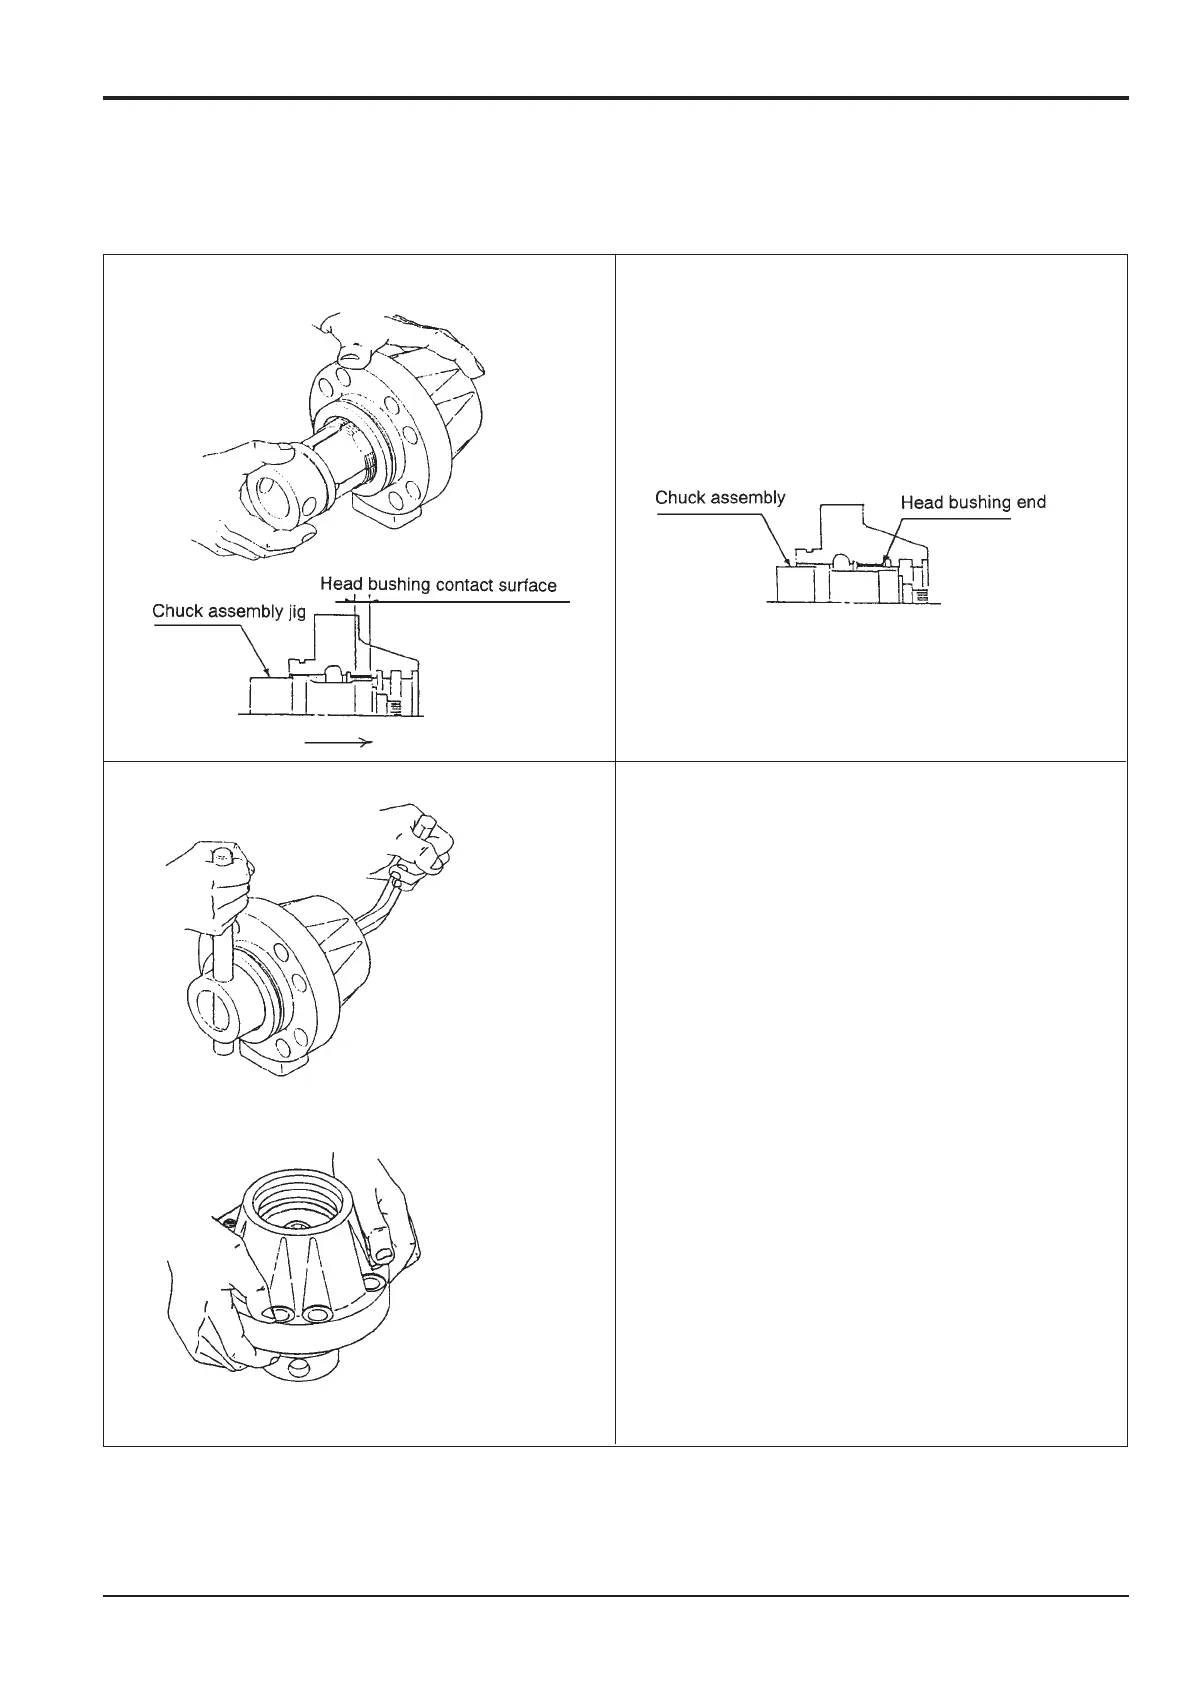
Gradually insert the chuck assembly into the cylinder
head until its blade end reaches the bushing end.
1 Insert the chuck assembly into the cylinder head,
taking care that parts of the blade do not damage
the inner circumferential surface.
2 Be careful that the blade does not jump out from the
bushing end surface.
1 Fit the Allen wrench into the chuck assembly adjuster
head and at the same time insert the lever into the
chuck assembly rear hole.
2 Tighten enough so that when the cylinder head is
lifted, the jig will not fall off.
Note: Tightening torque less than 5 kgf m (36.16 lbf ft) is
sufficient.
Move the cylinder head and chuck assembly to the press
bench, gripping the assembly as shown.
3 Setting the chuck assembly
4 Temporary tightening
JS02310