Routine Maintenance
Engine
141 141
9811/5700-7
1 Get access to the engine. Refer to Access Panels,
Engine Cover.
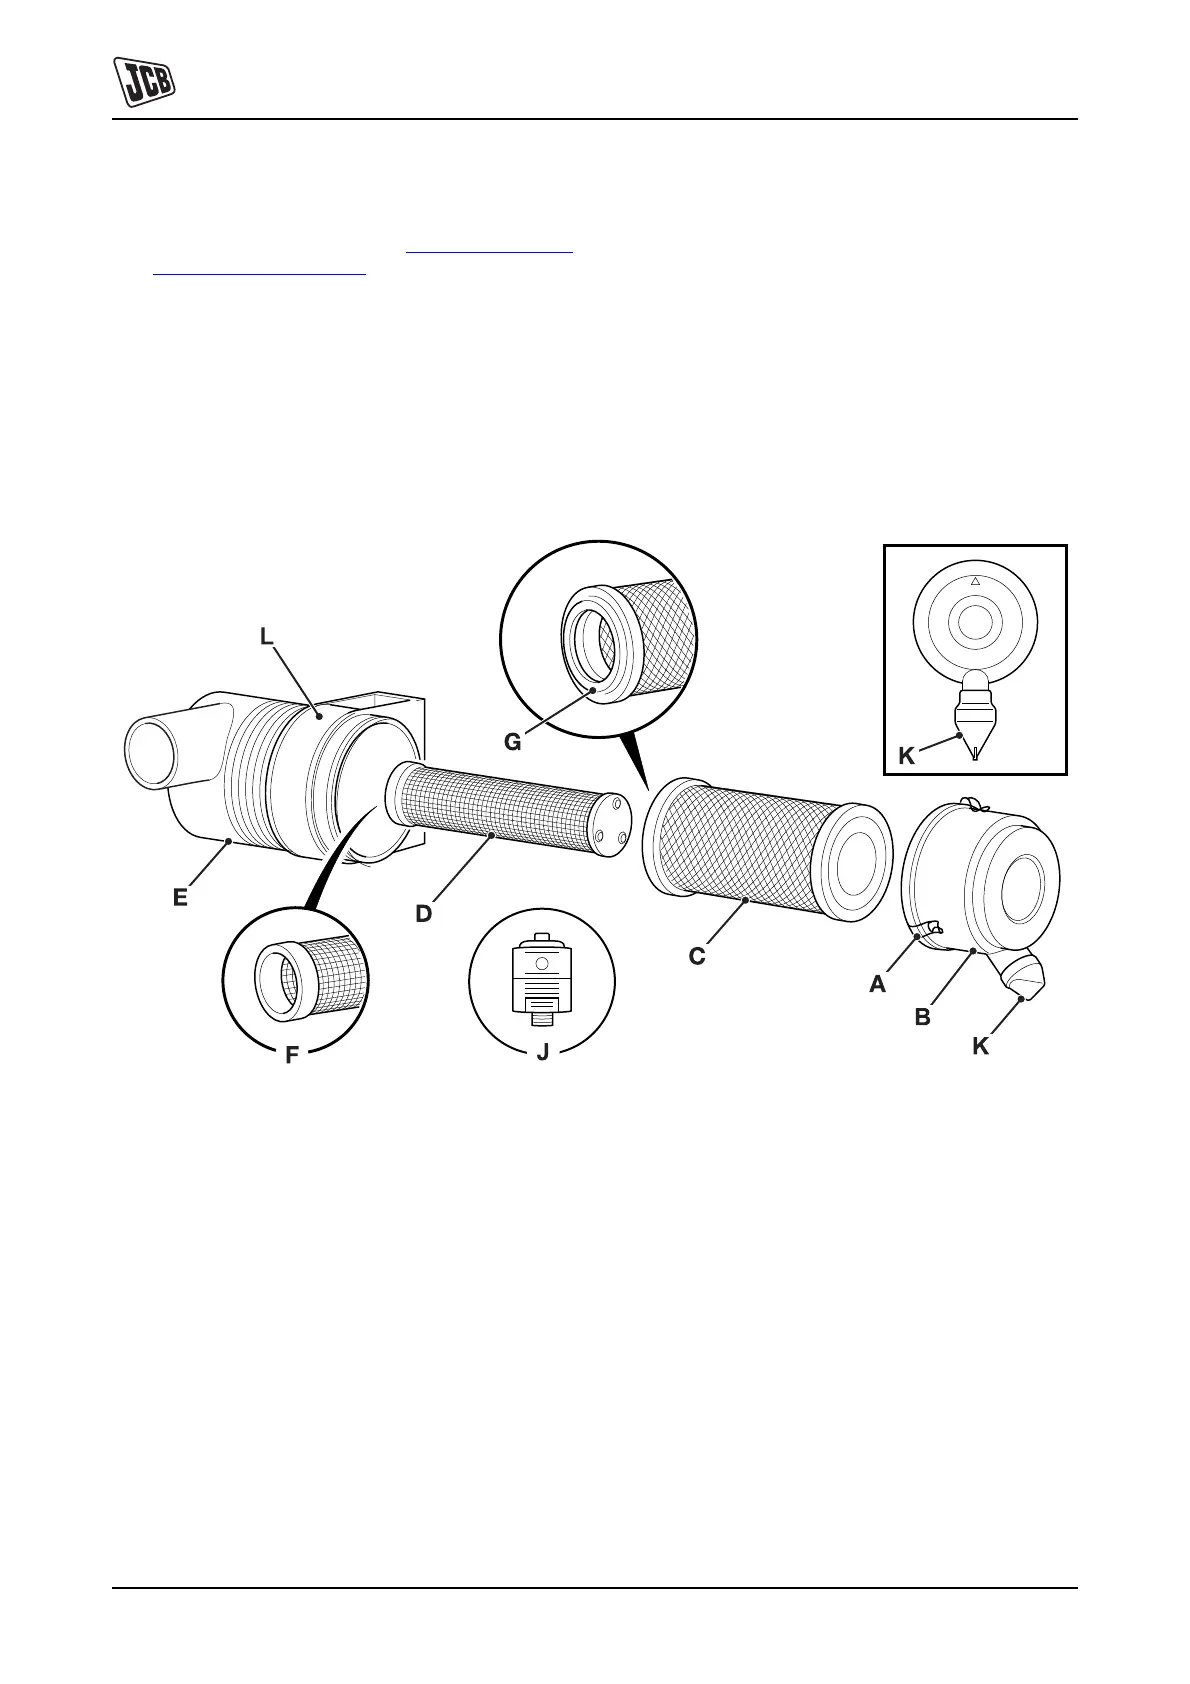
2 Clean the Pre-Cleaner (if fitted). K
Cleaning the Pre-
Cleaner (if fitted) ( T 140).
3 Open clips A and lift off cover B. Remove outer
element C. If the inner element is to be changed,
remove inner element D.
Note: Take care not to tap or knock the element. If
necessary, release the springs on the filter bracket L to
gain extra clearance when removing the filters.
4 Clean the inside of cover B and canister E.
5 Carefully insert the new inner element D into the
canister. Make sure it seats correctly by smearing
seal F with grease and checking for a witness mark
on the canister base.
6 Insert a new outer element into the canister. Make
sure it seats correctly by smearing seal G with grease
and checking for a witness mark on the canister base.
Fit cover B with dust valve K at the bottom. Push the
cover firmly into position and make sure it is secured
by clips A.
7 If necessary, fasten the springs on the filter bracket L.
8 Check all hoses for condition and tightness.
Fig 105.