This document provides a quick start guide for the Jennov HD WiFi Security Camera, outlining its features, installation process, and app setup. It also includes important safety and warranty information.
Function Description
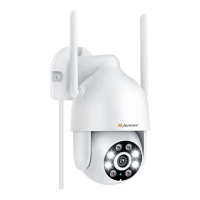
The Jennov HD WiFi Security Camera is designed for surveillance, offering remote monitoring capabilities through a dedicated mobile application. It captures video and images, providing security for your home or property. The camera supports both local storage via a Micro SD card and optional cloud storage for recorded footage.
Key functions include:
- Video Recording: The camera records video, with options for both full-day recording and event-triggered recording based on motion detection.
- Motion Detection: When enabled, the camera detects moving objects and can send alarm pushes to your mobile phone. This feature can be customized with different sensitivity levels (low, medium, high) and allows for the selection of specific alarm areas.
- Audible and Visual Alarms: The camera can provide audible alarms and/or white light alarms when motion or human shapes are detected, particularly effective at night.
- Two-Way Audio (Intercom): Users can press and hold the intercom button in the app to engage in two-way audio communication through the camera.
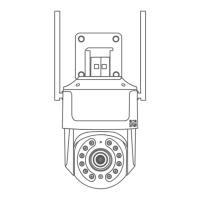
- PTZ Control: The camera supports Pan-Tilt-Zoom (PTZ) functionality, allowing users to remotely rotate the camera up, down, left, and right to adjust the viewing angle.
- Night Vision: The camera offers different night vision modes, including automatic switching between color (daytime) and infrared (nighttime), full-color mode (daytime color, no infrared/white light at night), and black and white image mode (daytime color, infrared at night).
- Screenshot Capture: Users can capture screenshots of the live feed directly from the mobile app.
- Lens Switch: This feature allows users to turn the viewable monitoring screen on and off, often used when sharing access with other users.
- Photo Album: The app includes a photo album where captured screenshots can be viewed.
- Device Sharing: The camera's feed can be shared with up to four other devices simultaneously, allowing multiple users to watch. Shared accounts have partial permissions to operate the device.
Usage Features
The camera is operated primarily through the "Cloudedge" mobile application, available on both Apple App Store and Google Play.
Setup and Installation:
- APP Installation: Users need to download the "Cloudedge" app by searching for it in their respective app stores or by scanning a provided QR code.
- Account Registration: An account must be created within the app using an email address, nickname, and password.
- Camera Connection: To connect the camera to your network, both the mobile phone and camera should be brought close to the router (within 5 meters/16 feet). The camera exclusively supports 2.4 GHz Wi-Fi signals; 5 GHz signals are not supported.
- Device Reset: Before adding the device, it needs to be reset, indicated by a flashing red indicator light.
- QR Code Scanning: The camera uses a QR code scanning method for network setup. The mobile phone displays a QR code, which the camera scans to establish a connection. A prompt tone confirms successful scanning.
- Installation Location: The recommended installation height is 7-10 feet (2-3 meters) above the ground to maximize the motion sensor's detection range. It's important to avoid direct sunlight and ensure the camera is installed in a 90-degree straight line. Strong light sources, such as street lights or reflective surfaces, should be avoided within 7-10 feet of the camera lens, as they can affect definition and night vision.
- Wi-Fi Signal Test: Before final installation, users are advised to test the Wi-Fi signal quality at the intended installation position using their cell phone to ensure a strong connection.
App Interface and Controls:
- Live View: The app provides a live feed of the camera's view, displaying bit rate and Wi-Fi strength.
- History: Users can access recorded video history.
- Cloud Storage: Integration with cloud storage is available as an optional feature.
- Settings: A comprehensive settings menu allows users to configure various camera functions, including:
- Receive Alert Notifications
- Device Share
- Location Management
- Network Indicator
- Image Setting (including screen flip for installation environment)
- Privacy Protection
- Alarm Management (motion detection sensitivity, working mode, alarm area, audible/visual alarms)
- Recording Management (full-day recording, event recording, SD card formatting)
- Cloud Storage Service
- Checking for New Versions
Security and Privacy:
- FCC Compliance: The device complies with Part 15 of the FCC Rules, ensuring it does not cause harmful interference and accepts any received interference.
- RF Exposure: The device meets general RF exposure requirements and can be used in fixed/mobile exposure conditions with a minimum separation distance of 20cm.
Maintenance Features
The manual outlines several maintenance and troubleshooting aspects to ensure optimal device performance.
SD Card Management:
- Installation: The Micro SD card should be inserted when the camera is powered off and fully inserted in the correct direction to prevent damage.
- Formatting: The SD card must be formatted with FAT32. This can be done via the Cloudedge app.
- Capacity Requirements: Supports 8-128GB capacity, with Class10 read and write speed.
- Data Backup: Before formatting the SD card, users are warned to back up important data as formatting will erase all data.
Troubleshooting and Reset:
- Device Reset: The camera has a reset button (press and hold for 5-8 seconds) to restore factory settings. This primarily resets network configuration; the camera must be removed from the app separately if it remains in the device list after a reset.
- Network Issues: If the device cannot be previewed properly, users should check network normalcy, place the camera closer to the router, or reset and re-add the device.
- Changing Routers: To connect the camera to a different router, it must first be removed and reset via the app, then reconfigured.
- Notification Issues: If mobile notifications are not received, users should confirm the app is running, reminder functions are enabled, and mobile phone system permissions for message notifications are granted.
Warranty and Support:
- 12-Month Warranty: The product comes with a free 12-month warranty, activated by filling out information or scanning a QR code and sending it to support@jennov.com.
- Customer Support: Contact information, including email (support@jennov.com) and a U.S. hotline (+1 3239021978), is provided for assistance with damaged parts or other issues during the warranty period.
General Care:
- Environmental Considerations: Avoid placing the camera in direct sunlight.
- Power Connection: It is not recommended to use power extension cables with the camera.
- Wi-Fi Password: Avoid using too many special symbols in the Wi-Fi password, as this may cause the device to be unrecognized and fail to add.