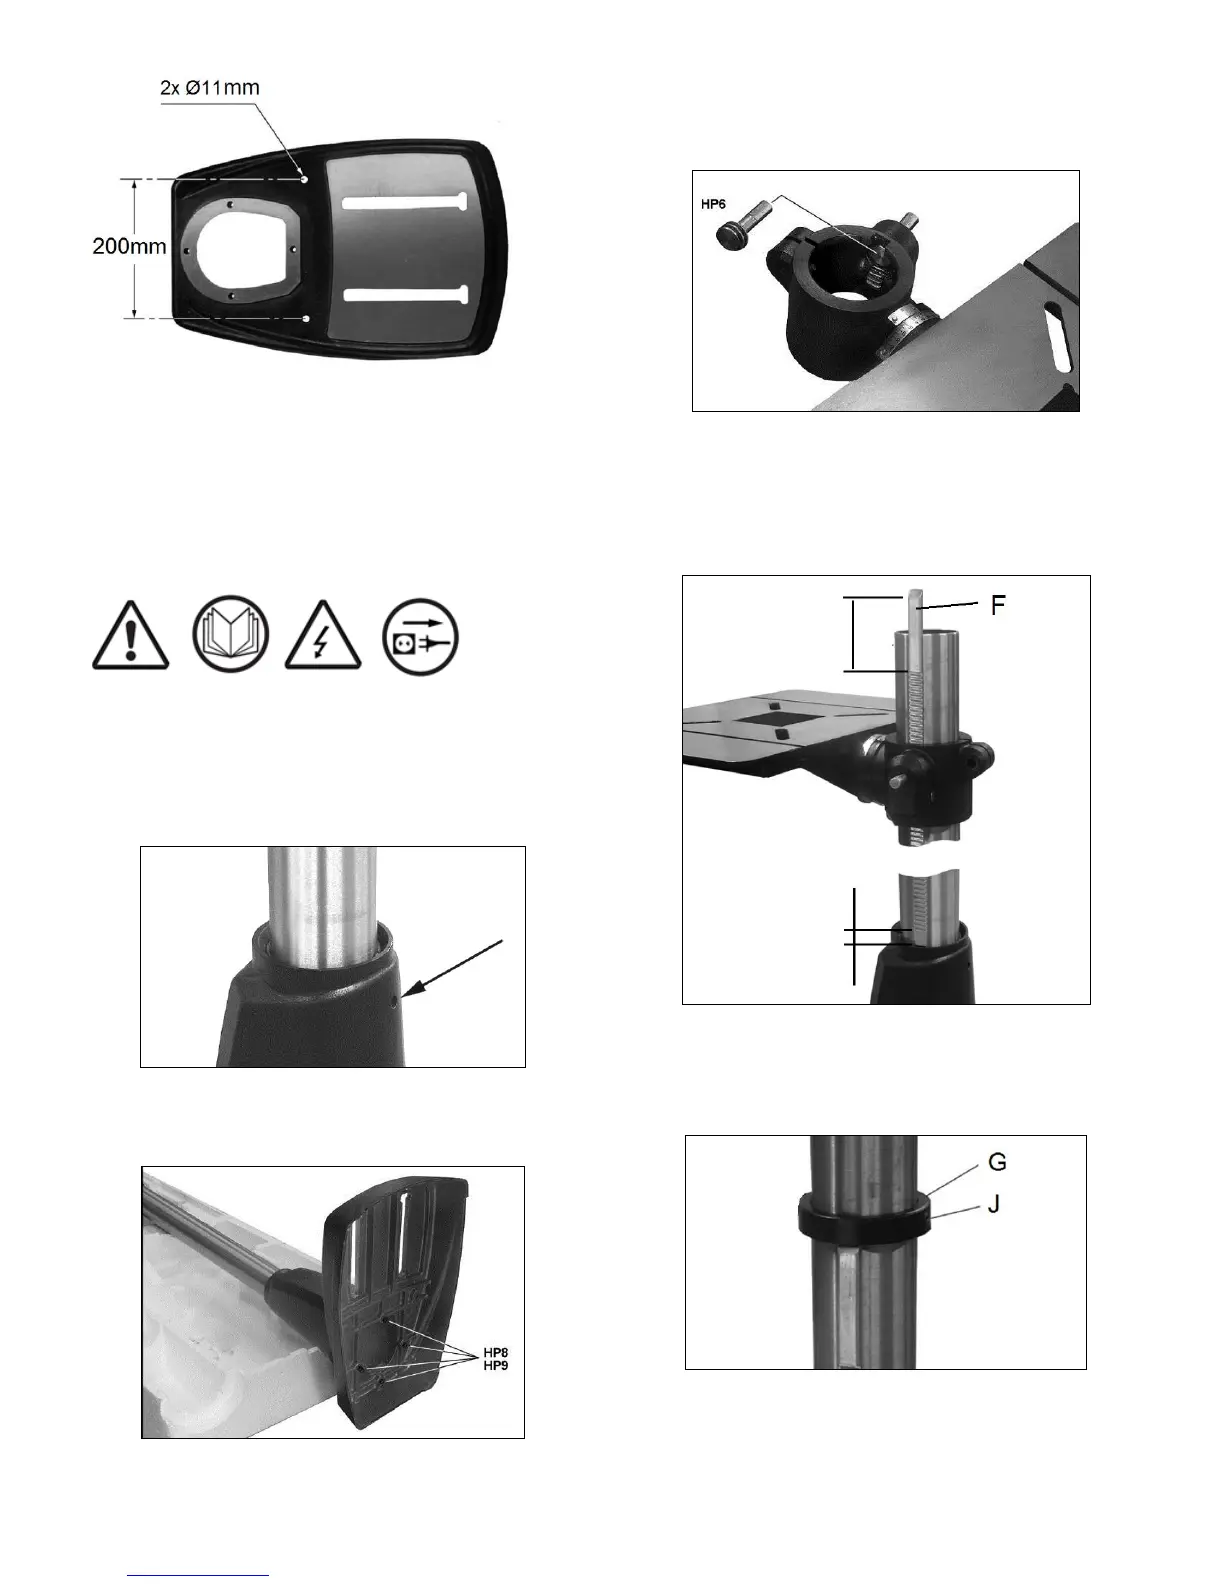
Fig 4
For packing reasons the machine is not completely
assembled.
5.2 Assembly
Do not connect the drill press to power source until machine
has been fully assembled.
If you notice transport damage while unpacking, notify your
supplier immediately. Do not operate the machine!
Dispose of the packing in an environmentally friendly manner.
Clean all rust protected surfaces with a mild solvent.
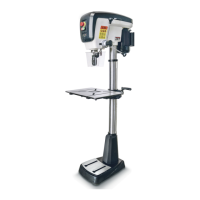
Make sure the set screw (Fig 5) is tight against the column.
Fig 5
Attach base to column foot with four M8 screws and flat
washers. Fig 6.
Fig 6
Tighten screws firmly.
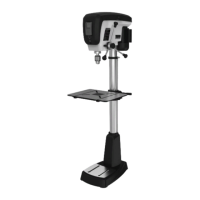
Set the column assembly upright.
Insert the worm shaft (HP6, Fig 7).
Fig 7
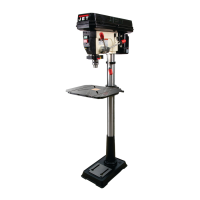
Position the rack (F, Fig 8) into the table bracket slot.
The longer flat portion of the rack should be at the top.
With the aid of a second person, slide the table bracket and
rack together down the column.
Fig 8
Place the stop collar (G, Fig 9) onto the column and slide it
down. Tighten set screw (J).
ATTENTION: the rack must be free for side movement.
Fig 9
Mount the table elevating crank (HP4, Fig 10).
Make sure the set screw (K) aligns with the flat on the worm
shaft.