4.1 These models are usually installed on a raised hearth of non-combustible
material.
4.2 It is preferable to install these units into a masonry chimney with Jetmaster
moulded flue liners. Alternatively, a steel flue can be supplied at extra cost.
This is merely bolted against the wall by means of securing brackets. The
steel flue is then sealed at roof level in the same way as the Victor model,
referred to previously (see Fig. 5).
4.3 The steel flue elbow is designed for 110 mm or 220 mm wall thickness.
Select the correct end and fit to the unit.
4.4 Tape the fibreglass supplied to the back of the unit to reduce heat transfer
to the brickwork, Excess can be trimmed after installation.
4.5 Position the unit against the wall and prop the base to suit the height of
hearth required. Heron model requires air inlet to be built into hearth.
NOTE: (a) In the case of a facebrick wall the unit can be set against the
brickwork and the elbow built in.
(b) In the case of a plastered finish wall, the unit should be set slightly
proud of the stock brickwork and the plasterer should then plaster
up to and slightly behind the back of the unit.
4.6 The brickwork chimney can then be built ensuring that the internal size of
the flue is not less than the size of the elbow outlet throughout its length
(refer 1.2. chimney flues)
4.7 The top of the chimney stack must be weathered as shown or a Jetmaster
cowl fitted (refer Fig.8).
12
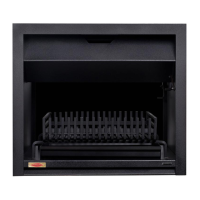
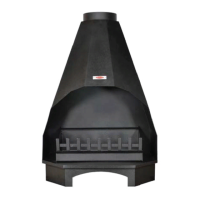
4.
Installation of Falcon and Heron models
Back to
content page