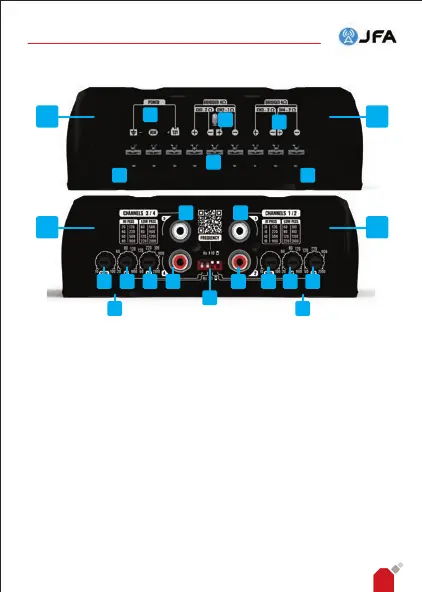
4. CONNECTIONS AND CONTROLS
5
1, 2, 3 and 4 - RCA connection: RCA audio input connection for channels
1 to 4 respectively. Connect to the player's audio outputs.
5 and 6 - Crossover:
◦ High PASS (HP) lter: settings from 20Hz to 9kHz.
Determines the start of the amplier's operating frequency.
◦ LOW PASS (LP) lter: settings from 60Hz to 20kHz.
Determines the end of the amplier's operating frequency.
7 - Crossover setting selector: use this switch to determine whether the
setting frequency selected on the crossover knobs will be multiplied by 10
(x10) or by 1 (x1).
8 - Level: adjusts the sensitivity of the amplier's inputs.
9 - JFA intelligent LED: indicates the amplier's operating status.
10 - Screw for xing the connector protection caps: Screw used to x
the nishing and connector protection caps. Use a No. 1 Phillips
screwdriver to remove the caps.
12 12
10
10
9
11
13 13
12 12
3 1
8 5 6 4
7
658
13 13
2
AP400 AND AP800 AUDIO AMPLIFIER - INSTRUCTION MANUAL