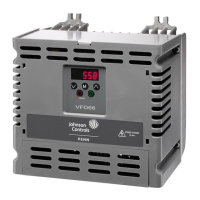
VYPER
™
VARIABLE SPEED DRIVE
OPERATION
S100-200 IOM (MAY 08)
Page 28
OPERATION
QUANTUM
™
LX CONTROL PANEL
This section is provided to briefl y familiarize the operator
with the Frick Quantum
™
LX control panel and its control of
the Vyper
™
. Detailed information about operation and set-
tings of the Quantum
™
LX control panel can be found in Frick
document: S90-022 0, OPERATION – SERVICE, FRICK
QUANTUM
™
LX COMPRESSOR CONTROL PANEL.
VYPER
™
OPERATION
Relying on user input as well as system pressures and
temperatures, the Quantum
™
LX directs the Vyper
™
to start
or stop the compressor and change the compressor’s speed
to regulate capacity. The setpoints that primarily control the
operation of the Vyper are found on the Capacity Control
Setpoints and Motor Setpoints pages of the Quantum
™
LX.
To start the compressor, the Quantum
™
LX sends a signal to
the Vyper
™
to turn on the motor. When the Vyper receives the
start command, it begins a precharge process as it prepares
to start the motor. During the precharge process the Vyper’s’
cooling pump is turned on, and the DC link voltage is slowly
increased. After about 30 seconds the Vyper
™
turns on the
motor and ramps up to the speed set by the VFD Minimum
Drive Output setpoint. At the same time, if the slide valve
is below the Variable Speed Minimum Slide Valve Position,
it immediately loads to the Variable Speed Minimum Slide
Valve Position.
As more capacity is required, the Quantum
™
LX loads the
slide valve. The Capacity Control Settings (on the Motor
Setpoints page) can be confi gured to cause the motor speed
to increase at the same time. However, in most Vyper
™
ap-
plications the Capacity Control Drive Speed setpoint is set to
match the Minimum Drive Output setpoint. In this confi gura-
tion the motor speed will remain at its minimum speed until
the slide valve loads above the Capacity Control Slide Valve
setpoint. If the slide valve cannot load due to a slide valve
load inhibit condition or because the compressor cannot build
differential pressure, the motor speed will increase to meet
the capacity requirement.
When the slide valve reaches the Capacity Control Slide
Valve setpoint, the motor speed can increase. At this point
the slide valve and motor speed can continue to increase
independently of one another until the capacity requirement
is met or they reach their maximum values. If the compressor
is in Auto mode, the motor speed is controlled by the VFD
Proportional Band and VFD Integration Time setpoints.
If less capacity is required, the Quantum
™
LX will fi rst de-
crease the motor speed. The motor speed can drop as low as
the Capacity Control Drive Speed setpoint. When the motor
speed reaches this point, depending on the Quantum
™
LX’s
confi guration, the slide valve may unload or the Quantum
™
LX
may stop the compressor. If the slide valve is permitted to
unload, it will not unload below the Variable Speed Minimum
Slide Valve Position while the compressor is running.
When the Quantum
™
LX turns off the compressor, it initially
keeps the Vyper
™
in Standby mode. In this mode, the Vyper’s
DC Link remains energized so that when the Quantum
™
LX
sends a start command to the Vyper
™
, the compressor starts
immediately. The Quantum
™
LX panel holds the Vyper
™
in
Standby mode for up to 2 hours after the compressor shuts
down. If this standby period passes without the compressor
turning on, the Vyper
™
then switches from Standby to Off.
When the Vyper
™
goes to Off mode, the DC Link is de-
energized, and the Vyper
™
will have to go through the 30
second precharge before the compressor can be restarted.
The current Vyper
™
Operating Mode is displayed on the
Vyper
™
Status page. To allow the compressor to restart
quickly, the Quantum
™
LX’s Recycle Delay is disabled. With
the Vyper
™
the compressor can be started multiple times in
a short period without causing damage to the motor.
After changing to Home Screen Service Level 2, press the
[Menu] button again. Pressing the [Menu] button displays
the menu fl ydown with some additional options. With the
scroll down button, select the [Operating Values] option
(See Figure 33).
The [Operating Values] menu leads to the option of Vyper
screen menu. Select [Vyper] (See Figure 34).
 Loading...