Table 2: Display configuration object names
Default command value
Display configuration object
name
Default value Description
Operator override ZN-OCC-MODE Occupied Occupancy status display
Operator override ZN-SP-BLANK Yes Setpoint display blank
Operator override ZN-T DISP 70 Temperature display
Operator override ZN-SP-TEMP Setpoint Upper right display setpoint
Setup and adjustments for the
Warmer/Cooler (W/C) model
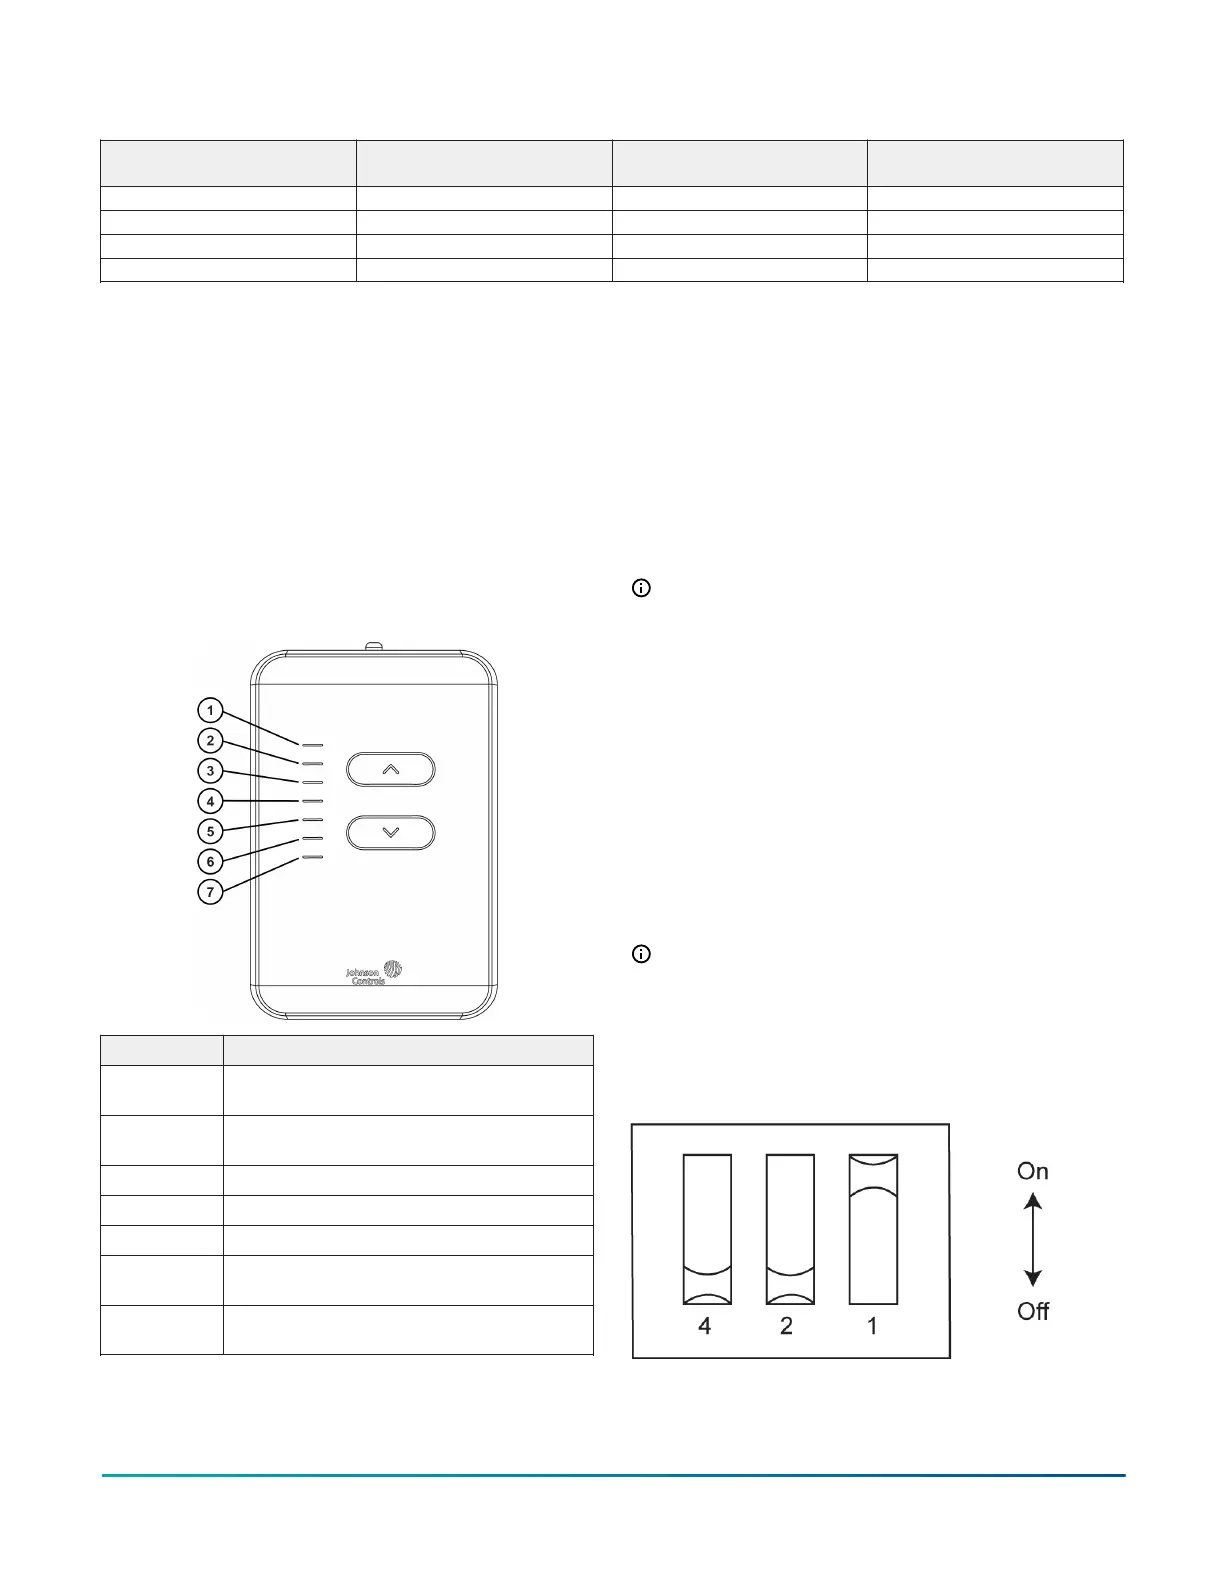
The non-display NS8000 W/C model uses LEDs to indicate
the temperature setpoint change. The center white
LED is the midpoint of the temperature setpoint range
configured in the controller. The incremental increase
or decrease in temperature assigned to the Upand
Down arrows depends on the temperature setpoint
adjustment set in the controller. The red LEDs indicate
an increase from the current room temperature setpoint.
The blue LEDs indicate a decrease from the current room
temperature setpoint. See the following figure and table
for further information about the LEDs.
Figure 5: NS8000 Warmer/Cooler (W/C) model
LED number Description
1
Partially lights up in red and fully lights up
in red
2
Partially lights up in red and fully lights up
in red
3 Fully lights up in red
4 Center LED fully lights up in white
5 Fully lights up in blue
6
Partially lights up in blue and fully lights
up in blue
7
Partially lights up in blue and fully lights
up in blue
Increasing the temperature
To increase the temperature, complete the following
steps:
1. To activate the W/C sensor model, press the Up
arrow once. The center white LED lights up.
2. To increase the temperature setpoint, press the Up
arrow again.
3. To increase the temperature further, continue to
press the Up arrow.
4. Optional: Press and hold the Up arrow to
continuously increase the temperature setpoint.
Note: When you press the Up arrow, the
temperature increases by one-tenth of the
temperature setpoint adjustment set in the
controller.
Decreasing the temperature
To decrease the temperature, complete the following
steps:
1. To decrease the W/C sensor model, press the Down
arrow once. The center white LED lights up.
2. To decrease the temperature setpoint, press the
Down arrow again.
3. To decrease the temperature further, continue to
press the Down arrow.
4. Optional: Press and hold the Down arrow to
continuously decrease the temperature setpoint.
Note: When you press the Down arrow, the
temperature decreases by one-tenth of the
temperature setpoint adjustment set in the
controller.
Network sensor addressing
Figure 6: Three-position switch
Vertical Wallbox-Mounted or Surface-Mounted NS8000 Series Network Sensors Installation Guide8

 Loading...