Do you have a question about the Johnson 40-6174 and is the answer not in the manual?
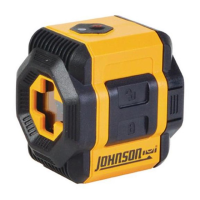
Controls the laser output for projecting lines or dots.
Mode conversion knob to switch between laser dot and line.
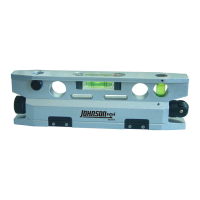
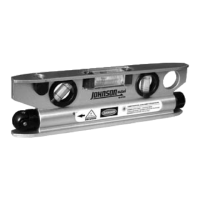
Verifies the accuracy of the spirit vials by rotating the level.
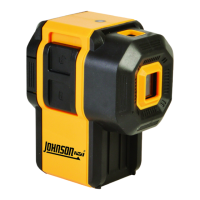
The Johnson Magnetic Torpedo Laser Level, Model No. 40-6174, is a Class IIIa laser tool designed for various leveling and alignment tasks. It is manufactured to comply with CFR 21, parts 1040.10 and 1040.11, as well as international safety rule IEC 285.
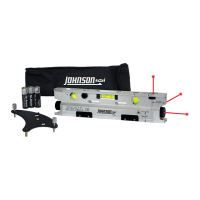
This instrument projects a single laser beam that can be selected as a dot, a vertical line, or a horizontal line. Its primary function is to assist in tasks requiring precise leveling and alignment, such as installing shelves, hanging pictures, or laying out materials. The laser output mode is easily switchable between dot and line, enhancing its versatility for different applications. The tool includes a convenient leveling base and features a magnetic surface, allowing it to be securely attached to metal surfaces. For mounting to round, square, or irregularly shaped objects, it comes with mounting straps that can be slipped through horizontal slots located below the horizontal vial.
The device is straightforward to operate. To power on/off, simply press the power switch to project the laser line or dot, and press it again to shut off the laser output. The laser output mode can be switched between a dot and a line by turning the mode conversion knob. Rotating the wedge lens up or down converts the laser from a dot to a line, or vice versa. When in line mode, rotating the wedge lens counter-clockwise will rotate the line from horizontal to vertical, or vice versa. The rotating head can only be turned in the direction indicated by an arrow sign.
Battery installation involves removing the battery door by rotating it counter-clockwise, inserting two "AA" alkaline batteries according to the illustrated polarity requirements, and then reinstalling the battery door by rotating it clockwise. Used batteries should be disposed of properly.
The leveling base is installed by screwing the attachment bolt clockwise into the 1/4" thread hole at the bottom of the instrument. The instrument can then be leveled by rotating two leveling screws.
Regular self-check and fine calibration are crucial for maintaining the accuracy of the instrument. It is the user's responsibility to verify the calibration before each use.
Checking Vials: To check the accuracy of the vials, place the level on a flat surface and note the position of the bubble. Rotate the level by 180 degrees (on the same gauging edge) and observe if the bubble remains in the same position.
Calibrating Vials: To access the calibration screws, remove the stickers located to the right and left of the vial at the top of the unit. Adjust the calibration screws to move the bubble back to the center, correcting half of the error. Rotate the level 180 degrees on the same gauging edge and move the bubble to the center again. Repeat this process until the error is entirely removed and the bubble consistently stays in the center. Note that the plumb vial and 45° vial cannot be calibrated.
Checking Laser: Once the vials are accurate, the laser accuracy can be verified using the near target, far target method. Place the unit on a flat surface and aim the laser at a stationary target at close range, noting a reference point. Move the unit away from the target, ensuring the laser's alignment to the target remains fixed. The accuracy of the laser can then be verified.
Calibrating Laser: The unit has set screws on the side and bottom for laser calibration. For vertical calibration, use the underside screws: tighten the front screw to adjust up and tighten the rear screw to adjust down. For horizontal calibration, use the two screws on the side where the part number and date code are located: tighten the front screw to adjust right and tighten the back screw to adjust left.
This laser unit is a precision tool and must be handled with care. Avoid exposing it to shock vibrations and extreme temperatures. Always turn off the unit before moving or transporting it. Remove the batteries when storing the tool for extended periods (more than three months) to prevent damage from battery deterioration. Store the unit in its case when not in use and avoid getting it wet. Keep the laser unit dry and clean, especially the laser output window, by removing any moisture or dirt with a soft, dry cloth. Do not use harsh chemicals, strong detergents, or cleaning solvents.
Johnson Level & Tool offers a three-year limited warranty. Non-warranty repairs and course calibration must be performed by an authorized Johnson® service center. Using non-Johnson® parts or accessories will void the warranty. For warranty repairs (manufacturing defects only), proof of purchase is required, and a warranty registration card must be completed and submitted within 30 days of purchase. For assistance, contact Johnson Level & Tool's Customer Service Department. In the U.S., call 888-9-LEVELS; in Canada, call 800-346-6682.
| Brand | Johnson |
|---|---|
| Model | 40-6174 |
| Category | Laser Level |
| Language | English |