ELECTRICAL
ELECTRIC STARTER SERVICING
Place the washer
on
the armature shaft. Place a
new gasket on the drive end cap.
Align the drive end cap mark with the mark
on
the
frame and magnet assembly. Assemble the drive
end cap to the frame and magnet assembly.
Put a drop of
oil
on
the two thru-bolts and install
the thru-bolts. Tighten the thru-bolts and torque
30
25/30 MODELS
Lubricate the armature shaft bearing surface with
one drop of SAE Number
10 oil. Lubricate pinion
helix
on
armature shaft with Starter Pinion Lube,
PIN
337016.
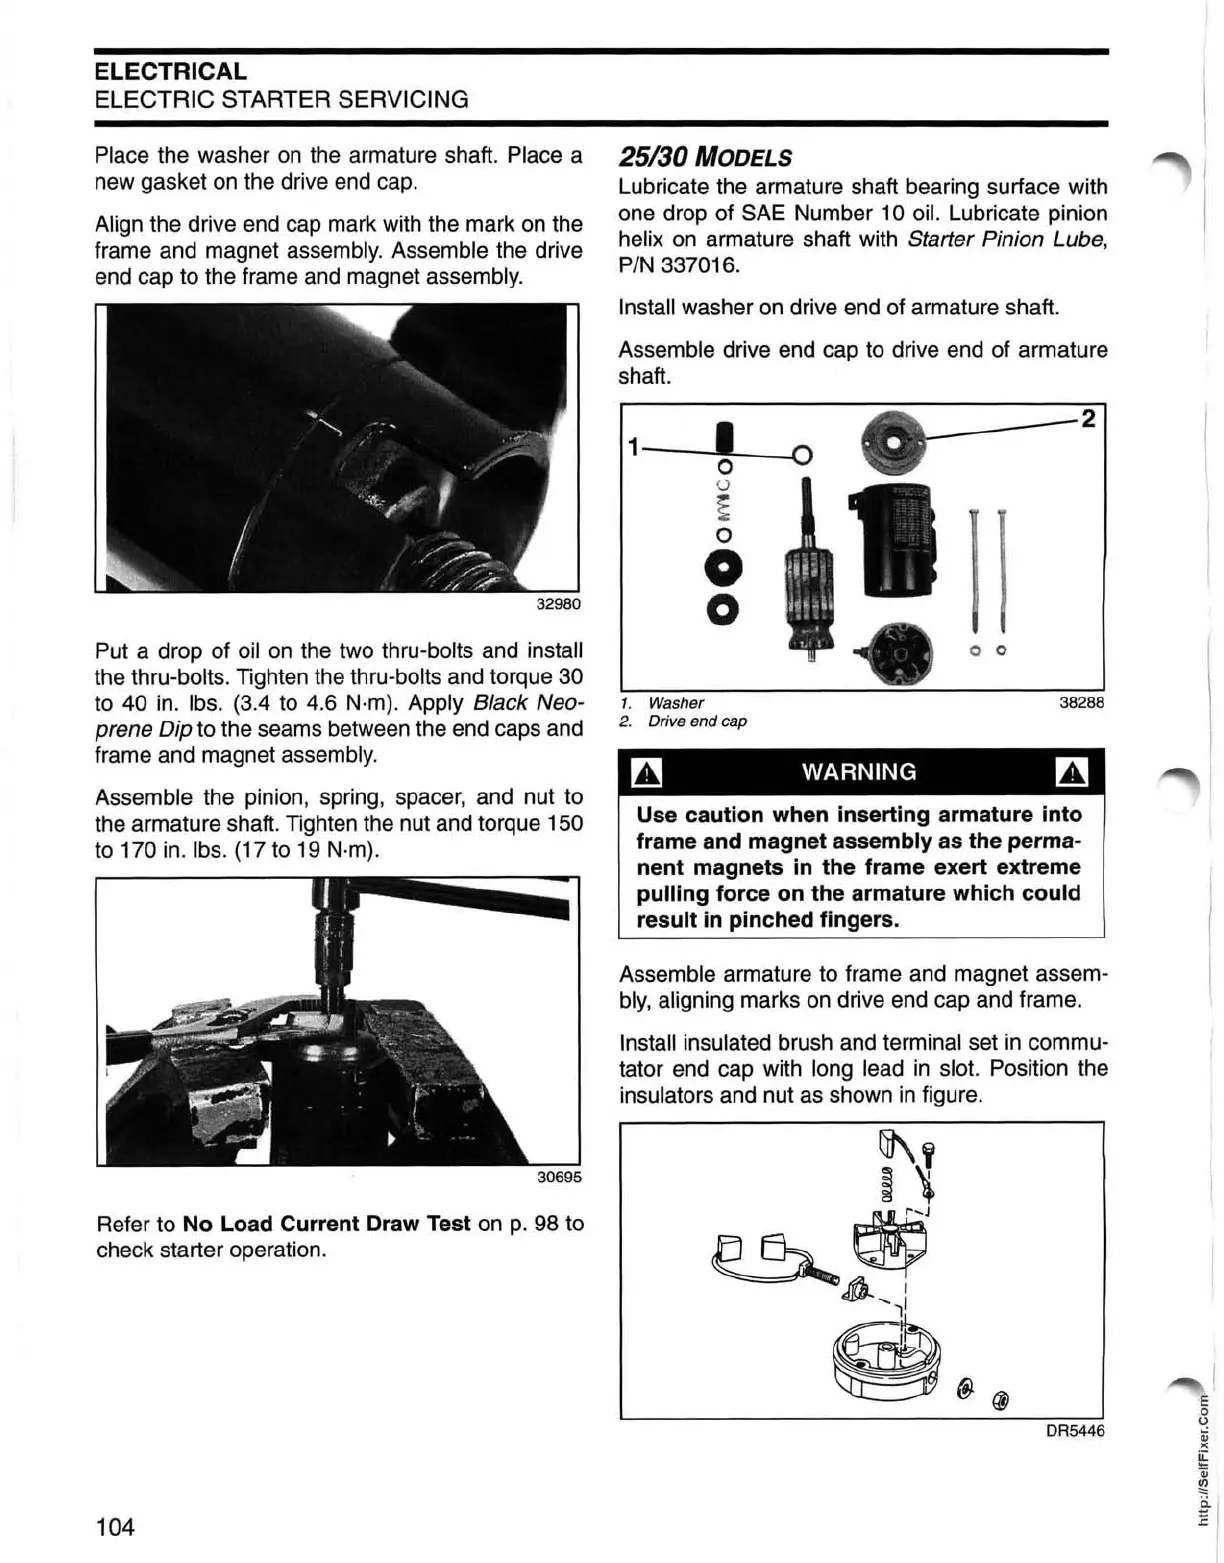
Install washer
on
drive end of armature shaft.
Assemble drive end cap to drive end of armature
shaft.
1_~I--O
o
<.)
~
o
o
o
O
~
___
--2
o 0
to 40
in.
Ibs. (3.4 to 4.6 N·m). Apply Black Neo- 1. Washer
38288
prene Dip to the seams between the end caps and 2. Drive end cap
frame and magnet assembly.
Assemble the pinion, spring, spacer, and nut to
the armature shaft. Tighten the nut and torque 150
to 170 in. Ibs. (17 to 19 N·m).
Refer to No Load Current Draw Test
on
p.
98 to
check starter operation.
104
m
WARNING
m
Use caution when inserting armature
into
frame and magnet assembly as the perma-
nent magnets in the frame exert extreme
pulling force on the armature which could
result in pinched fingers.
Assemble armature to frame and magnet assem-
bly,
aligning marks
on
drive end cap and frame.
Install insulated brush and terminal set
in
commu-
tator end cap with long lead
in
slot. Position the
insulators and nut as shown
in
figure.
DR5446