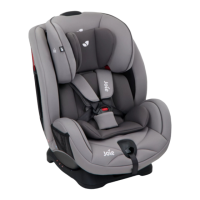
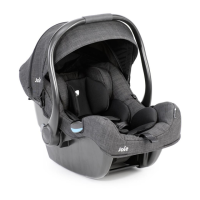
REARWARD FACING MODE
REARWARD FACING MODE
35
36
ii. Use of Small Seat Pad
1. Pull the head support aside and thread the shoulder harness through
the head support slot to fasten the head support. (Fig. 11)
Before assembling the head support, please check whether the
shoulder harnesses are at the proper height. Please refer to P. 34
(Proper Position of the Shoulder Harnesses) & P. 40 (Shoulder
Harnesses Height Adjustment).
2. While pulling up the webbing adjuster, pull out the shoulder harnesses
to proper length. (Fig. 12)
Fig. 12.1 Webbing adjuster
3. Press the red button to disengage the buckle (Fig. 13.1), and then
place the small seat pad in the child restraint. (Fig. 13.2)
4. Engage the buckle. (Fig. 14)
5. Pull the adjustment webbing tight. (Fig. 15)
iii. Rearward Reclining Angle Adjustment
While pushing the reclining adjustment handle (Fig. 16.1), pull the child
restraint from the first position to the last position. (Fig. 16.2)
Angle indication: The top blue diamond and bottom blue diamond are
aligned. The reclining angle is shown as Fig. 8
1. Small seat pad is for child's protection. Small seat pad must be
used for children 0-6 months.
2. After removing the foam from the small seat pad, please store it in a
place where the child cannot access it.
3. Before using the small seat pad, please assemble the foam. (Fig. 10)
Note
iv. Rearward Facing Installation
1. Pull out the safety belt and engage the vehicle buckle tongue into the
buckle. (Fig. 17)
Fig. 17.1 Shoulder belt Fig. 17.2 Waist belt
2. Incline the child restraint rearward and thread the belt through the two
rearward blue safety-belt slots underneath the body. (Fig. 18)
Fig. 18.1 / Fig. 18.2 Safety-belt slot
The correctly assembled belt is shown as Fig. 19.
3. Fasten the belts in the two rearward blue safety-belt slots at the back
of the body. (Fig. 20)
!
Shoulder belt must pass through the rearward safety-belt slot.
4. While pressing the child restraint, pull the belts to fasten the child
restraint tightly and securely. (Fig. 21)
!
Please check by moving the child restraint back and forth.
!
The child restraint can not be used if the vehicle safety belt with female
buckle is too long to tie the base. (Fig. 21.3)
Correctly assembled vehicle belt is shown as Fig. 22
!
Waist belt passes through the rearward safety-belt slots, as Fig. 22.1
!
Shoulder belt must passes through the rearward safety-belt slots,
as Fig. 22.2
!
The vehicle buckle tongue is engaged with the buckle correctly,
as Fig. 22.3
1. Make sure the shoulder harness is adjusted to proper height before
installing this child restraint. Please refer to P. 34 (Proper Position
of the Shoulder Harnesses) & P. 40 (Shoulder Harnesses Height
Adjustment).
2. First adjust the angle of the child restraint to the last position. Angle
indication: Align the top blue diamond and bottom blue diamond. (Fig. 8)
3. When installing and adjusting the safety belts, make sure that both the
shoulder belt and the waist belt are not twisted and will not stop the
safety belts from functioning properly.
Note


 To Next Page