Unpacking Con't
It is best to unpack a unit in a large open work area with two people on hand. The carton should be set
upright in the center of the work area and a small knife used to carefully slit or lift the taped edges of the outer
carton's top flaps. Fold the flaps to the sides to lift out the inner foam that houses the amplifier. One person
should hold the box while another lifts the amplifier out and places the unit on a flat surface. Very carefully
remove the foam one side at a time while providing support for the amplifier. Now, while your memory is
fresh, reassemble the carton system for future use.
Accessories
1 AC Power Cord
Preparation for Use
1. Place your amplifier on a flat surface.
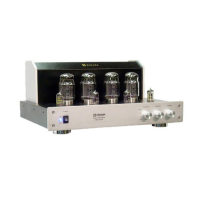
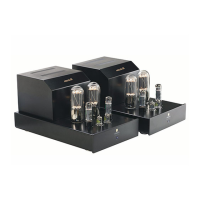
2. Your JD 502B amplifier is shipped with the vacuum tubes in boxes and protected against vibration by
bubble packing. The pre-amp and driver tubes ( the four small tubes) are in boxes and can be installed by
matching the "V1" on the amplifier with the "V1" on the tube and so on. On the larger power output tubes,
there is a key on the middle plastic. Make sure the pins of the tube are lined up with the holes in the socket
and never use excessive force when putting the tube into the socket. Once the tubes are firmly seated, do
not remove them since they are matched to your amplifier. If you remove the tubes and do not put them back
in their original sequence, the sonic quality of your amplifier may be compromised.
Note: Contact Enhancers are not recommended for use on vacuum tube contact pins. With continual
exposure to heat and air, these substances can form gummy, dust-collecting residues which actually reduce
contact and degrade sonic performance. Proper external use of contact enhancers -- on interconnect plugs,
speaker connections, etc. -- is subject to the discretion of the owner.
Operating and Adjustment Procedure
1. Make sure you have read and complied with the CONTROL AND CONNECTION instructions prior to
attempting to operate your unit.
2. Make sure your JD 502B is properly connected to a high-current power receptacle via the attached power
cord (see Connections).
3. Attach the audio sources and speakers to the JD502B.
4. Before you turn the amplifier on, make sure the speaker connections are properly hooked up. Never run
the amplifier without speakers hooked up since this may damage the transformers. When turning the unit on,
make sure the volume control is at its lowest point.
5. Your JD 502B will now operate satisfactorily. However, a full stabilization or warm-up period of at least 5
minutes is recommended for best sonic performance.
The amplifier should always be turned on and off via its own power on-off switch. Further, other discrete
components of an audio system should be turned on first. Otherwise, with some equipment, the amplifier will
reproduce warm-up thumps, etc., some of which could be harmful to your speaker system.