Camcorder XLR Adapter/Preamp/Mixer User’s Manual Page 9
Input Connection
Unused XLR Inputs
When a preamp does not have an input connected to it, the preamp is presented with a high impedance. When a
preamp is presented with a high impedance, it will produce a lot of noise. So, for any XLR input channel that does
not have an input connected to it, make sure to turn the corresponding TRIM down all of the way.
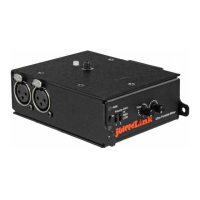
Input Attenuator (MIC/LINE)
Channels 1/2 have a 40dB input attenuator switch on the bottom of the unit that can be engaged to protect the input
preamp from overloading in the presence of high signal levels. If connecting line level signals to the input of either
channel 1 or 2, then set the corresponding attenuator switch to LINE. Similarly, if connecting microphone level
signals, then set the attenuator switch to MIC.
Channels 3/4 in 4 channel mixers are not equipped with input attenuators. They are to be used with microphone
level signals, similar to the MIC setting.
The 3.5mm output plug connections from the receivers of wireless microphone systems can be treated as
microphone level signals. It is reasonable to assume that if the output from a product was intended to go into the
microphone input of the camcorder, then the MIC setting on the mixer should be used.
Phantom Powering Condenser Microphones
12/48V phantom power is not available on all models.
Condenser microphones require a voltage for operation. Some microphones have facilities for an internal battery.
Other microphones need to be operated from phantom power, which is when the voltage is generated by the device
that the microphone cable plugs into on the other end from the mic, and the voltage is transmitted up the
microphone cable.
There are some advantages to phantom powering mics. On some mics, their specs are improved when operating
from phantom power instead of the internal battery. Microphones that operate from phantom only tend to be
shorter and lighter (since they don’t have a battery or battery compartment), so they are easier to boom (remember,
you should be getting the mic off of your camcorder and booming frequently to get the mic closer to the source for
the best microphone placement).
The internal switching power supply generating the will generate a phantom voltage corresponding to the switch
12V and 48V switch positions. When phantom power is not in use, then leave the internal switching power supply
in the OFF position to conserve battery life.
Once the switching power supply voltage has been selected and is being generated by the internal switching power
supply, power can be supplied to the individual channels. This is accomplished by setting the Phantom channel
switches (1, 2, etc.) to the On position. Then, the phantom voltage is supplied to pins 2 and 3 on the activated
channels through current limiting resistors.
Many older condenser microphones will operate from 48V only. The phantom voltage should be set to 48V if any of
your microphones require 48V.
However, there are many modern condenser microphones which are specified for 11-52V operation. If all of you’re
the condenser microphones being used can operate down to 12V, then use the 12V setting for the phantom
voltage. This will significantly increase battery life, since the switching power supply will not have to work as hard
to boost the voltage from 9V to 12V (compared to boosting it to 48V).
Some of the features described in this and other sections may not be available on your model. Please refer to
the Comparison Chart to determine the capabilities of your particular device.