– 23 –
3.頭部への取り付けと調整
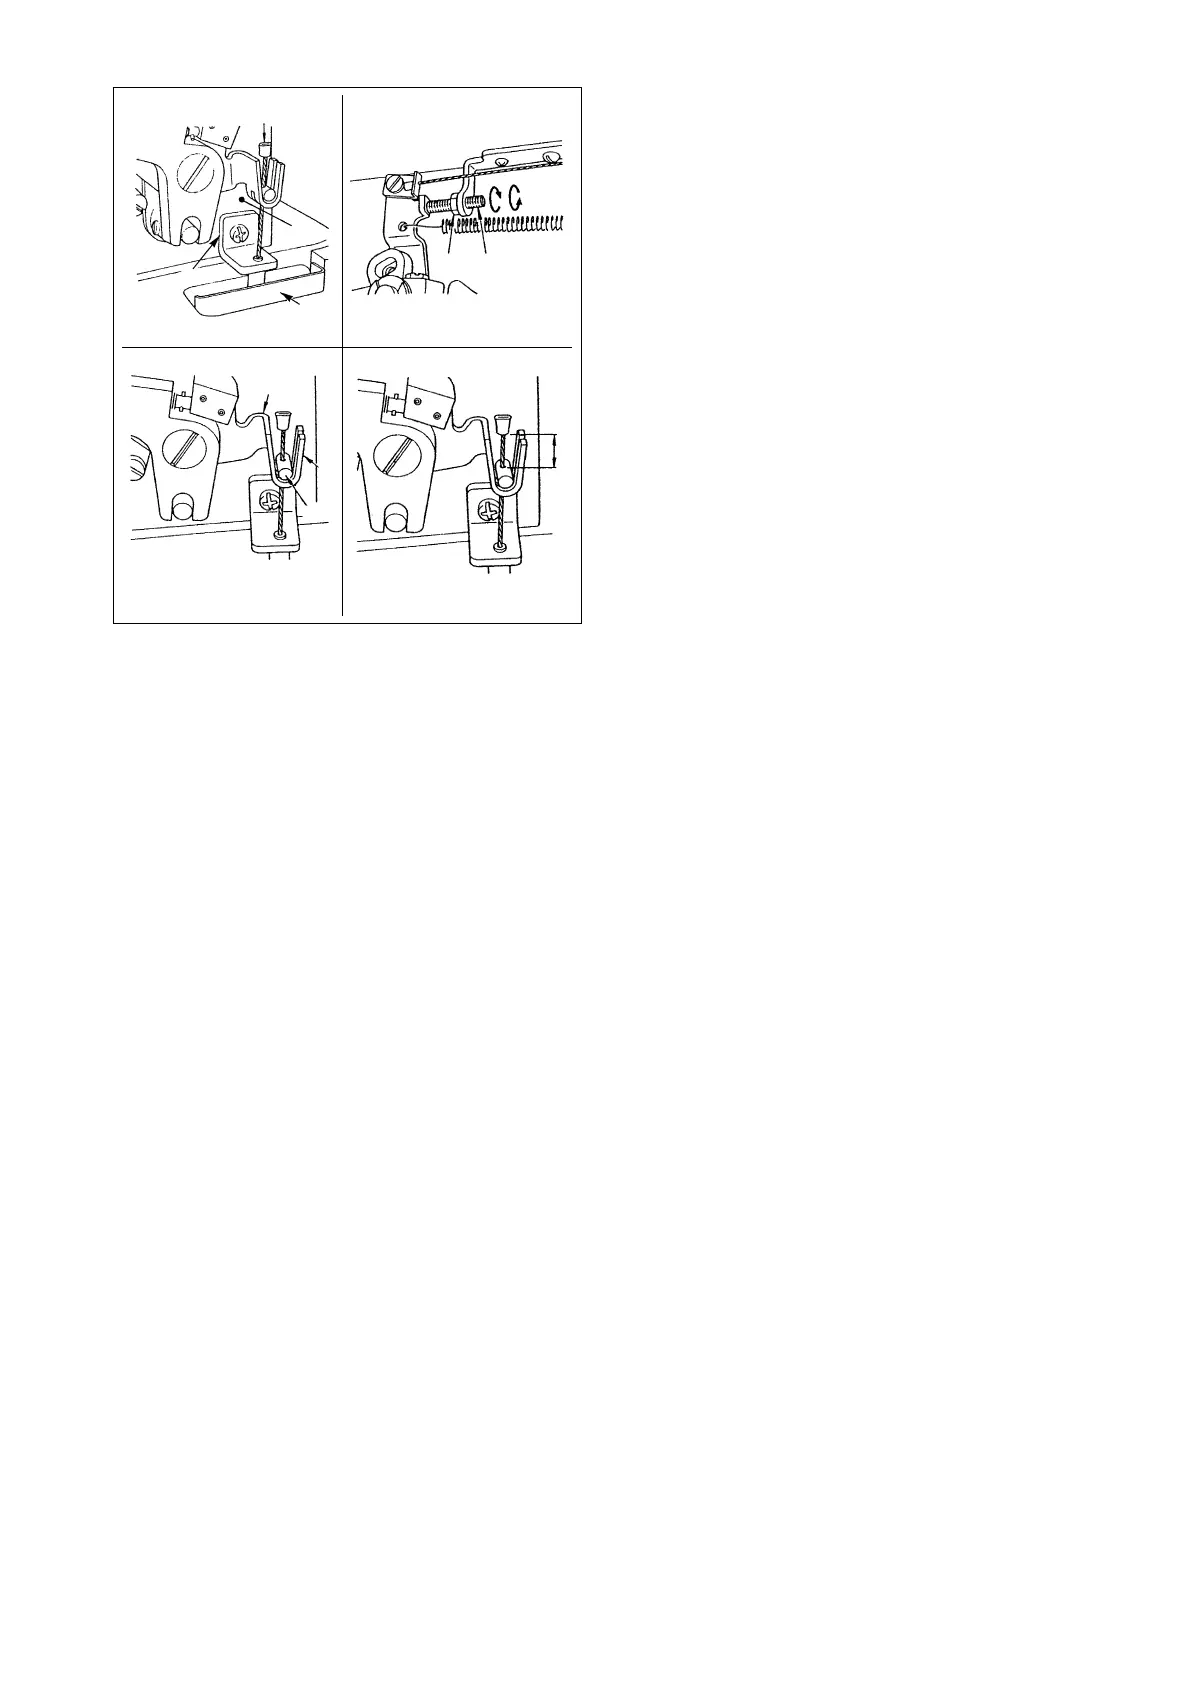
1)局部いせ込みワイヤー❶の端をワイヤーチュー
ブ案内❷とオイルパンの間を通し、テーブル上面
に出します。
2)ミシン頭部をセットします。
3)局部いせ込みワイヤー❶をアーム後方の 面に
面を当てた状態で、ねじにより固定します。
4)ワイヤーコロ❸を上送り調節板❹のフック部
に引っ掛けます。
5)ストッパーナット❺をゆるめ、局部いせ込みス
トッパー❻を右に回すとワイヤーのあそび が
小さくなり、左に回すと大きくなります。
6)あそび の大きさは下送り量 3mm,上送り量
3mm にして、送りレバーを返し縫いの状態にし
た時、ワイヤーのあそびがなくなるように調整し
ます。
( 注意 )正送りの時にワイヤーのあそびがない場合は、
返し縫いの時に上送りが逆送りになりません。
3.
Installing the PF-6 on the machine head and
adjusting it
1) Pass the end of partial shirring wire
❶
between wire
tube guide
❷
and the oil pan, and pull the end upon
to the machine table.
2) Install the machine head.
3) Fix wire
❶
using the strew, with face
in contact
with face
at the rear of the machine arm.
4) Hook wire roller
❸
on hook
of top feed adjust
plate
❹
.
5) Loosen stopper nut
❺
, and turn stopper
❻
clock-
wise to decrease wire play
, or turn it counter-
clockwise to increase the play.
6) Adjust play
so that the wire has no play when the
feed lever is set for reverse feed stitching with both
bottom and top feed amounts set at 3 mm.
(Precaution) If the wire has no play in the normal feed
mode
,
the walking foot will not perform
reverse feed even when the machine
is placed in the reverse feed stitching
mode.
❶
❷
❺❻
❹
❸
3.
往机头上的安装和调整
1) 把局部归拢钢丝
❶
的端部从钢丝套管导线器
❷
和
油槽中间穿过 , 露出到机台上面。
2) 安装缝纫机头。
3) 把
面顶到机架后方的
面 , 然后固定局部归
拢钢丝
❶
。
4) 拉钢丝凸块
❸
把它挂到上送部调节板
❹
的钩
上。
5) 拧松止动器
❺
, 把局部归拢止动器
❻
向右转动 ,
钢丝的余线
变短 , 向左转动 , 则变长。
6) 余线
的大小 , 把下送布量设为 3mm, 上送布量
设为 3mm, 送布拨杆设为倒缝 , 把钢丝的余线调整
为没有。
(注意)
正送布时 , 钢丝没有余线时 , 上送布不能倒送。