– 11 –
5-3. Temporary measures
5-3-1. Emergency stop
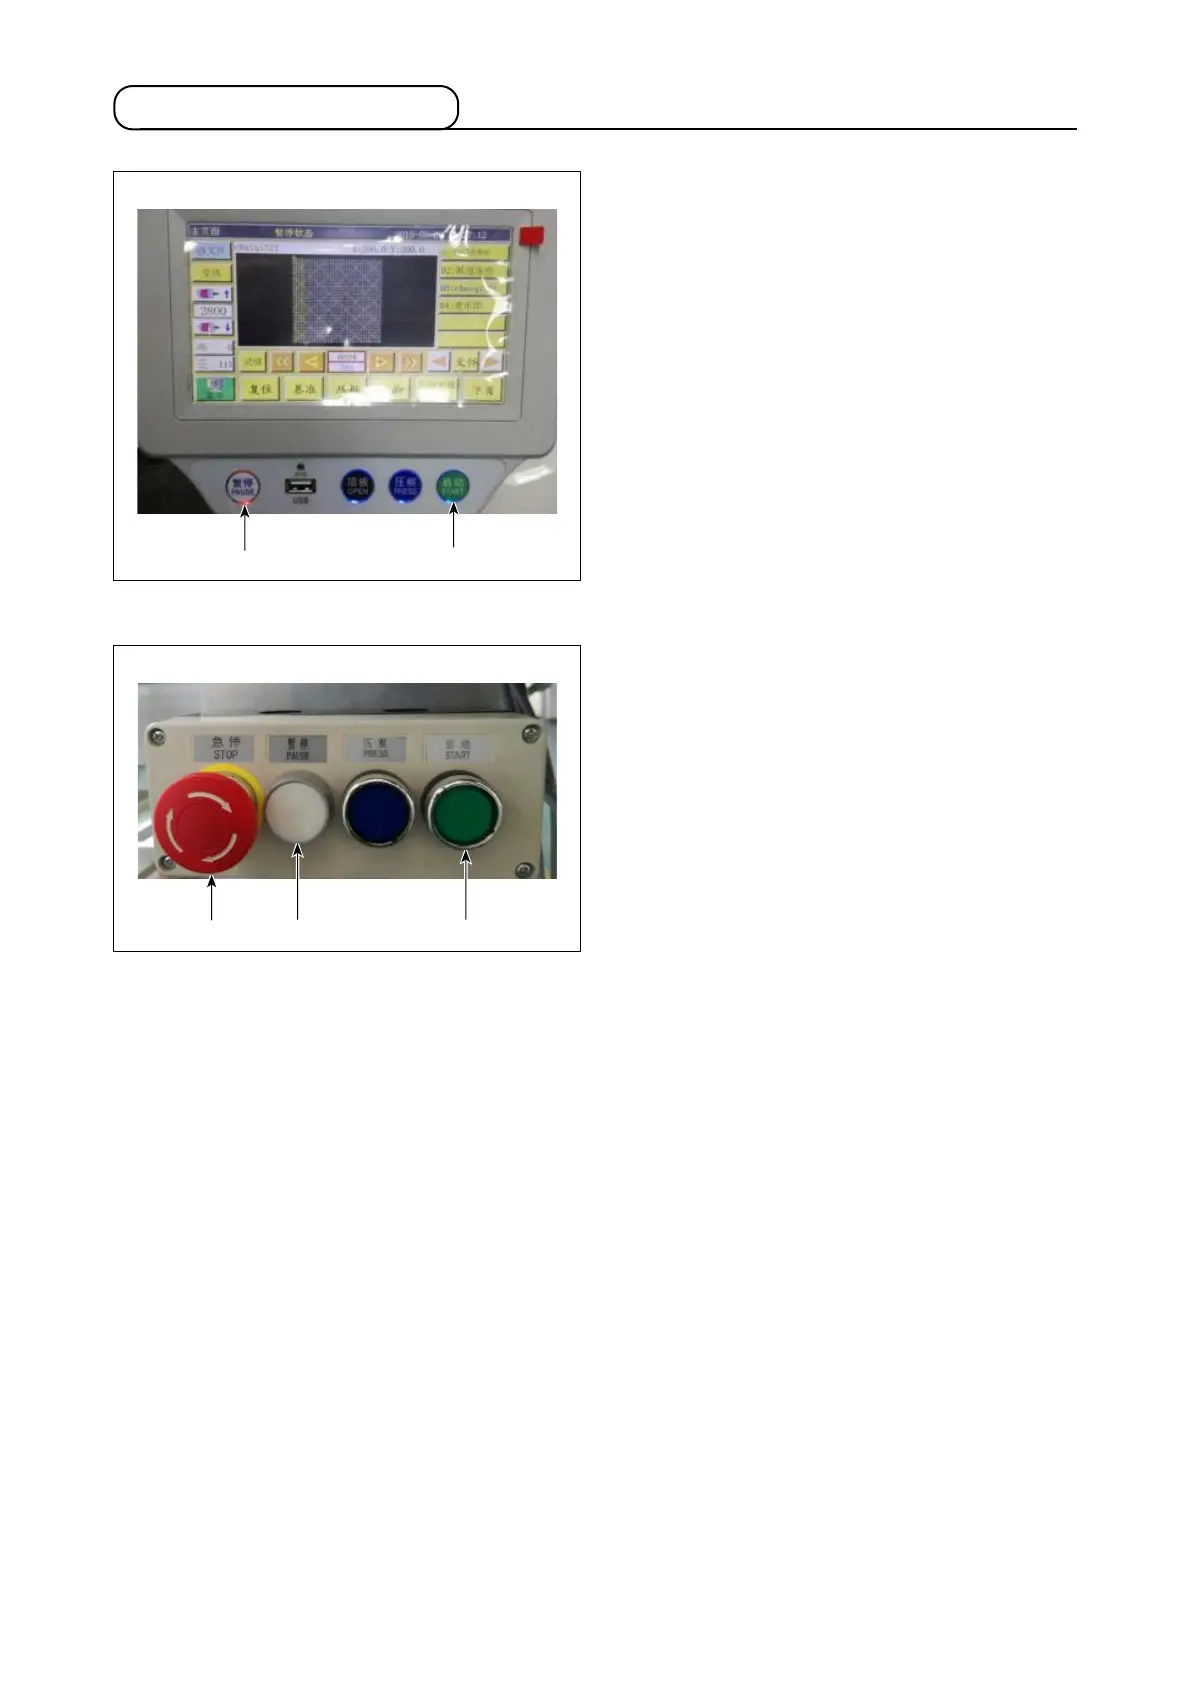
In the case an accident occurs, press the white
pause button on the operation panel (Fig. 1 and
Fig. 2) to stop the current operation state (the
laser operation is stopped, but the power to the la-
ser is not turned OFF). Or, all of the power supply
to the equipment excluding the bobbin winder and
the control panel cabinet fan can be turned OFF
by pressing the red emergency stop button on the
four-button control panel (Fig. 2).
Fig. 1
Fig. 2
5-3-2. Re-start
Method 1 : While the sewing machine is in the
temporary stop state, the background
LED lamp of "PAUSE" button ❶ (Fig.
1) located at the lower portion of the
screen lights up in red.
When the accident is eliminated, press
"PAUSE" button ❶ (Fig. 1). Then, the
background LED lamp of the pause
button changes its color to blue to
indicate that the laser is released from
the temporary stop state. Then, when
you press "START" button ❷ (Fig.
1) located at the lower portion of the
screen, the sewing machine re-starts
automatic sewing.
❶
❷
❺ ❸ ❹
Method 2 : Press white "PAUSE" button ❸ (Fig. 2) on the four-button control panel to release the laser
from the temporary stop state. When you press "START" button ❹ (Fig. 2) on the four-button
control panel, the sewing machine continues automatic sewing.
Method 3 : When the laser is placed in the temporary stop state with emergency stop button ❺ (Fig. 2)
pressed, turn the emergency stop button ❺ (Fig. 2) clockwise to release the laser from the
emergency stop state, before re-starting the sewing machine. After the aforementioned re-
setting, press "START" button ❹ (Fig. 1) located at the lower portion of the screen or green
"START" button ❹ (Fig. 1) on the four-button control panel to continue / re-start sewing.
 Loading...