– 25 –
5-8-3. Setting the laser cutting
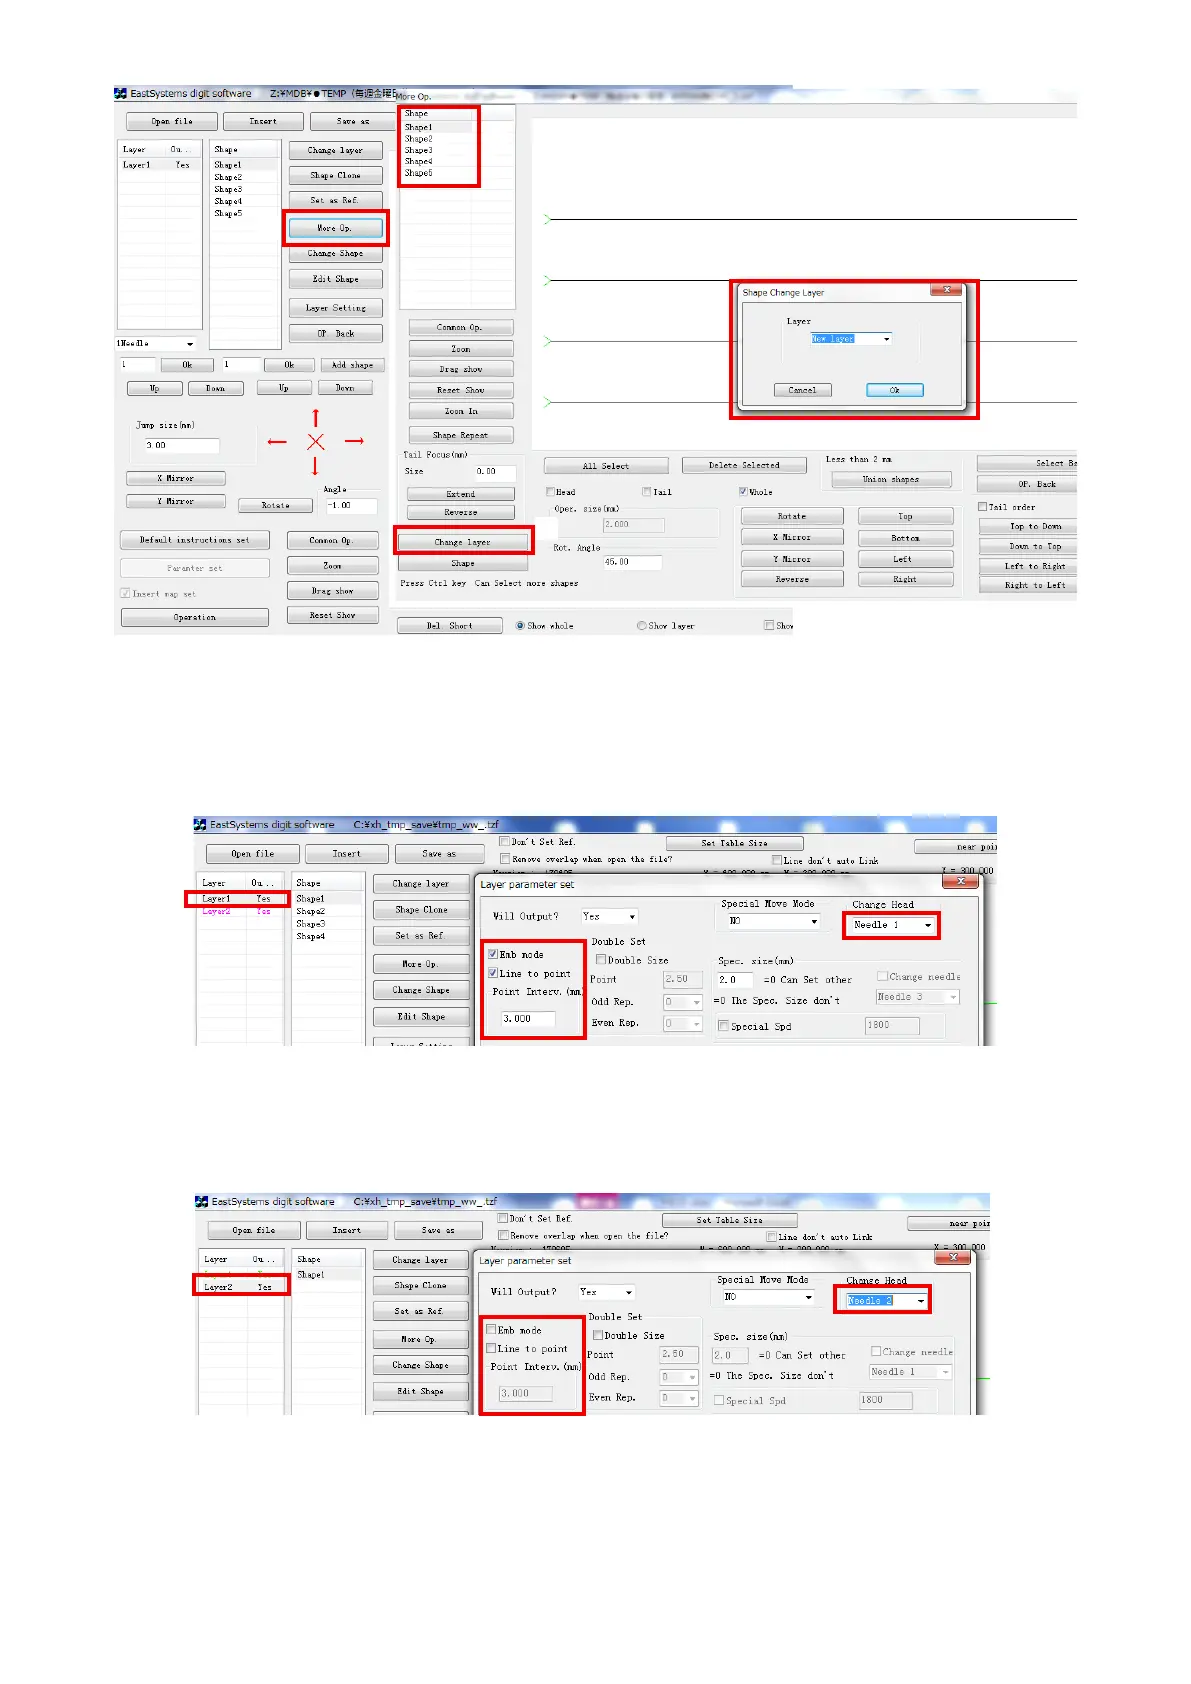
1) Open the software. Search for the target file. → Click "Batch processing" ❶ . → ❷ Select all stitch-
es to be cut with the laser. (It is possible to select two or more stitches while keeping the Ctrl key,
located at the lower left of the keyboard, held pressed). After the completion of selection, → Click
"Layer to change" ❸ . → ❹ Select a new layer and click the "Confirm".
2) Double click the stitch line layer. → Put a checkmark to the "Line bending point". → Set the next
option. → Confirm.
※
The stitch line is "Head 1" in the aforementioned procedure.
3) Then, double click the layer 2 to be cut with the laser. Put no checkmark to any option. Change the
"Head 1" to "Head 3" and confirm.
4) After the completion of setting, click the "Operation processing", located at the lower left of the
screen to output the file. Then, save that file and terminate the procedure.
❶
❹
❷
❸
 Loading...