–
19
–
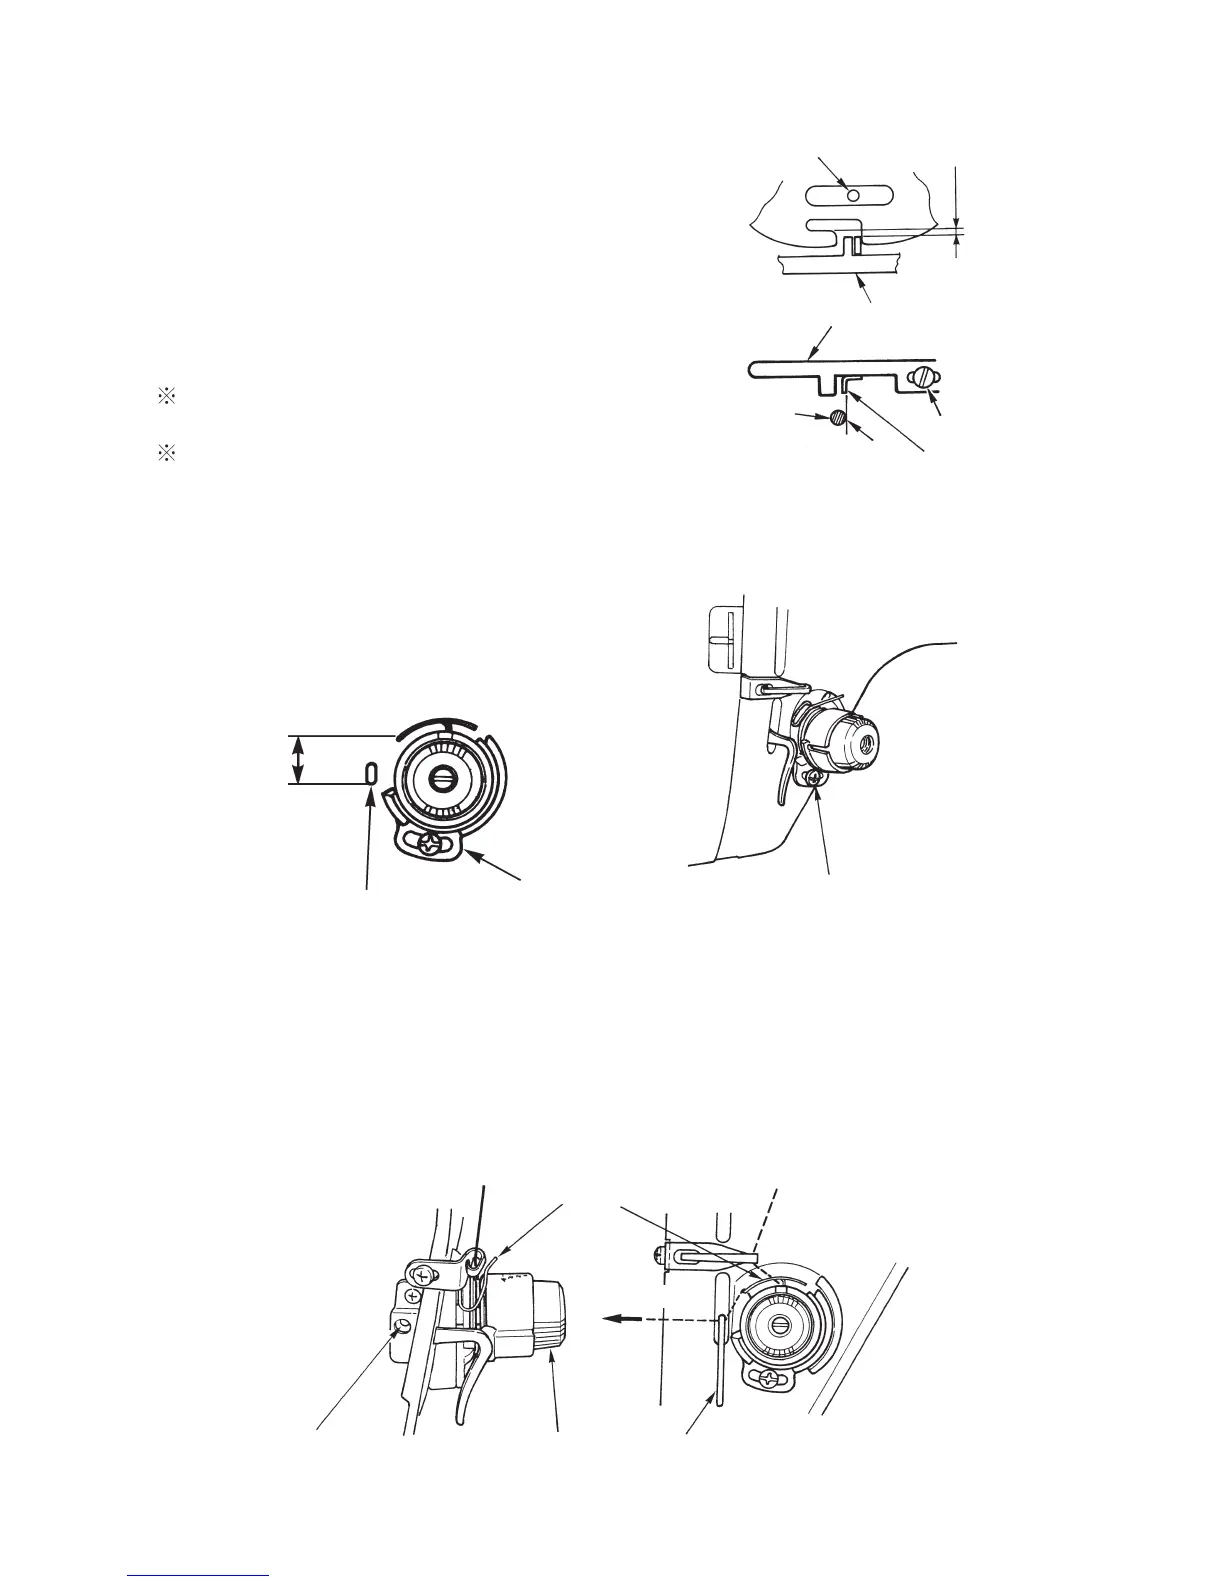
8. Positionofbobbincasepositioningnger
™
Loosen bobbin case positioning finger
1
set-
screw.
™
Make right-hand edge of convex portion of bobbin
casepositioningngerspring alignwith
2
right-
hand edge of needle.
™
Temporarily tighten setscrew, hold clearance of
0.3 to 0.5 mm between inner hook and bobbin
casepositioning nger,andsecurelytightenset-
screw.
Bobbin case positioning nger shouldnot come
in contact with hook.
Bobbin case positioning finger should not inter-
fere with hook.
9. Momentum of thread take-up spring (absorbing amount of thread)
™
Thread take-up spring has to be installed at posi-
tion of 10±0.5 mm from thread guide as shown in
thegurebelow.
™
Perform adjustment with
1
thread take-up spring
adjusting plate.
10. Tension of thread take-up spring
™
Pass needle thread up to
1
thread tensioner thread guide.
™
Lower presser foot and draw needle thread.
™
Adjust tension of thread take-up spring to 0.176 to 0.245N when thread take-up spring starts lowering.
™
For adjustment, loosen thread tensioner setscrew and turn
3
thread tensioner.
™
Turning clockwise = increasing tension of
4
thread take-up spring.
Needle
Thread take-up spring
adjusting plate.
10.5±0.5 mm
2
Thread tensioner
setscrew
1
Thread tensioner
thread guide
3
Thread tensioner
asm.
4
Thread take-up spring
Top view
Needle
3
0.3 to 0.5 mm
2
1
Front view
Needle thread
Bobbin case positioning
ngerspring
Bobbincasepositioningnger
Thread tensioner
thread guide
1
Thread take-up spring
adjusting plate and setscrew

 Loading...