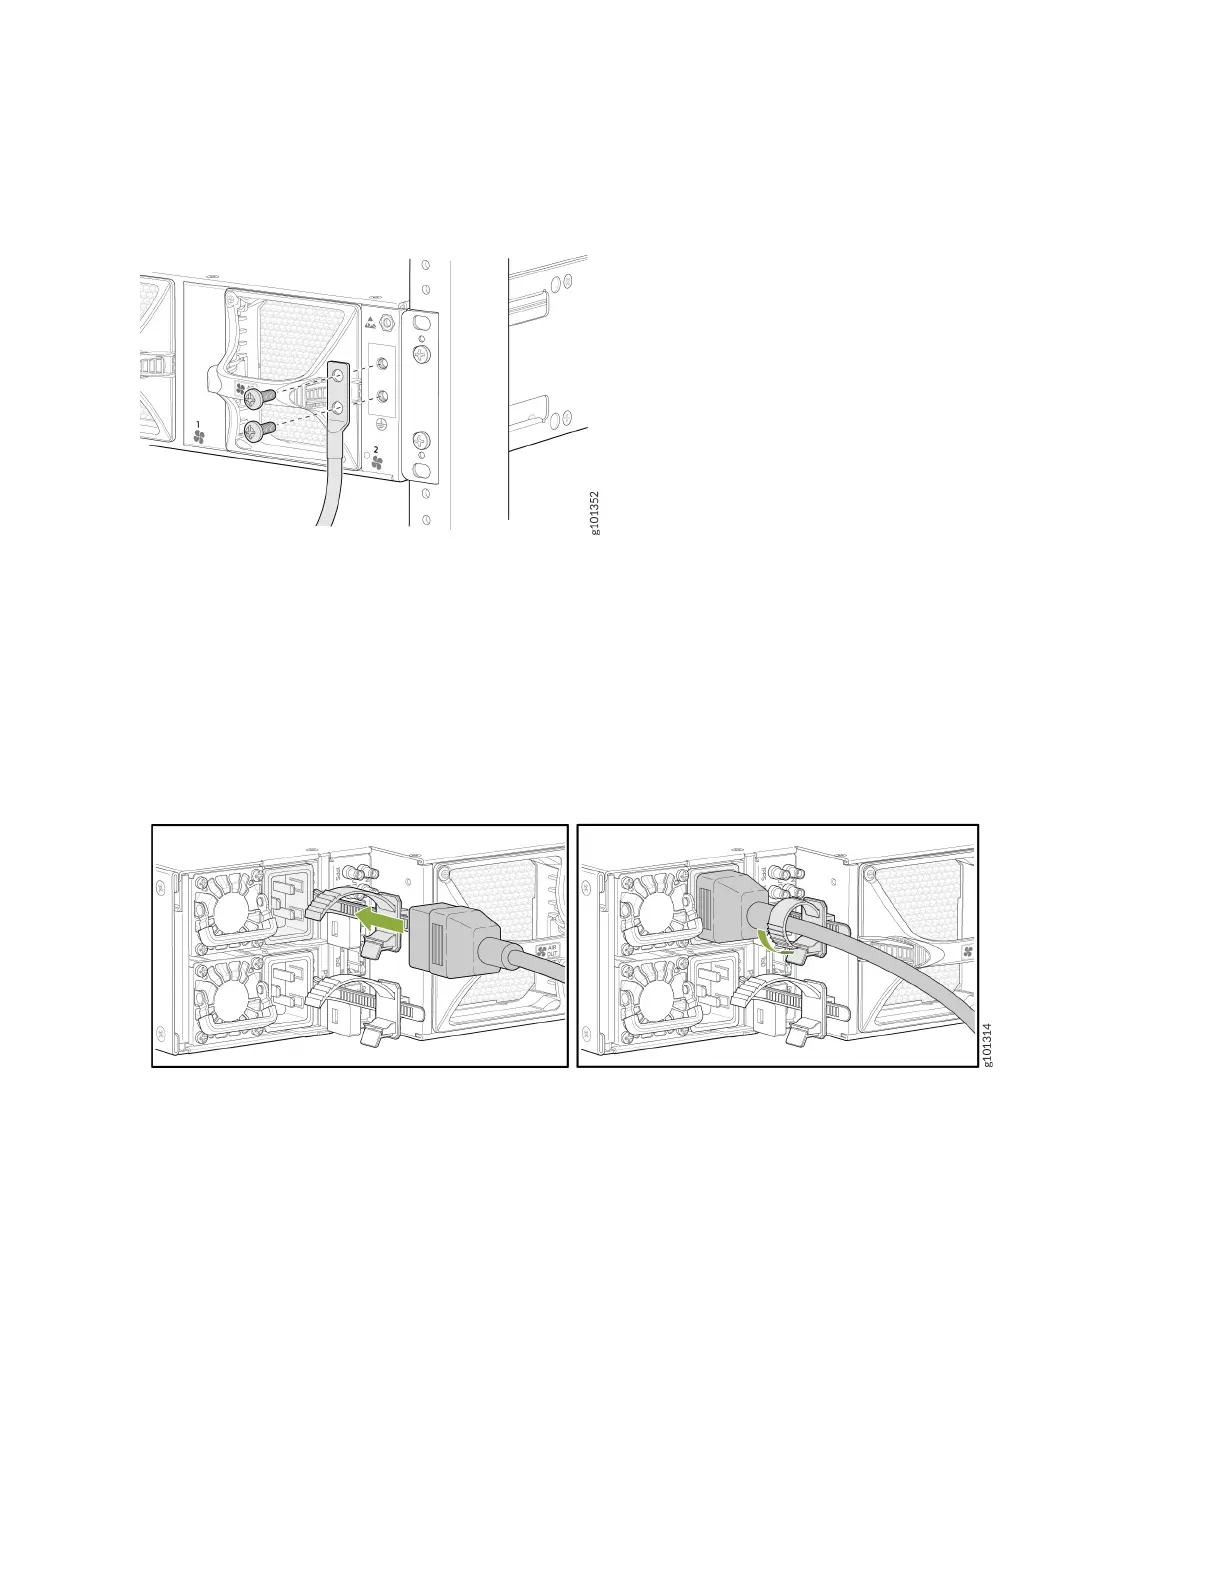
5. Detach the ESD grounding strap from the site ESD grounding point and connect it to one of the ESD points on the
chassis.
6. Place the grounding lug aached to the grounding cable over the grounding points on the chassis, and secure it
with M6 pan head screws.
7. Dress the grounding cable, and ensure that it doesn’t block access to or touch other device components, and that it
doesn’t drape where people could trip over it.
8. Ensure that the power supplies are fully inserted in the router.
9. Turn o the AC power switch on the power supply.
10. Plug in the AC power cord to the power socket on the power supply.
11. Push the retainer clip through the loop and ghten it unl it ts snug around the power cord.
12. Route the power cord so that it doesn't block the air exhaust and access to router components, or drape where
people could trip on it.
13. If the AC power source outlet has a power switch, turn it o.
14. Plug the power cord into the AC power source outlet.
15. If the AC power source outlet has a power switch, turn it on.
16. Repeat Step 8 through Step 15 to install the other power supply.
6