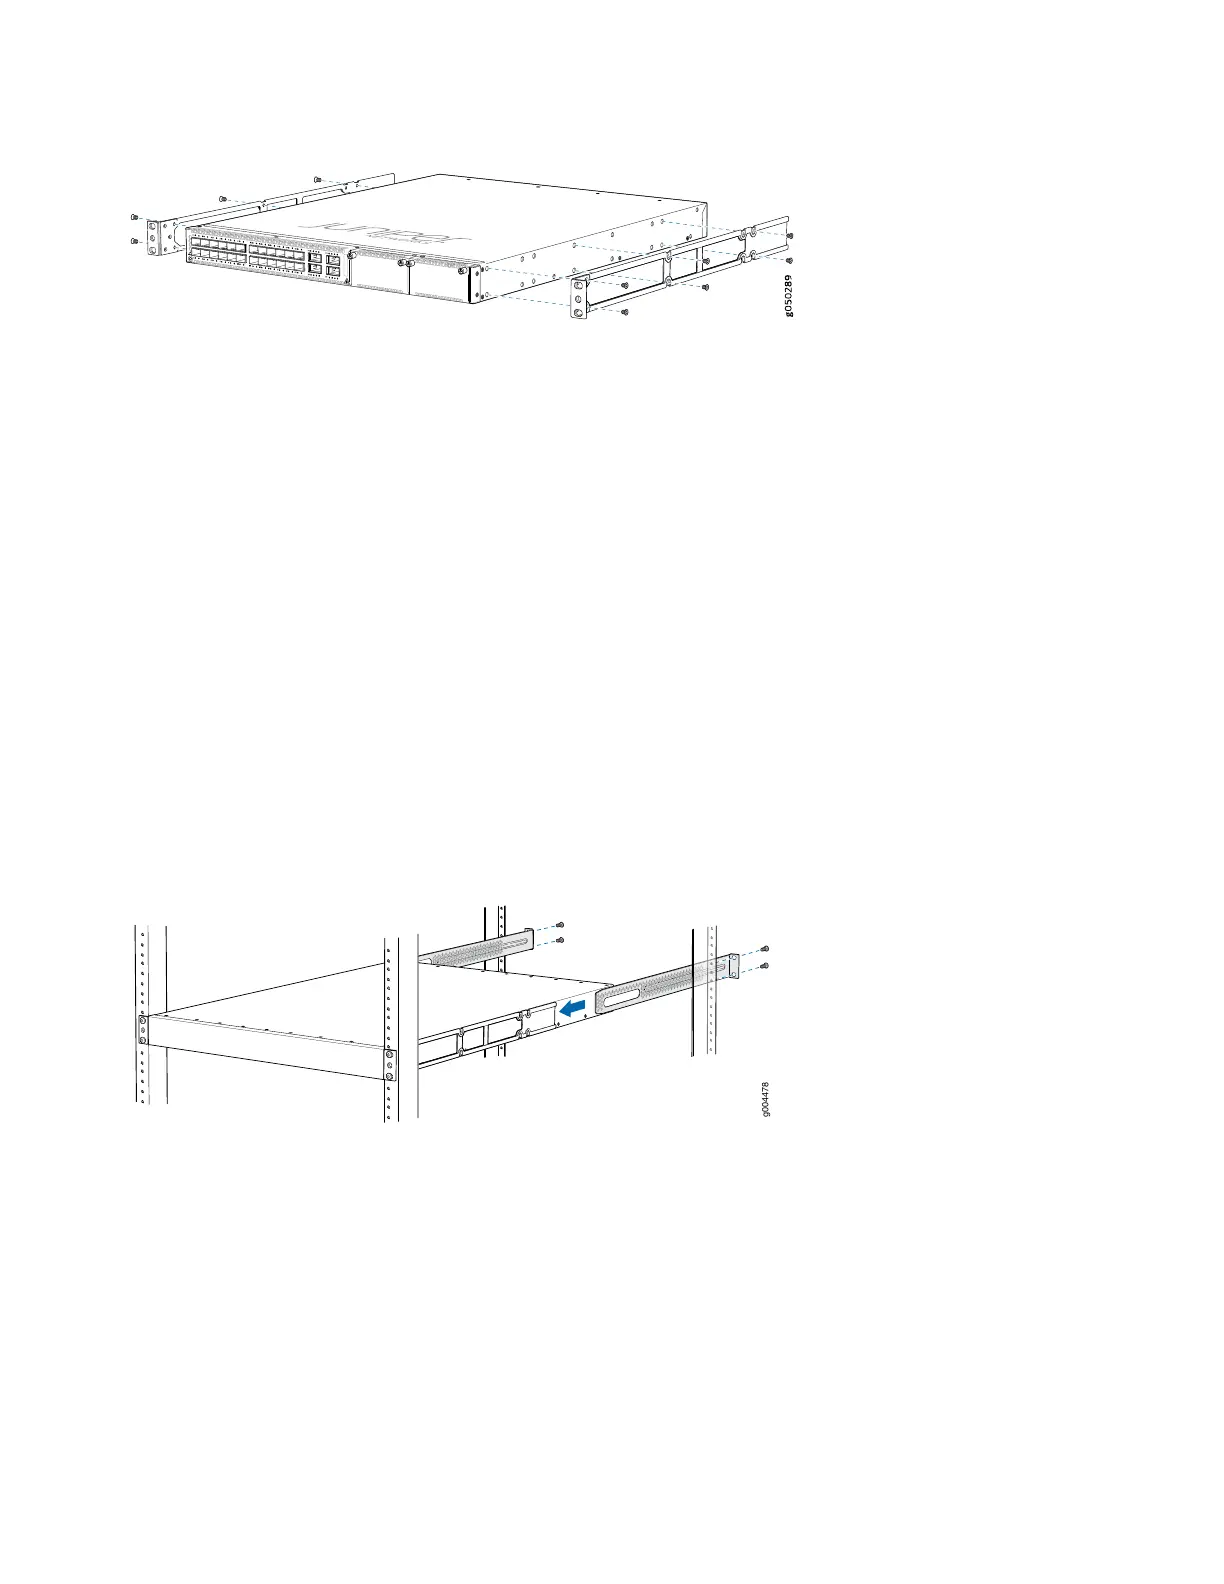
3. Align the holes in the side mounting-rail with the holes on the side of the chassis.
4. Attach the side mounting-rail to the switch using six mounting screws. Use cage nuts and washers if your rack requires
them.
5. Repeat Step 3 and Step 4 on the opposite side of the switch.
6. Have one person grasp both sides of the switch, lift it, and position it in the rack so that the front bracket is aligned
with the rack holes.
7. Have a second person secure the front of the switch to the rack by using four mounting screws (and cage nuts and
washers if your rack requires them). Tighten the screws.
8. Continue to support the switch while sliding the rear mounting-blades into the channel of the side mounting-rails and
securing the blades to the rack. Use the four mounting screws (and cage nuts and washers if your rack requires them)
to attach each blade to the rack. Tighten the screws.
9. Ensure that the switch chassis is level by verifying that all the screws on the front of the rack are aligned with the
screws at the back of the rack.
10. Attach a grounding cable to earth ground and then attach it to the chassis grounding points.
4