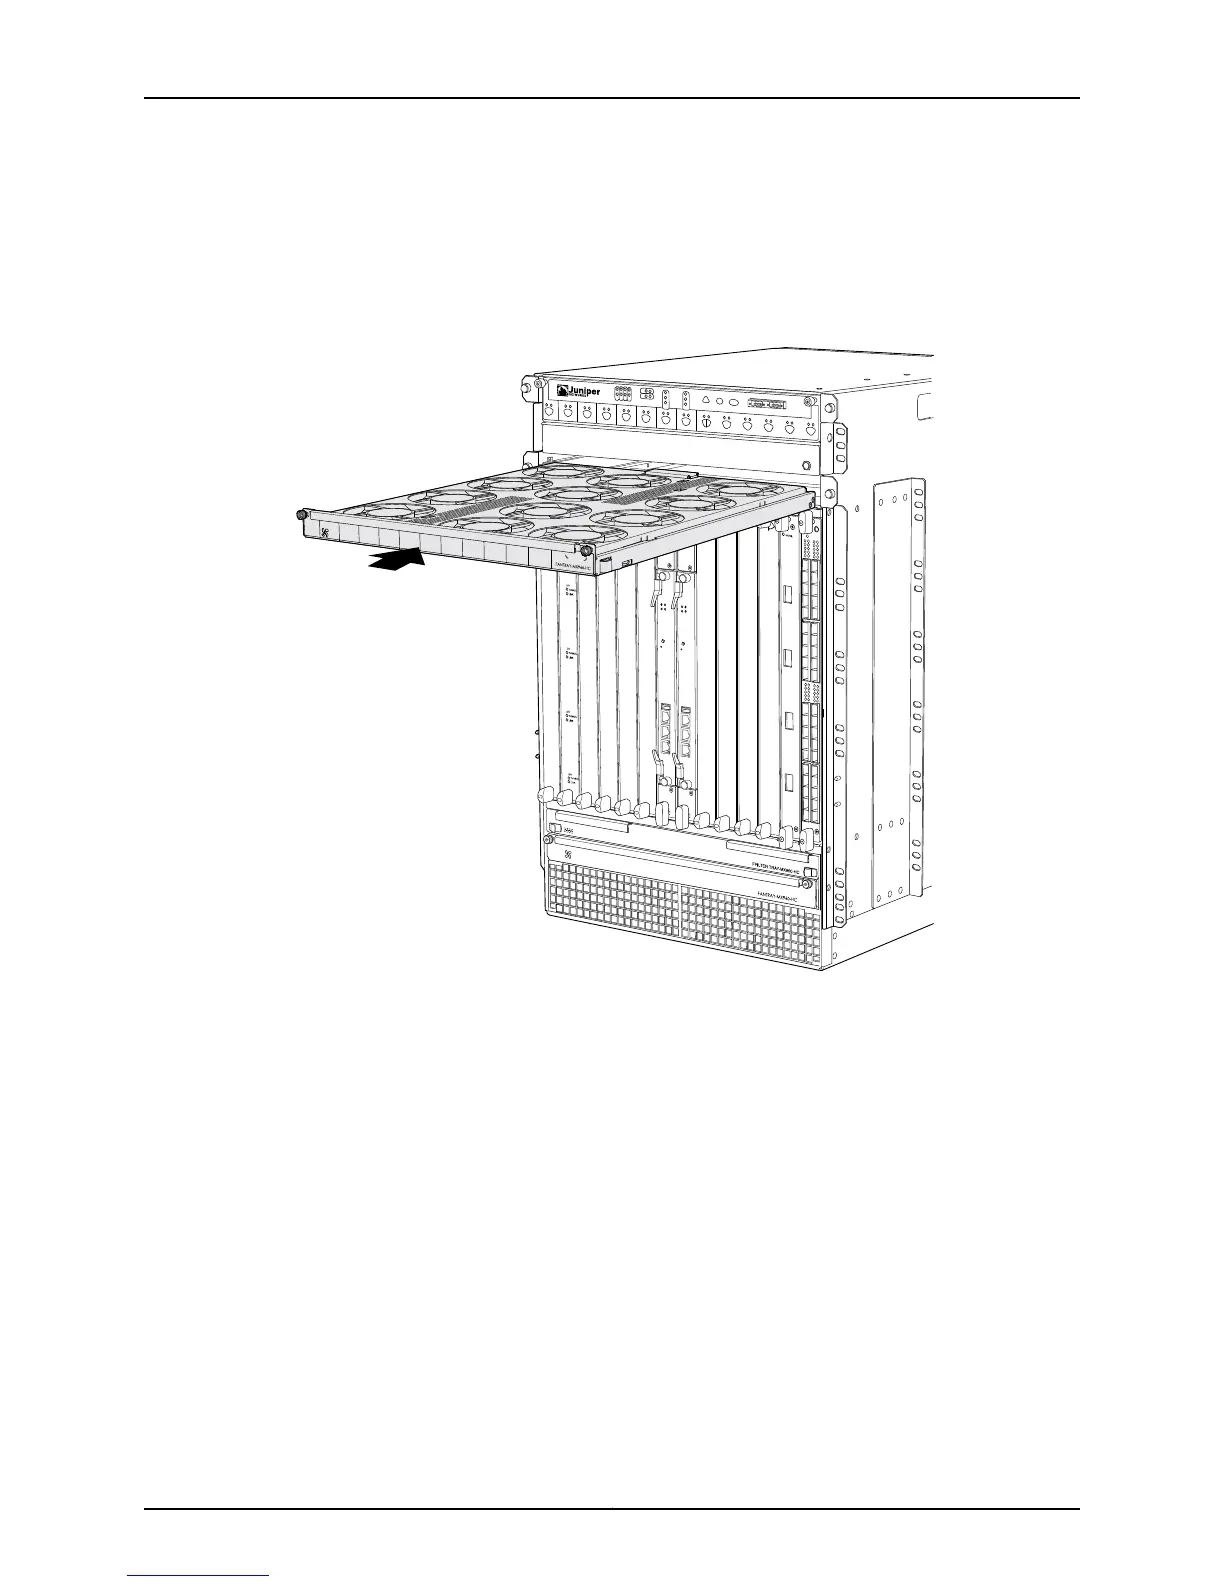
3. Tighten the captive screws on each side of the fan tray faceplate to secure it in the
chassis.
4. Lower the standard cable manager back into position, if necessary.
Figure 9: Installing an Upper Fan Tray
g006001
OK
0
FAIL
ONLINE
OK
1
FAIL
ONLINE
OK
2
FAIL
ONLINE
OK
3
FAIL
ONLINE
OK
4
FAIL
ONLINE
OK
5
FAIL
ONLINE
OK
0
FAIL
ONLINE
MASTER
ONLINE
OFFLINE
RE0
FAN
PEM
1
0
0
1
2
3
RE1
OK
1
FAIL
ONLINE
OK
7
FAIL
ONLINE
OK
8
FAIL
ONLINE
OK
9
FAIL
ONLINE
OK
10
FAIL
ONLINE
OK
11
FAIL
ONLINE
OK
2
6
FAIL
ONLINE
ACO/LT
YELLOW ALARM
RED ALARM
NC
NO
C
NC
NO
C
1
0
1
0
1
0
1
0
1
0
1
1
0
0
1
0
1
0
1
0
Copyright © 2010, Juniper Networks, Inc.10
Upgrading MX240, MX480, and MX960 3D Universal Edge Router Power Supplies and Fan Trays