EasyManua.ls Logo

Juniper ACX7100 User Manual

Juniper ACX7100
12 pages
To Next Page IconTo Next Page
Page #1 background imageLoading...
Page #1 background image
ACX7100 48L Quick Start
IN THIS GUIDE
Step 1: Begin | 1
Step 2: Up and Running | 6
Step 3: Keep Going | 10
Step 1: Begin
IN THIS SECTION
Meet the ACX7100-48L | 1
Install the ACX7100-48L | 2
Power On | 4
In this guide, we provide a simple, three-step path, to quickly get you up and running with your new Juniper Networks
®
ACX7100-48L Cloud Metro Router. We’ve simplied and shortened the installaon and conguraon steps, and
included how-to videos. You’ll learn how to install an AC-powered ACX7100-48C in a rack, power it up, and congure
basic sengs. If you need instrucons for installing a DC-powered ACX7100-48L, see the ACX7100-48L Hardware
Guide.
Meet the ACX7100-48L
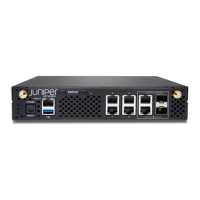
The ACX7100-48L Cloud Metro Router is a high-performance router, featuring a 1-U form factor that provides high
port density, reliability, and scalability. You can deploy the router as an aggregaon soluon in a service provider metro
network or in a data center that hosts edge compung applicaons.
Question and Answer IconNeed help?

Do you have a question about the Juniper ACX7100 and is the answer not in the manual?

Juniper ACX7100 Specifications

General IconGeneral
ModelACX7100
Product FamilyACX Series
Form Factor1U
CoolingFront-to-back airflow
Operating SystemJunos OS
CategoryRouter
Power SupplyDual, hot-swappable
Management OptionsCLI
RedundancyPower supply, fan
Operating Temperature32°F to 104°F (0°C to 40°C)
Storage Temperature-40 to 70 °C
Operating Humidity5% to 90% non-condensing
Humidity5% to 90% non-condensing

Summary

Step 1: Begin Setup

Meet the ACX7100-48L Hardware

Overview of the ACX7100-48L router's features, form factor, and capabilities.

Install the ACX7100-48L Router

Instructions for physically installing the ACX7100-48L router into a rack.

Power On the ACX7100-48L

Steps to connect and power on the ACX7100-48L router after installation.

Step 2: Get Up and Running

Plug and Play Operation

Explanation of the router's default factory settings enabling plug-and-play operation.

Customize Basic Configuration

Guide to customizing the router's factory default configuration via CLI commands.

Step 3: Keep Going and Learn More

What's Next After Configuration

Information on next steps after initial configuration, including user access and software management.

General Information and Resources

Links to additional documentation, installation guides, and Junos OS Evolved learning resources.

Learn with Juniper Videos

Information about Juniper's video library for hardware installation and Junos OS network features.

Related product manuals