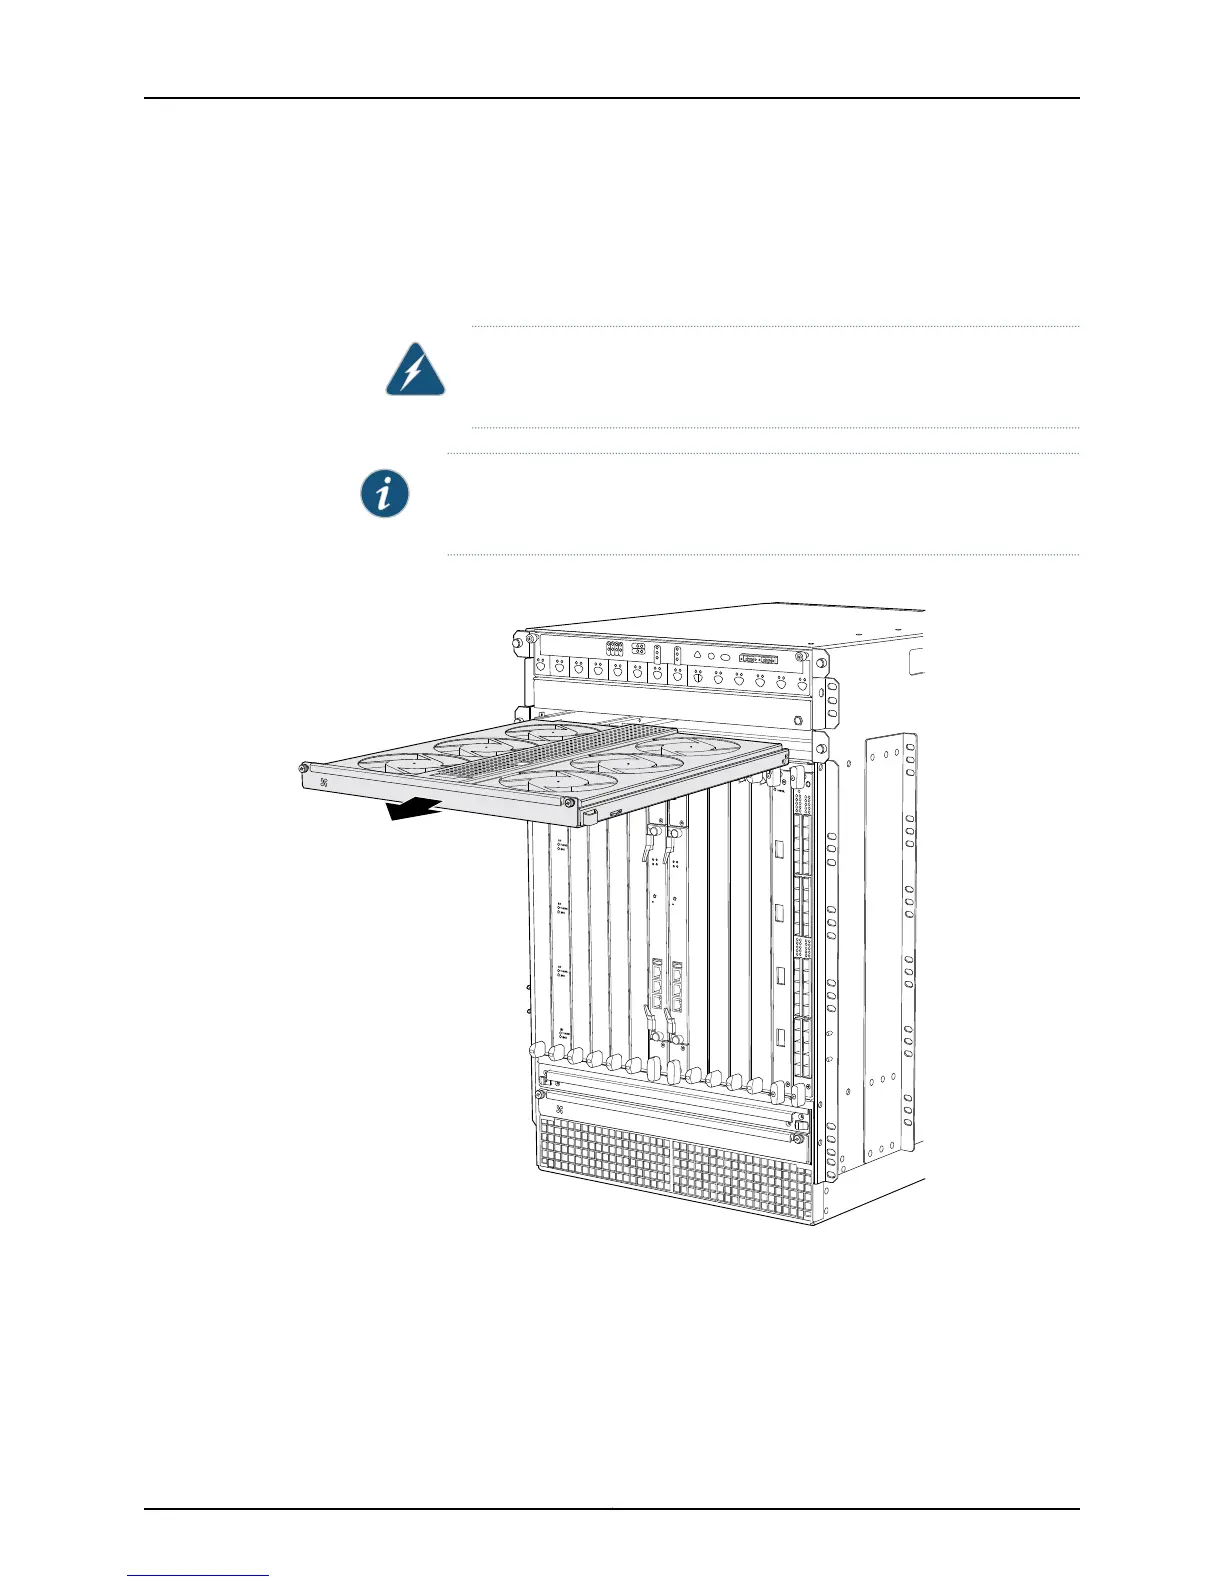
4. Press on the two latches located on the inside of the fan tray to release the fan tray
from the chassis.
5. Place one hand under the fan tray to support it, and pull the fan tray completely out
of the chassis.
WARNING: To avoid injury, keep tools and your fingers away from the fans
as you slide the fan tray out of the chassis. The fans might still be spinning.
NOTE: To prevent overheating, install the replacement fan tray immediately
after removing the existing fan tray.
Figure 8: Removing an Upper Fan Tray
OK
0
F
AIL
ONLINE
OK
1
F
AIL
ONLINE
OK
2
F
AIL
ONLINE
OK
3
F
AIL
ONLINE
OK
4
F
AIL
ONLINE
OK
5
F
AIL
ONLINE
OK
0
F
AIL
ONLINE
MASTER
ONLINE
OFFLINE
RE0
F
AN
PEM
1
0
0
1
2
3
RE1
OK
1
F
AIL
ONLINE
OK
7
F
AIL
ONLINE
OK
8
F
AIL
ONLINE
OK
9
F
AIL
ONLINE
OK
10
F
AIL
ONLINE
OK
1
1
F
AIL
ONLINE
OK
2
6
F
AIL
ONLINE
ACO/L
T
YELLO
W ALARM
RED ALARM
NC
NO
C
NC
NO
C
1
0
1
0
1
0
1
0
1
0
1
1
0
0
1
0
1
0
1
0
g004042
To install the fan trays (see Figure 5 on page 6 and Figure 9 on page 10):
1. Attach an electrostatic discharge (ESD) grounding strap to your bare wrist, and connect
the strap to one of the ESD points on the chassis.
2. Grasp the fan tray on each side, and insert it straight into the chassis. Note the correct
orientation by the "this side up" label on the top surface of the fan tray.
9Copyright © 2010, Juniper Networks, Inc.
Replacing the MX960 Fan Trays