•
Management host, such as a PC laptop, with a serial port (not provided)
•
(Optional) Grounding cable kit with bracket, lug, and three nuts with integrated washers. To install the grounding cable,
see the QFX5100 documentation at https://www.juniper.net/documentation/product/en_US/qfx5100.
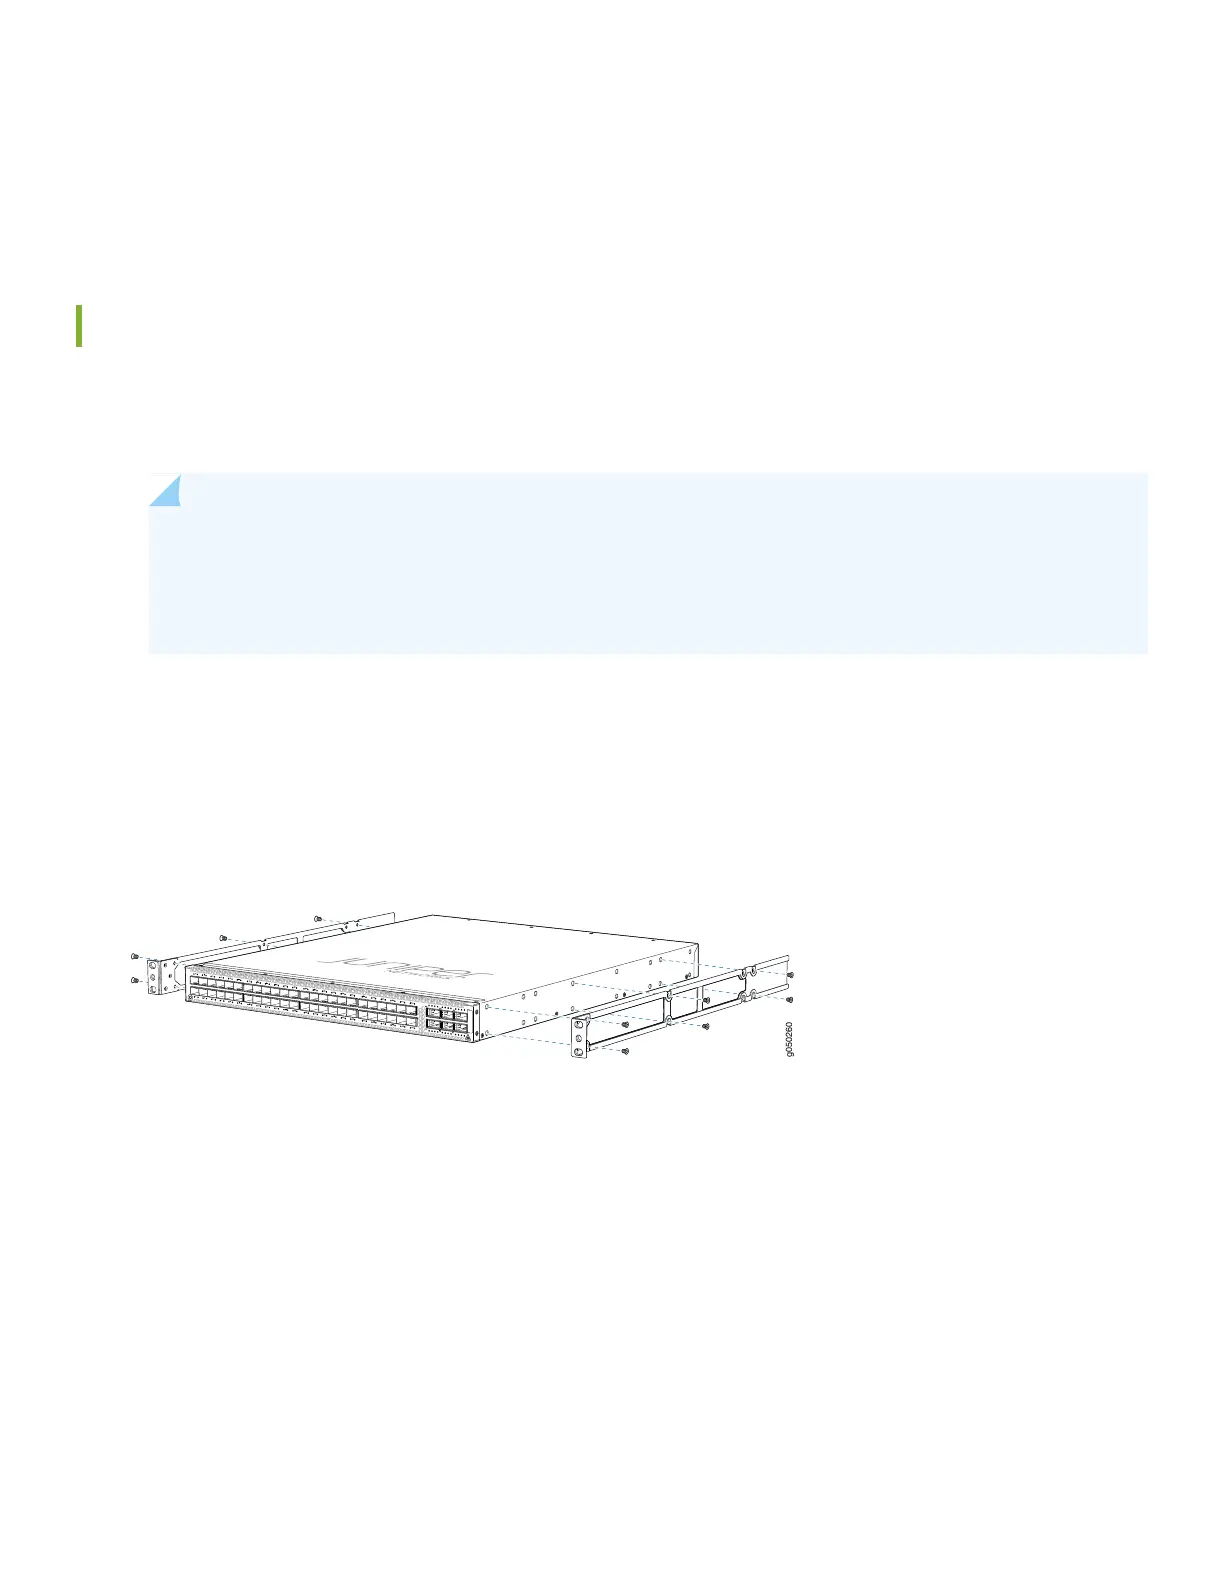
Mount the QFX5100-48S
The QFX5100-48S can only be mounted in a four-post rack configuration. To mount the device in a 19 inch rack:
1. Attach the ESD grounding strap to your bare wrist and to a site ESD point.
NOTE: If you are mounting multiple units in the rack, mount the heaviest unit at the bottom and mount the
others from bottom to top in order of decreasing weight. The switch weighs approximately 21.8 lb (9.8kg).
Installing the QFX5100-48S switch in a rack or cabinet requires two people to lift the switch and secure it
to the rack.
2. Place the rack in its permanent location, allowing adequate clearance for airflow and maintenance, and secure it to the
building structure.
3. Determine whether the end with field replaceable units (FRUs) or the ports are to be placed at the front of the rack.
4. Align the holes in the mounting-rail with the holes on the side of the chassis.
5. Attach the side mounting rail to the switch using six mounting screws. Use cage nuts and washers if your rack requires
them.
6. Repeat Step 4 and Step 5 on the opposite side of the device.
7. Have one person grasp both sides of the switch, lift it, and position it in the rack so that the front bracket is aligned
with the rack holes.
8. Have a second person secure the front of the switch to the rack using four mounting screws (and cage nuts and washers
if your rack requires them.) Tighten the screws.
2