How to Set Up Your SRX345 Services Gateway
2
Factory-Default Settings
Security Policies
Source Zone Destination Zone Policy Action
trust untrust permit
trust trust permit
NAT Rules
Source Zone Destination Zone Policy Action
trust untrust Source NAT to untrust zone
interface
Interfaces
Port Label Interface Security Zone DHCP State IP Address
0/0 and 0/15 ge-0/0/0
and ge-0/0/15
untrust Client Dynamically
assigned
0/1 to 0/14 VLAN Interface
irb.0 (ge-0/0/1
to ge-0/0/14)
trust Server 192.168.2.1/24
MGMT fxp0 Server 192.168.1.1/24
cl-1/0/0
dl0 untrust ISP assigned*
* Only if the LTE Mini-PIM is present
Services
Services
SSH
HTTPS
NETCONF over SSH
Protocols
Protocols
RSTP (all interfaces)
Screens
Screens
Basic set of screens are enabled on the untrust zone
Device Startup Mode
Device Startup Mode
Switching
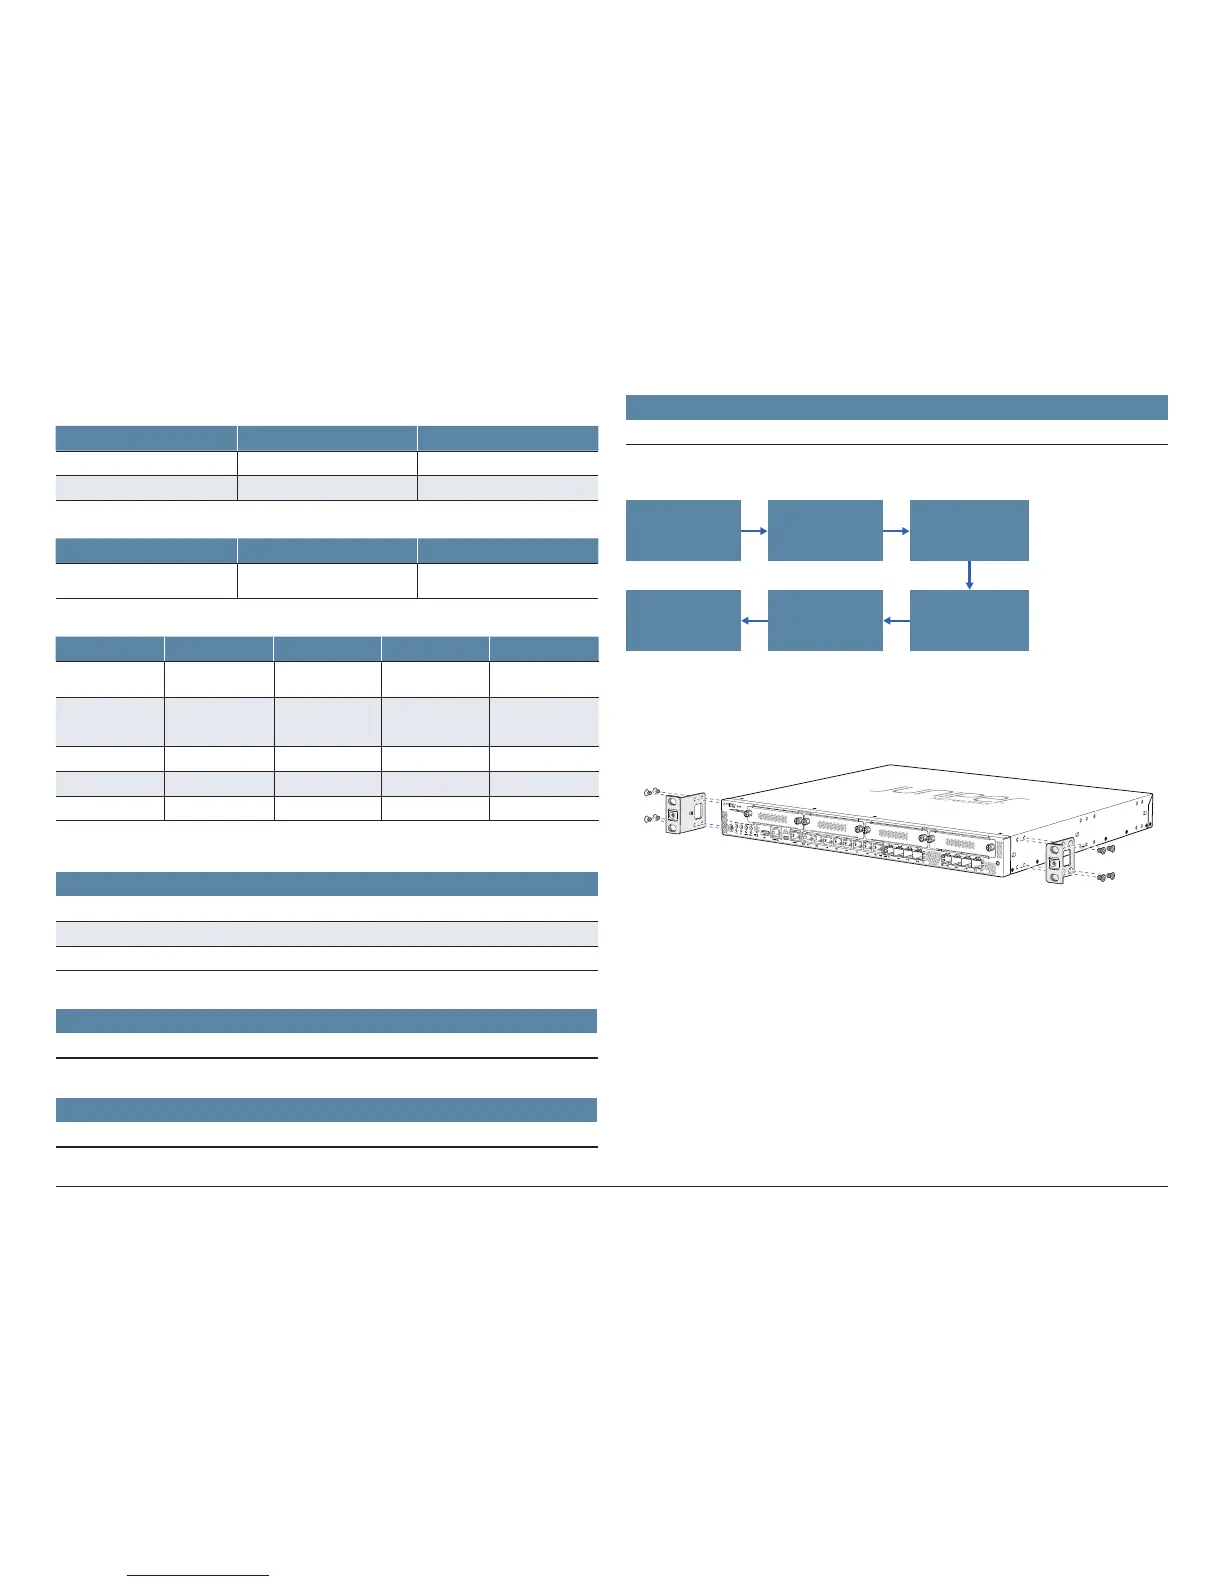
Initial Configuration Process
6
Install Device
in a Rack
Connect the
Grounding Cable
Power On
the Device
Verify the
Settings
Configure
Using ZTP/J-Web
Connect to
Management Device
Install the Device in a Rack
1. Position a mounting bracket on each side of the chassis. Use a Phillips (+)
screwdriver, number 2 to install the screws that secure the mounting brackets
to the chassis. Use either the front or center mount position.
2. Have one person grasp the sides of the device, lift it, and position it in the rack.
Align the bottom hole in each mounting bracket with a hole in each rack rail,
making sure that the chassis is level.
3. Have a second person install a mounting screw into each of the two aligned
holes. Use a number-2 Phillips screwdriver to tighten the mounting screws.