EasyManuals Logo

Juniper SRX345 User Manual

Juniper SRX345
12 pages
To Next Page IconTo Next Page
To Previous Page IconTo Previous Page
Page #4 background imageLoading...
Page #4 background image
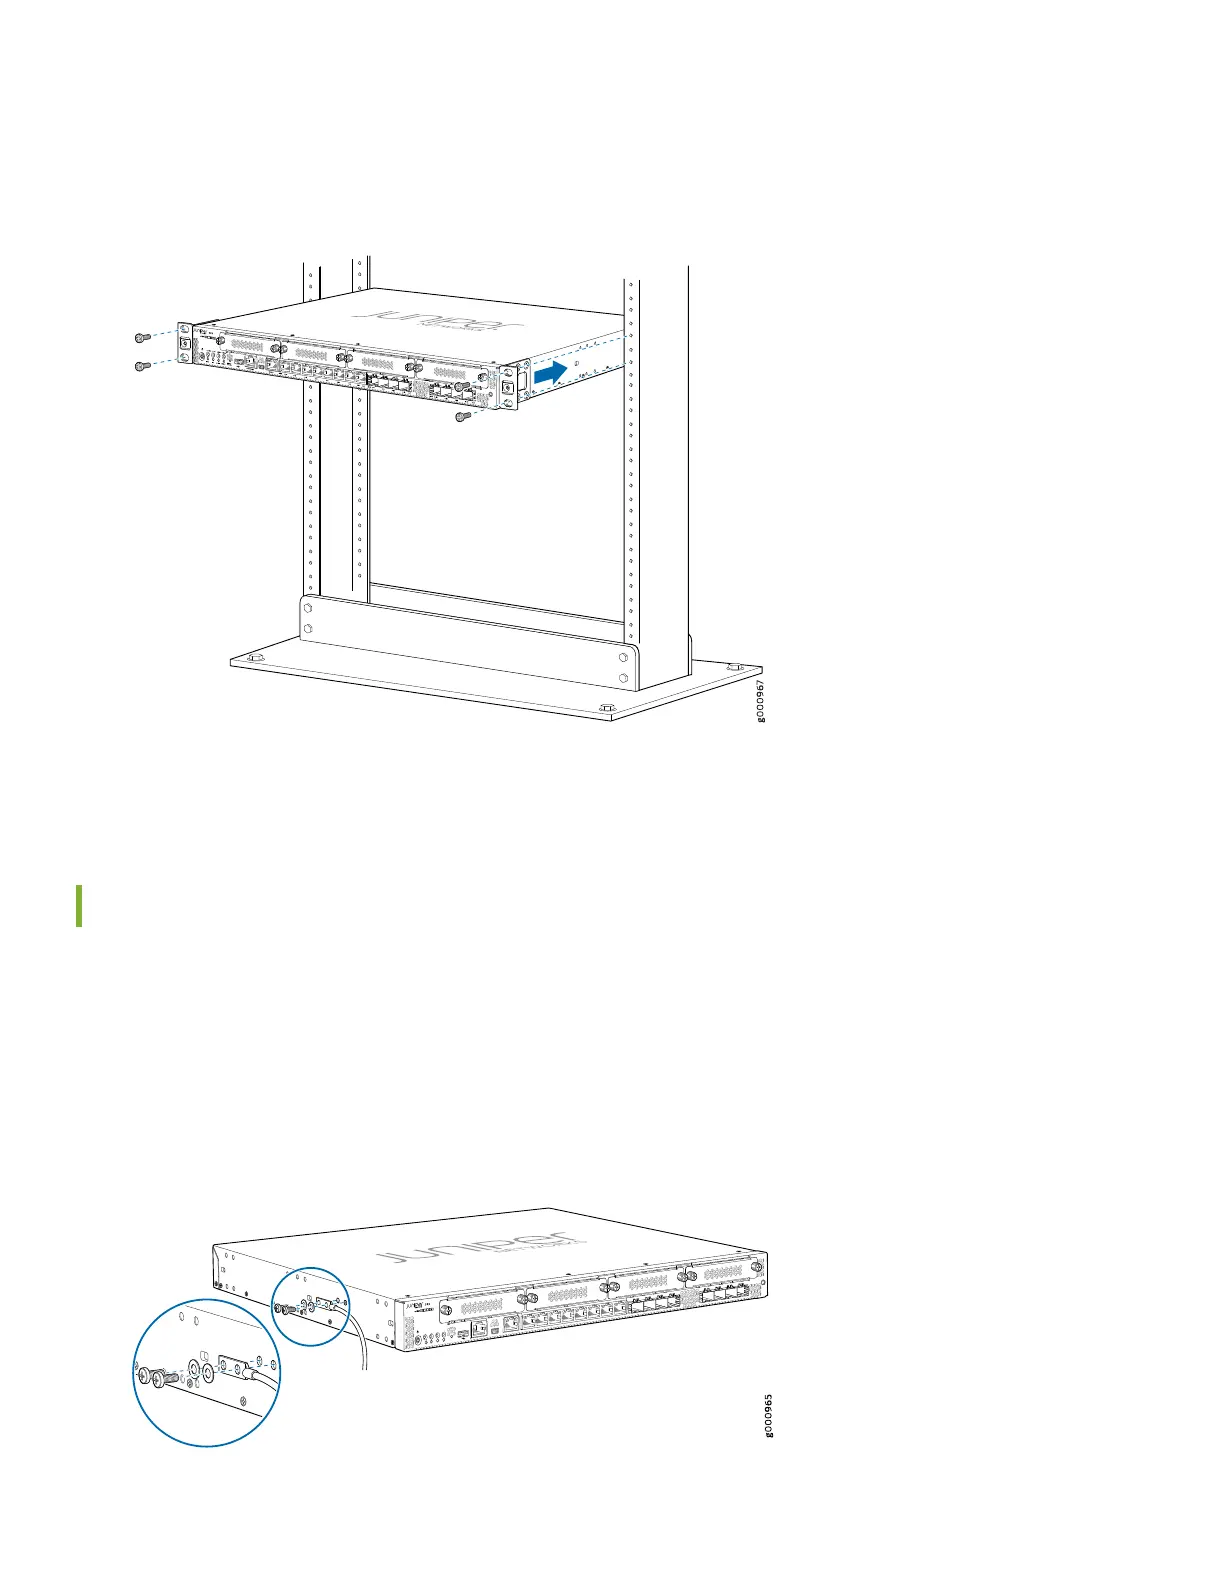
5. While you’re holding the SRX345 in place, have a second person insert and tighten the rack mount screws to secure
the mounting brackets to the rack. Make sure to tighten the screws in the two bottom holes first and then tighten the
screws in the two top holes.
6. Check that the mounting brackets on each side of the rack are level.
Power On
Now that you’ve installed your SRX345 in the rack, you’re ready to connect it to power.
1. Attach an electrostatic discharge (ESD) grounding strap to your bare wrist, and connect the other end of the ESD strap
to the ESD point on the rack.
2. Attach a grounding cable to earth ground, and then attach the other end to the grounding point on the side panel of
the SRX345.
4

Other manuals for Juniper SRX345

Questions and Answers:

Question and Answer IconNeed help?

Do you have a question about the Juniper SRX345 and is the answer not in the manual?

Juniper SRX345 Specifications

General IconGeneral
USB 2.0 ports quantity1
Ethernet LAN (RJ-45) ports8
Flash memory8000 MB
Internal memory4000 MB
CertificationFCC A, RoHS 2
Rack capacity1U
Heat dissipation420 BTU/h
Power consumption (typical)122 W
Storage temperature (T-T)-20 - 70 °C
Operating temperature (T-T)0 - 40 °C
Storage relative humidity (H-H)5 - 95 %
Operating relative humidity (H-H)10 - 90 %
Routing protocolsBGP, CLNS, MPLS, OSPF, RIP-1, RIP-2
Supported network protocolsIPv4, IPv6
Firewall securityYes
Security algorithmsIPSEC, SSL/TLS
Networking standardsIEEE 802.1p
Ethernet LAN data rates10, 100, 1000 Mbit/s
Weight and Dimensions IconWeight and Dimensions
Weight4900 g
Dimensions (WxDxH)440.9 x 370.1 x 43.6 mm

Related product manuals