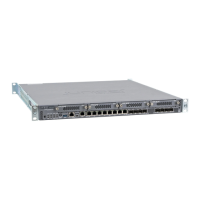
NOTE: Be sure to check out our Guided Setup: SRX300 Line Firewalls. Our Guided Setup picks up where this
Day One+ leaves off, providing step-by-step instructions on how to easily secure and validate your branch
location.
SRX345 Provisioning Options
It’s simple to provision and manage the SRX345 and other devices on your network. You can choose the configuration
tool that’s right for you:
•
Junos CLI commands. In this guide we show you how to configure the SRX345 with CLI commands that leverage the
plug and play factory defaults.
•
J-Web, Juniper Networks Setup wizard that is preinstalled on the SRX345. For information on performing initial
configuration using the J-Web setup wizard see Configure SRX Devices Using the J-Web Setup Wizard in the J-Web
User Guide for SRX Series Devices.
•
Juniper Sky™ Enterprise, Juniper Networks-hosted public cloud-based Software as a Service (SaaS) solution. You’ll need
to have a Juniper Sky Enterprise subscription service before you can use it to configure the SRX345. For more information,
check out the Juniper Sky Enterprise Getting Started Guide.
•
Juniper Networks Contrail Service Orchestration (CSO). To use CSO, you’ll need an authentication code. See the Contrail
Service Orchestration (CSO ) Deployment Guide.
If you are using Junos OS Release 19.2 or earlier, you can use Juniper Networks Network Service Controller to configure
the SRX345 with ZTP. Network Service Controller is a component of CSO. See Configure the Device Using ZTP with
Juniper Networks Network Service Controller.
Initial Configuration Using the CLI
IN THIS SECTION
Connect to the Serial Console Port | 7
Perform Initial Configuration | 8
Congratulations! Your SRX is Up and Running | 9
You can use the console port on the SRX to do the initial configuration. This section assumes you start from a factory
default configuration. See SRX345 Firewall Hardware Guide for details on the SRX345 factory default configuration.
6

 Loading...