Do you have a question about the JVC Everio GZ-HD500 and is the answer not in the manual?
Basic operation for powering up the device and charging the battery pack.
Basic operation for capturing video content with the camcorder.
Basic operation for reviewing recorded videos and still images.
Tips for recording happy Christmas celebrations with family.
Guidance on creating an awesome wedding video for the bride and groom.
Advice on capturing good times during domestic or overseas trips.
Tips for taking video or still images at amusement parks.
Checks if all included items are present and in good condition.
Instructions on how to charge the camcorder's battery pack.
Guide on how to insert a microSD card for expanded storage.
Initial setup for date and time before recording.
Record videos easily using automatic settings.
Adjusting the angle of view using the zoom function.
Capture still images easily using automatic settings.
Adjusting settings like brightness and shutter speed manually.
Select and play back recorded videos from an index screen.
Select and play back recorded still images from an index screen.
Play back a digest of recorded videos for quick content review.
Add effects to the beginning and end of recorded videos.
Find desired files using search functions like group, date, or event.
Output images from the camcorder to a TV via various connectors.
Instructions for connecting to a TV using an HDMI mini connector.
Play back custom-created playlists of favorite videos.
Play back discs created using the unit's backup function.
Remove unwanted videos and images to free up recording space.
Prevent important videos/still images from accidental deletion.
Delete specific selected files from the recording media.
Delete all files on the recording media.
Remove protection from all files, allowing them to be deleted.
Categorize videos by events for easier playback organization.
Split a selected video into two separate files.
Enlarge and save parts of still images containing faces.
Capture still images from scenes within recorded videos.
Select and save a specific part of a video as a new file.
Capture and copy video parts for YouTube™ upload.
Set EXPORT attributes for videos to easily register them in iTunes.
Create a playlist with a selected recording date and title screen.
Create playlists by selecting favorite videos in a preferred order.
Arrange files one by one to create a playlist.
Create playlists by arranging multiple files according to group.
Create playlists by arranging multiple files according to recording date.
Create playlists by arranging files according to events and dates.
Modify the content of a created playlist.
Remove created playlists.
Add a title screen to a created playlist.
Copy videos and still images from HDD/microSD to another media.
Copy all videos and still images to another media.
Copy selected videos and still images to another media.
Move videos and still images from HDD/microSD to another media.
Move all videos and still images to another media.
Copy recorded files to discs using an optional BD/DVD writer.
Instructions for preparing the DVD Writer (CU-VD50).
Instructions for preparing the DVD Writer (CU-VD3).
Instructions for preparing the BD Writer.
Set type and quality for discs using a BD/DVD writer.
Sort and copy files according to their recording date.
Sort and copy videos according to registered events.
Arrange and copy created playlists in the desired order.
Select and copy specific desired files.
Make discs playable on other devices after copying.
Play back short scenes from recorded videos for quick review.
Connect and prepare a USB external hard disk drive.
Copy video and still image files to a USB external hard disk drive.
Play back files stored on the connected USB external hard disk drive.
Delete all files on the USB external hard disk drive.
Create discs using a Blu-ray recorder connected via USB.
Transfer videos by connecting to a DVD recorder or VCR.
Copy files to a PC using the provided software.
Check PC system requirements for the provided software.
Back up all files to the PC's hard disk.
Organize backed-up files by adding labels for easier management.
Copy files arranged using the user list to DVDs.
Details intellectual property rights of the software program.
Outlines the non-exclusive rights granted to the user.
Guide on how to use the slider and buttons to set menu options.
Adjust video settings like brightness, white balance, and quality.
Allows manual adjustment of recording settings.
Automatically adjusts brightness and focus based on detected faces.
Turns the built-in light on or off.
Categorizes videos by events for easier playback organization.
Sets the video quality for recording.
Brightens subjects automatically in dark places.
Records scenes over long periods at set intervals.
Reduces noise caused by wind.
Adjust still image settings like quality and size.
Use for taking group photos with a delay.
Adjusts continuous shooting settings.
Sets the image size (number of pixels) for still images.
Sets the image quality for still images.
Detailed manual adjustments for shooting conditions.
Options for deleting, searching, and editing videos.
Perform operations like copying, moving, protecting, and dividing files.
Delete unwanted videos.
Refine video index screen by group, date, or event.
Set whether to show on-screen displays like icons during playback.
Options for deleting, searching, and editing still images.
Search and play still images by recording dates.
Add effects to transitions in slideshow playback.
Adjust display settings like language and brightness.
Change the language displayed on the unit.
Configure the display style for year, month, day, and time.
Set the brightness of the LCD monitor.
Set the brightness of the monitor's backlight.
Set the color of the focus outline when using Focus Assist.
Reset current time or set local time for overseas use.
Adjust various camera settings like operation sound and power options.
Plays a demonstration of the unit's special features.
Prevents forgetting to turn off the power by automatically shutting down.
Turns the operation sound on or off.
Displays the REC button for use as the START/STOP button.
Enables immediate recording when the LCD monitor is opened.
Prevents damage to the HDD when the unit is dropped.
Enables operation using the provided remote control.
Sets created discs to a readable state for DVD writers.
Updates the unit's functions to the latest version.
Returns all settings to their default values.
Adjust settings for connecting to a TV or DVD recorder.
Displays icons and date/time on a TV screen.
Sets the aspect ratio (16:9 or 4:3) for TV output.
Sets the definition of video output from the COMPONENT connector.
Sets the definition of video output from the HDMI mini connector.
Sets linked operations ON/OFF when connected via HDMI.
Perform settings for the recording media.
Sets the recording/playback media for videos.
Sets the recording/playback media for still images.
Deletes all files on the HDD.
Deletes all files on the microSD card.
Execute data deletion when disposing of the unit.
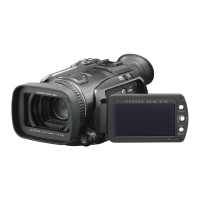
Identifies parts on the front of the camcorder.
Identifies parts on the rear of the camcorder.
Identifies parts on the bottom of the camcorder.
Identifies parts inside the camcorder's interior.
Describes the LCD monitor and its controls.
Explains common icons and indicators during recording.
Details specific indicators shown during video recording.
Details specific indicators shown during still image recording.
Details indicators shown during video playback.
Details indicators shown during still image playback.
Troubleshoots issues related to the battery pack.
Troubleshoots common problems during recording.
Troubleshoots issues related to the microSD card.
Troubleshoots common problems during playback.
Troubleshoots issues related to editing and copying files.
Troubleshoots issues related to PC connectivity and software.
Troubleshoots issues with the LCD screen or recorded image quality.
Addresses various other operational issues and solutions.
Provides solutions for common error messages displayed by the unit.
Instructions for cleaning the camcorder body.
Instructions for cleaning the lens and LCD monitor.
Technical specifications related to the camera's functions.
Details about the various input/output connectors.
Technical specifications for video recording and playback.
Technical specifications for still image capture.
Specifications for the AC adapter accessory.
Specifications for the BN-VG114E battery pack.
Specifications for the RM-V760 remote control.
| Digital zoom | 200 x |
|---|---|
| Optical zoom | 20 x |
| Focal length range | 3 - 60 mm |
| Focal length (35mm film equivalent) | 46.4 - 928 mm |
| Sensor type | CMOS |
| Total megapixels | 1.37 MP |
| Optical sensor size | 1/5.8 \ |
| Display diagonal | 2.7 \ |
| Auto focus | Yes |
| Compatible operating systems | Digital Photo Navigator (Win) Pixela Everio MediaBrowser (Win) |
| USB 2.0 ports quantity | 1 |
| Internal storage capacity | 80 GB |
| Product color | Silver |
| Battery type | BN-VG114 |
| Depth | 110 mm |
|---|---|
| Width | 53 mm |
| Height | 63 mm |
| Weight | 265 g |