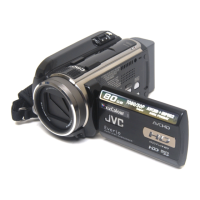
What to do if my JVC Camcorder is not recording?
- Jjoshua65Jul 31, 2025
If your JVC Camcorder isn't recording, first, check the A / B button. If that's not the issue, make sure you're in recording mode by tapping the q button.
What to do if my JVC Camcorder is not recording?
If your JVC Camcorder isn't recording, first, check the A / B button. If that's not the issue, make sure you're in recording mode by tapping the q button.
Why does my JVC Everio GZ-HM860 Camcorder recording stop automatically?
If your JVC Camcorder stops recording automatically, there are a couple of reasons why this might be happening. First, the unit might be overheating, in which case you should turn it off, wait a while, and then turn it back on. Also, the camcorder will automatically stop recording after 12 hours of continuous recording.
Why is the POWER/CHARGE lamp blinking on my JVC Everio GZ-HM860?
If the POWER/CHARGE lamp on your JVC Camcorder starts blinking when the monitor is closed, it could be due to a couple of reasons. First, check the remaining battery power; the lamp won't flash when fully charged. Second, if you're charging in a hot or cold environment, make sure the battery is being charged within the permitted temperature range, otherwise charging might stop to protect the battery pack.
How to set up JVC Camcorder for 3D images on TV?
If you're having trouble viewing 3D images properly on your 3D compatible TV using the JVC Camcorder GZ-HM970, ensure that you have correctly set the “HDMI OUTPUT” in the “COMMON” menu.
Why does my JVC Everio GZ-HM860 Camcorder heat up?
It is normal for the JVC Camcorder unit to heat up. This is not a malfunction and may occur when the unit is used for a long time.
Techniques for stable and effective shooting, including holding, panning, and different shooting positions.
Tips for recording family activities during Christmas celebrations and parties.
Guidance on capturing key moments and expressions during a wedding event.
Advice on capturing travel memories and bringing necessary equipment.
Tips for shooting videos and still images at amusement parks.
Safety and comfort guidelines for viewing 3D images on the camcorder's LCD.
Check the included camcorder accessories and their descriptions.
Step-by-step instructions for charging the battery pack using the AC adapter.
Procedure for inserting an SD card for expanded recording capabilities.
How to operate the camcorder using the touch screen interface and its gestures.
Identification of buttons and functions on the LCD screen in different modes.
Initial setup for setting the camcorder's date and time.
Connecting and using external devices wirelessly via Bluetooth.
Sending still images wirelessly to a Bluetooth-compliant device.
Using a smartphone as a remote control for the camcorder via Bluetooth.
Recording videos with automatic exposure and focus adjustments.
Adjusting settings manually for video and still images.
Manually focusing the subject for clear and precise shots.
Adjusting shutter speed for subject movement and lighting.
Adjusting the color tone based on the ambient light source.
Registering faces for automatic focus and brightness adjustment.
Adjusting focus and brightness by tapping on subjects or areas.
Automatically capturing still images when smiles are detected.
Using the image stabilizer feature to reduce camera shake.
Recording videos at high speed for smooth slow-motion playback.
Recording scenes at set intervals for time-lapse playback.
Automatic recording triggered by detecting subject movement or brightness changes.
Assigning a frequently used function to the USER button for quick access.
Checking the available recording time and battery status.
Selecting and playing recorded video files from an index screen.
Selecting and viewing recorded still images from an index screen.
Playing back 3D video content on the LCD or a 3D compatible TV.
Connecting the camcorder to a TV for playback using various cable types.
Using HDMI-CEC for linked operations and control with a compatible TV.
Playing back standard 2D video and still image content on a TV.
Playing back discs created using the camcorder's backup function.
Removing unnecessary video and still image files to free up space.
Preventing important files from accidental deletion by applying protection.
Extracting still images from video clips during playback.
Selecting and saving a specific portion of a video as a new file.
Preparing and capturing video clips suitable for YouTube uploads.
Setting video attributes for easy transfer and registration with iTunes.
Copying recorded files to discs using an optional DVD writer.
Copying recorded files to discs using an external Blu-ray drive.
Dubbing videos to a VHS tape by connecting to a VCR.
Copying files to and playing from a USB external hard disk drive.
Copying video and still images from built-in memory to an SD card.
Moving files from built-in memory to an SD card, deleting from memory.
Copying files to a Windows computer using the provided software.
Installing the software for managing camcorder files on a PC.
Creating a backup of all recorded files to a computer.
Copying files to a Mac computer using the specified method.
Adjusting various settings specific to video recording.
Adjusting various settings specific to still image recording.
Options for deleting or searching specific video files.
Options for deleting or searching specific still images.
Accessing common settings applicable across different modes.
Deleting all files from the camcorder's internal memory.
Deleting all files from the inserted SD card.
Erasing all unit data before disposal or transfer.
Identification of parts located on the front of the camcorder.
Identification of parts located on the rear of the camcorder.
Identification of parts located on the bottom of the camcorder.
Identification of internal components and controls of the camcorder.
Description of the camcorder's LCD monitor and its functions.
Explanation of common icons and indicators displayed during recording.
Icons and indicators specifically displayed during video recording.
Icons and indicators specifically displayed during still image recording.
Icons and indicators displayed during video playback.
Icons and indicators displayed during still image playback.
Troubleshooting common issues related to the battery pack.
Troubleshooting issues related to SD card insertion and usage.
Troubleshooting problems encountered during playback of media.
Explanations and solutions for various error messages displayed by the unit.
Cleaning and maintaining the camcorder body for long-term use.
Cleaning the camcorder's lens and LCD monitor screen.
Technical specifications related to the camera's features and performance.
Technical details of the camcorder's input/output connectors.
| Image Sensor | CMOS |
|---|---|
| Video Resolution | 1920 x 1080 |
| Digital Zoom | 200x |
| LCD Screen Size | 3.0 inches |
| Touch Screen | Yes |
| Image Stabilization | Optical |
| HDMI Output | Yes |
| USB Interface | Yes |
| Battery Type | Lithium-ion |
| LCD Screen Resolution | 230, 000 pixels |
| Storage Media | SD/SDHC/SDXC |
| Video Format | AVCHD |
