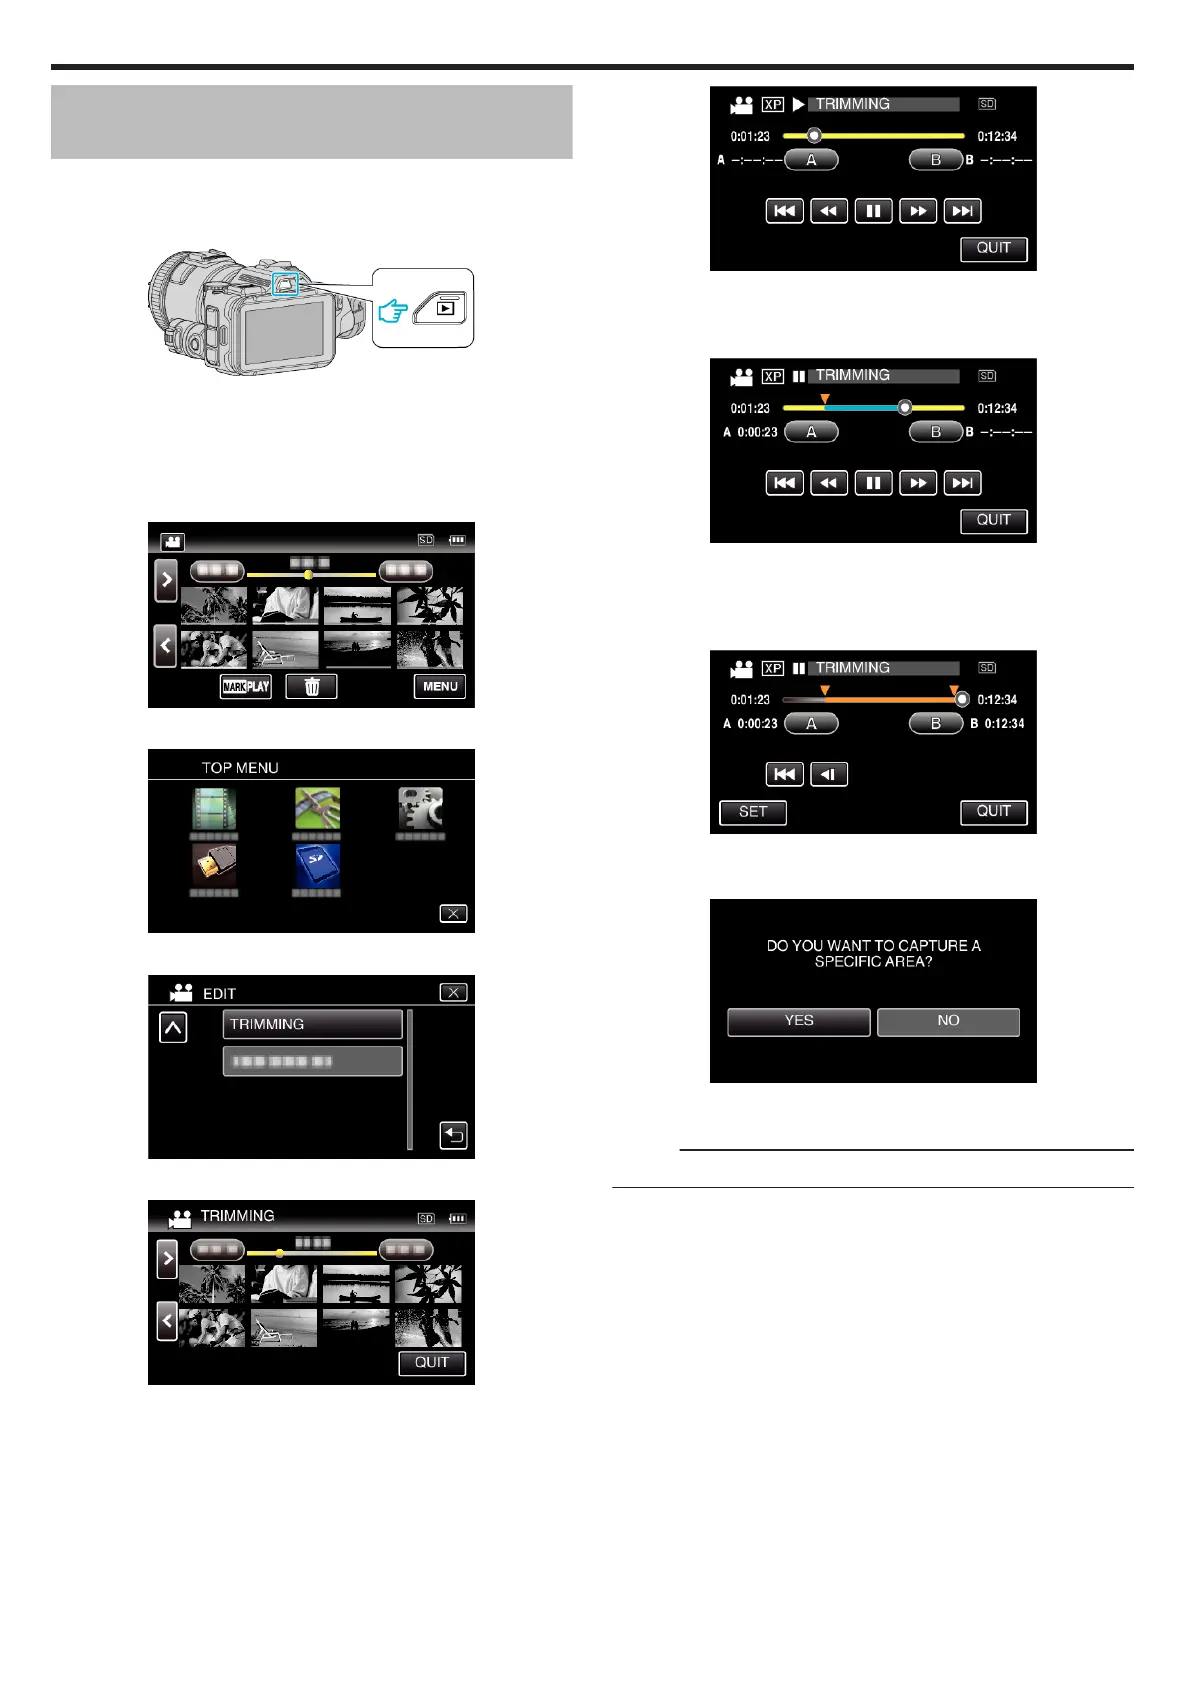
Capturing a Required Part in the Video
(TRIMMING)
Select the required part of a video and save it as a new video file.
0
The original video remains in its existing location.
1
Press the L button to select the playback mode.
.
0
Check if the playback mode is A.
0
If the mode is B still image, tap B on the recording screen to display
the mode switching screen.
Tap A to switch the mode to video. (You can also use the A/B button
on this unit.)
2
Tap “MENU”.
.
3
Tap “EDIT”.
.
4
Tap “TRIMMING”.
.
5
Tap the video to edit.
.
6
Tap e to pause playback at the desired start point, then tap “A”.
.
0
When “A” is tapped, the start point is set.
0
After setting the start point, tap d to continue playback.
7
Tap e to pause playback at the desired end point, then tap “B”.
.
0
When “B” is tapped, the end point is set.
0
To reset the start or end point, tap “A” or “B” at the desired scene
(position).
8
Tap “SET”.
.
0
When “SET” is tapped, the trimming area is confirmed.
9
Tap “YES”.
.
0
After copying, tap “OK”.
0
When copying finishes, the copied file is added to the index screen.
Memo :
0
The division point may deviate slightly from the selected scene.
Editing
72
 Loading...