EasyManua.ls Logo

JVC GR-SXM250 User Manual

JVC GR-SXM250
28 pages
To Next Page IconTo Next Page
Page #1 background imageLoading...
Page #1 background image
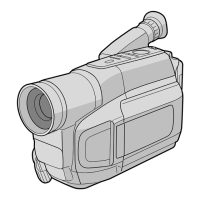
COMPACT VHS CAMCORDER
JVC
GR.SXM250
For Customer Use:
Enter beIow the Model No. and Serial No which is
located on the bottom of the camcorder. Retain this
information for future reference
Model No.
Serial No.
SuperVHS
Su/Jer VHSET
Printed in Malaysia
@ _ 1102-DY-YL-PJ
COPYRIGHT@ 2002 VICTOR COMPANY OF JAPAN, LTD
AUTOMATIC DEMONSTRATION
Automatic Demonstration takes place when "DEMO MODE" is set to "ON"
(factory-preset).
Available when the Power Switch (_ is set to "Q" or "_" while pressing down the Lock Button _)
located on the switch.
Performing any operation during the demonstration stops the demonstration temporarily. If no operation
is performed for more than 1 minute after that, the demonstration will resume.
"DEMO MODE" remains "ON" even if the camcorder power is turned off.
To cancel Automatic Demonstration, set the Power Switch (_ to "[_" and press the MENU Wheel O in
while the demo is in progress. This takes you directly to the demo mode's Setting Menu (so you will not
have to go through the main Menu Screen). Rotate the MENU Wheel O to select "OFF" and press it.
NOTES:
When a tape whose Erase Protection tab is in the position that allows recording is loaded in the
camcorder, demonstration is not available.
If you do not detach the Lens Cap, you cannot see the actual changes of the Automatic Demonstration
activated on the LCD monitor or viewfinder.
Question and Answer IconNeed help?

Do you have a question about the JVC GR-SXM250 and is the answer not in the manual?

JVC GR-SXM250 Specifications

General IconGeneral
Camcorder Media TypeVHS-C
Image Sensor Size1/4 inch
Display TypeLCD
Image SensorCCD
Effective Pixels270, 000 pixels
Shutter Speed1/60 - 1/4000 sec
Focus AdjustmentAutomatic, manual
White BalanceAutomatic
Display Size2.5 inches
LensZoom lens

Summary

Automatic Demonstration Feature

General Precautions

Safety Guidelines

Provides crucial safety guidelines and warnings for user protection.

Critical Safety Instructions

Initial Setup Guide

Battery Pack Usage

Explains how to use and charge the camcorder's battery pack.

AC Power Connection

Details how to connect and use the camcorder with AC power.

Battery and System Configuration

Camcorder Operations Guide

Controls, Connectors & Indicators

LCD/Viewfinder Indicator Guide

Explains the various indicators displayed on the LCD monitor and viewfinder.

Recording and Playback Procedures

Recording Procedure

Step-by-step guide on how to record video footage with the camcorder.

Playback and Audio Operations

Covers playback operations, audio volume adjustment, and LCD brightness.

Core Camcorder Features

Key Operational Features

Tracking Adjustment

Time Base Corrector (TBC)

TV/VCR Connections

Tape Dubbing Procedure

Cassette Adapter Usage

Menu Settings Guide

Camera Menu Options

Details settings within the Camera Menu, including Exposure and Stabilizer.

System Menu Settings

Advanced Recording Features

Digital Effects Guide

Troubleshooting Common Issues

Shooting Problem Solutions

Addresses issues like vertical lines, bright spots, and animation/time-lapse problems.

Playback and Tape Issues

Solutions for blurred playback, tape stopping, and tape eject problems.

Warning and Error Indicators

Explains various warning messages and error codes.

General Cautions and Warnings

AC Adapter & Video Light Cautions

Safety advice for using the AC adapter and the video light.

Battery & Cassette Precautions

Guidelines for proper handling and use of batteries and cassettes.

Unit Usage and Maintenance

Camcorder Specifications

Related product manuals