(No.YD002)1-17
SECTION 4
ADJUSTMENT
4.1 Before adjustment
4.1.1 Precaution
• The adjustments of this unit include the mechanism com-
patibility and electrical adjustments. During the perfor-
mance of this work, be sure to observe the precautions for
each type of adjustment.
• If there is a reference to a signal input method in the signal
column of the adjustment chart, “Ext. S-input” means the
Y/C separated video signal and “Ext. input” means the
composite video signal input.
• Unless otherwise specified, all measuring points and
adjustment parts are located on the Main board.
4.1.2 Required test equipments
• Color (colour) television or monitor
• Oscilloscope: wide-band, dual-trace, triggered delayed sweep
• Signal generator: RF / IF sweep / marker
• Signal generator: stairstep, color (colour) bar [PAL]
• Recording tape
• Digit-key remote controller(provided)
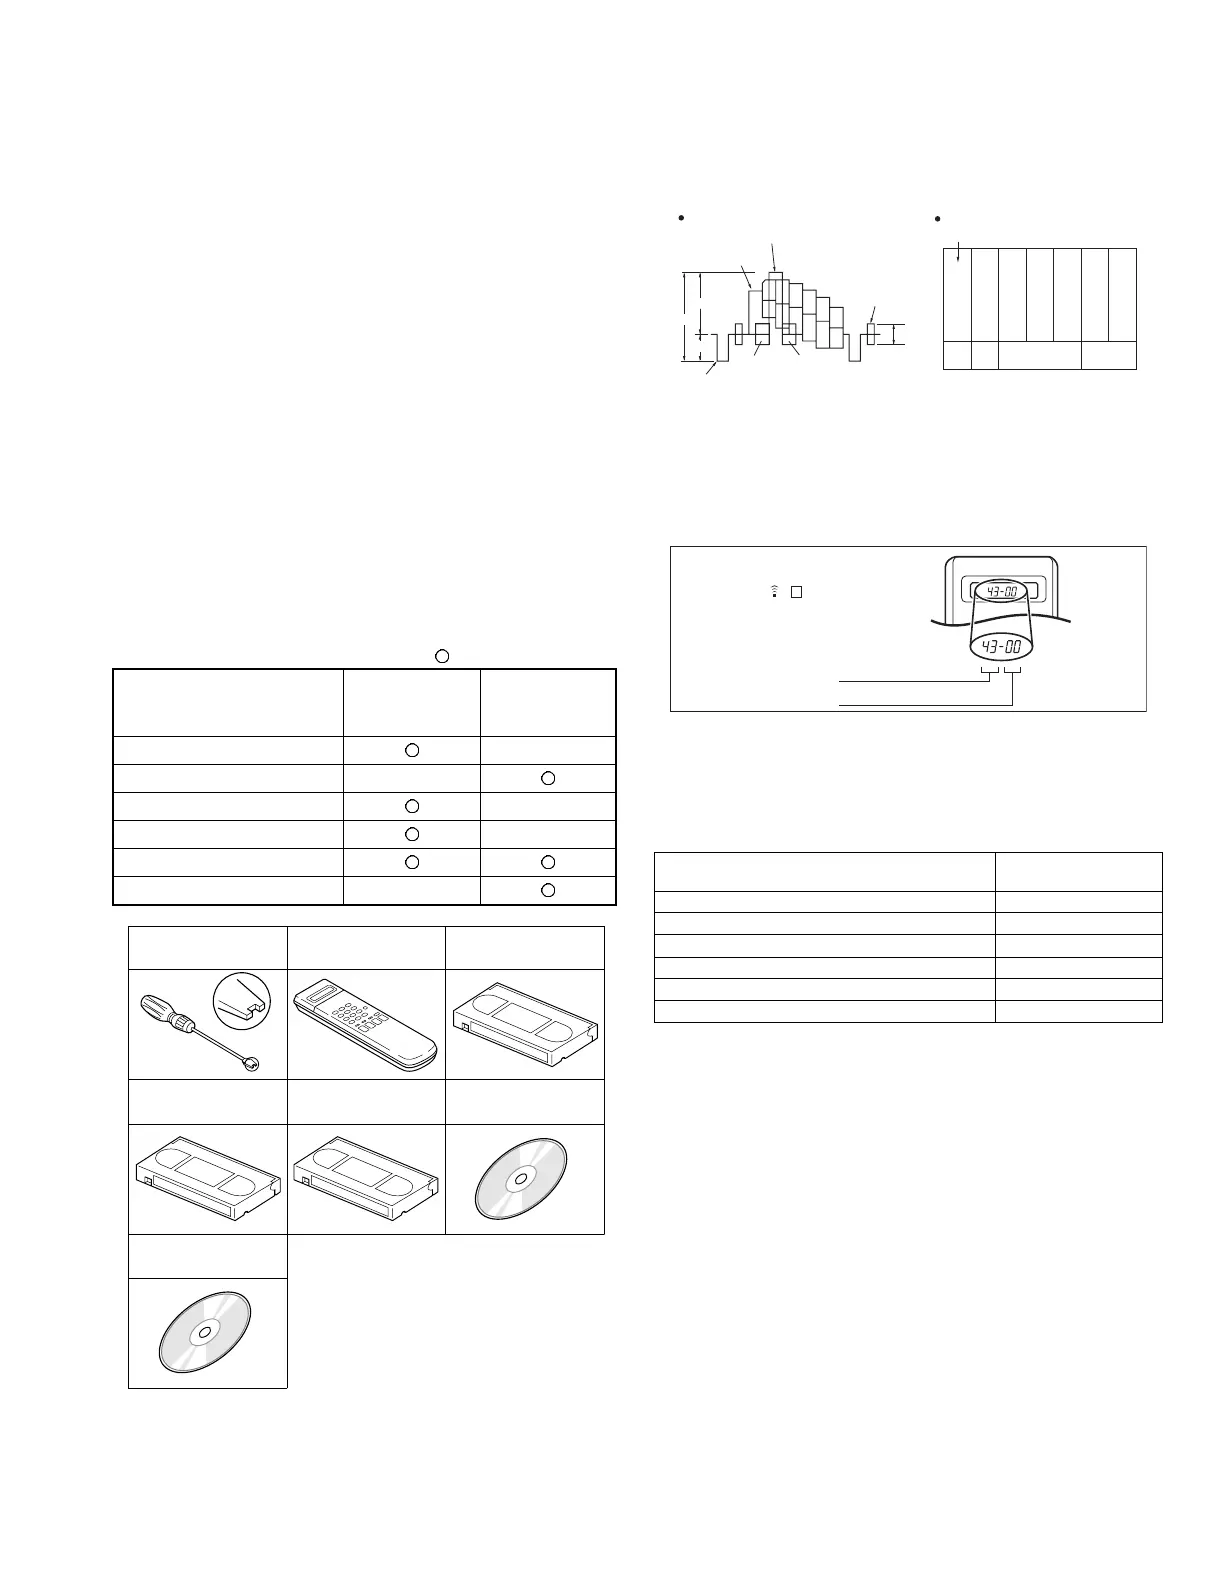
4.1.3 Required adjustment tools
: Used --- : Not used
4.1.4 Color (colour) bar signal,Color (colour) bar pattern
4.1.5 Switch settings
When adjusting this unit, set the VCR mode and switches
as described below.
• When using the Jig RCU, it is required to set the VCR to the
Jig RCU mode. (See "SECTION 2 SPECIFIC SERVICE IN-
STRUCTIONS")
Fig.4-1a Jig RCU [PTU94023B]
• Set the switches as shown below unless otherwise specified
on the relevant adjustment chart. The switches that are not list-
ed below can be set as desired.
If the VCR is not equipped with the functions detailed below,
setup is not required.
4.1.6 Manual tracking mode (Auto tracking ON/OFF) set-
ting
(1) In order to set to the manual tracking mode during tape
playback, press the “SP/EP(LP)”button on the remote con-
trol unit.
• Each press of the button switches the auto tracking ON
or OFF.
• When the manual tracking mode is set, the tracking is
placed at the center position.
(2) Press “channel +/-” to adjust the tracking manually.
Mechanism
compatibility
adjustment
Electrical
adjustment
Roller driver
---
Jig RCU ---
Back tension cassette gauge ---
Alignment tape(MHPE) ---
Alignment tape(MHPE-L)
Alignment tape(MHP-L)
---
Roller driver
PTU94002
Back tension cassette gauge
PUJ48076-2
Jig RCU
PTU94023B
Alignment tape
(SP, stairstep, PAL)
MHPE
DVD test disc
VT-501
Alignment tape
(LP, stairstep, PAL)
MHPE-L
CD-DA test disc
CTS-1000
AUTO PICTURE/VIDEO CALIBRATION/
B.E.S.T./D.S.P.C.
OFF
PICTURE CONTROL/SMART PICTURE NORMAL/NATURAL
VIDEO STABILIZER OFF
TBC ON
Digital 3R ON
VIDEO NAVIGATION/TAPE MANAGER OFF
BLUE BACK OFF
(75%)
White(75%)
0.7 V
0.3 V
Horizontal sync
VU
1V
White(100%)
Yellow
Cyan
Green
Magenta
Red
Blue
Burst
0.3 V
V(R-Y)
U(B-Y)
White
Yellow
Cyan
Green
Magenta
Red
Blue
U Black
White
100%
V
Colour bar signal [PAL]
Colour bar pattern [PAL]
INITIAL MODE
DATA CODE
CUSTOM CODE
43: A CODE
[Data transmitting method]
Depress the " "( 3 ) button
after the data code is set.
Jig RCU
www.freeservicemanuals.info
Digitized in Heiloo Netherland
 Loading...