

P
pmartinezAug 29, 2025
Why is the radio reception poor on my JVC Car Receiver?
- KKathleen SalinasAug 30, 2025
If you are experiencing poor radio reception with your JVC Car Receiver, ensure that the antenna is firmly connected.
Why is the radio reception poor on my JVC Car Receiver?
If you are experiencing poor radio reception with your JVC Car Receiver, ensure that the antenna is firmly connected.
Why is sound not being heard during playback from Android device on my JVC Car Receiver?
If you cannot hear sound during playback from your Android device on your JVC Car Receiver, try the following: * Reconnect the Android device. * Launch any media player application on the Android device and start playback. * Relaunch the current media player application or use another media player application. * Restart the Android device. If USB connection does not work, connect the Android device through the auxiliary input jack.
What to do if the disc cannot be ejected from my JVC KD-T401?
If the disc cannot be ejected from your JVC Car Receiver, press and hold the eject button to forcibly eject the disc. Be careful not to drop the disc when it is ejected.
How to fix JVC Car Receiver when sound cannot be heard?
If you cannot hear any sound from your JVC Car Receiver, try adjusting the volume to a suitable level. Also, inspect the cords and connections to ensure they are properly connected.
How to eject a stuck disc from JVC KD-T401 Car Receiver?
If the disc cannot be ejected from your JVC Car Receiver, press and hold to forcibly eject the disc. Be careful not to drop the disc when it is ejected.
What to do if there is no sound during Android playback on JVC KD-T401?
If you're not getting any sound during playback on your JVC Car Receiver with an Android device, try these steps: * Reconnect the Android device. * Launch a media player app on the Android device and start playback. * Relaunch the current media player app or try a different one. * Restart the Android device. * If USB connection doesn't work, try connecting the Android device through the auxiliary input jack.
Read manual for proper use, observe warnings/cautions. Keep manual accessible.
Avoid driving distractions. Do not ingest battery - chemical burn hazard.
Adjust volume for outside awareness. Lower volume for digital sources.
Step-by-step instructions for setting the clock and date, including format.
Guide to setting system parameters like key beep and source selection.
Table detailing operations: fast-forward, track/folder selection, repeat play.
Settings for equalizer presets and custom sound settings (EASY EQ, PRO EQ).
Steps to save custom sound settings into memory.
Controls for Bass Boost, Loudness, and subwoofer settings.
Selecting speaker output settings based on connection method.
Adjusting brightness separately for day and night.
Selecting illumination colors for the symbolic button.
Troubleshooting common issues like no sound or wiring errors.
Troubleshooting unsupported tracks or reading errors.
Troubleshooting poor radio reception or static noise.
Troubleshooting Android device connection, playback, and sound issues.
Technical specifications for FM and AM tuner performance.
Important safety warnings regarding installation and wiring.
Detailed diagram and instructions for connecting the unit's wiring harness.
Cautions for safe installation, handling hot parts, and speaker connections.
Step-by-step guide for installing the unit into a dashboard.
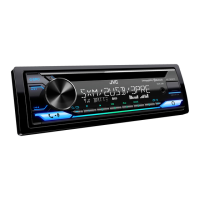
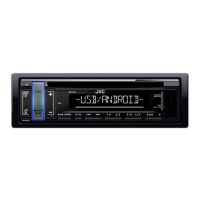
| DIN size | 1 DIN |
|---|---|
| CD player | Yes |
| Output power | 200 W |
| Product color | Black |
| Ready for iPod | - |
| High pass filter | No |
| Disc types supported | CD |
| Audio output channels | - channels |
| Equalizer bands quantity | 3 |
| Maximum power per channel | 50 W |
| Audio formats supported | FLAC, MP3, WAV, WMA |
| Display type | LCD |
| Illumination color | White |
| USB version | 2.0 |
| USB port position | Front |
| USB connector type | USB Type-A |
| USB ports quantity | 1 |
| AM band range | 531 - 1611 kHz |
| FM band range | 87.5 - 108 MHz |
| LW band range | 153 - 279 kHz |
| Supported radio bands | AM, FM, LW, MW |
| Preset stations quantity | 24 |
| Package weight | 1500 g |
| Depth | 158 mm |
|---|---|
| Width | 182 mm |
| Height | 53 mm |
| Weight | 1200 g |