2-6
KS-F150
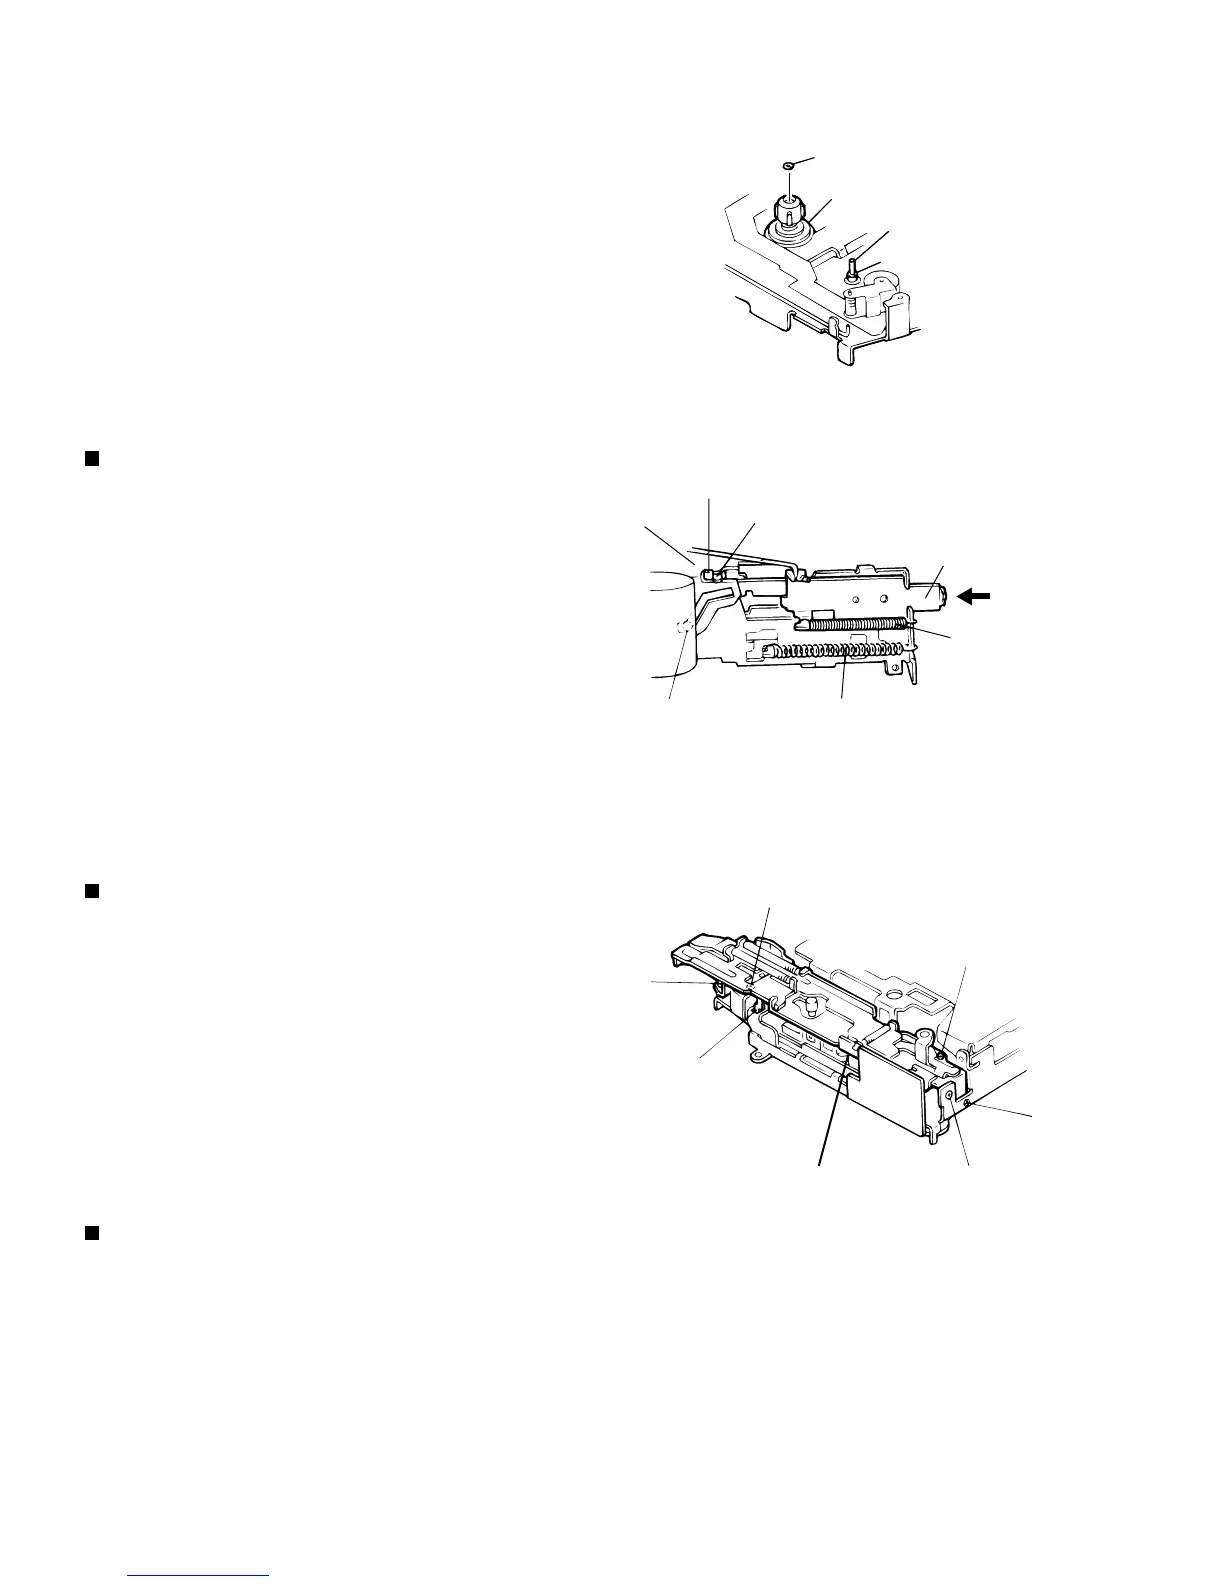
KS-FX12
Cassette hanger
Return link
EJECT lever
EJECT L.Spring
EJECT C.Spring
EJECT cam
The convex section should be between
the cassette hanger and EJECT cam .
Fig. 5
Push
b
Note : The reel disk and capstan can now be replaced.
1-1 Remove the C washer at the top of the reel disk
to remove the reel disk.
caution : Replace with a new C washer after
repairing.
1-2 To replace the capstan, remove the E washer in
the pinch-roller section.
Remove the main belt of the flywheel before-
hand.
Assembling the Cassette Hanger
( See Fig. 1 and 5)
1. Assemble the return link.
2. Install the cassette hanger on the chassis.
Note : While pressing the EJECT lever, assemble in the
order shown below.
Removing the FF/REW lever assembly
( See Fig. 6)
1. From the rear of unit, remove the FF/REW lever
assembly retaining the one screw ( 1 ).
2. From the upper part of the FF/REW lever assem-
bly, remove the FF/REW lever assembly retaining
the one screw ( 2 ).
3. From the front of unit, remove the FF/REW lever
assembly upwards and pull it slightly to the front.
Assembling the FF/REW lever Assembly
1. Assemble the FF/REW lever assembly to the
chassis of rear section ( c ).
2. Assemble the pinch-roller shaft ( d ), change lever
( B ) ( e ) and return link ( f ) to chassis.
C Washer
Reel disk
Capstan
E Washer
Fig. 4
Fig. 6
FF/REW lever assembly
2
1
2
f
e
c
d
 Loading...