EasyManua.ls Logo

JVC KW-AVX815 - User Manual

JVC KW-AVX815
6 pages
To Next Page IconTo Next Page
Loading...
KW-AVX816/KW-AVX815
KW-AVX810
Installation/Connection Manual
ϰ༬௥ો˿
°“√µ‘¥µ—Èß/§ŸË¡◊Õ°“√µ‘¥µ—Èß
Crimp connector
қʪ૊Ꮓ
¢—È«µËÕ”À√—∫Àπ’∫
Power cord
ྐཔ௤૊·ڄለӧ
“¬‡§‡∫‘≈°”≈—ß
Batteries
ྐЖ
·∫µ‡µÕ√’Ë
Heat sink
ಞᇊ
·ºËπ√–∫“¬§«“¡√ÈÕπ
1
0108MNMMDWJEIN
EN, CT, TH
©2008 Victor Company of Japan, Limited
Remote controller
ჲ૆዇
√’‚¡µ§Õπ‚∑√≈
Parts list for installation and connection
The following parts are provided for this unit.
If anything is missing, contact your dealer immediately.
Main unit
ጅ
µí«‡§√◊ËÕß
Round head screws (M5 x 8 mm)
ฐᏃᒘീ (M5 x 8 mm)
°√ŸÀ—«°≈¡ (M5 x 8 mm)
Flat head screws (M5 x 8 mm)
Ꮓᒘീ (M5 x 8 mm)
°√ŸÀ—«·∫π (M5 x 8 ¡¡)
LVT1794-007A
[U/UT]
ENGLISH
This unit is designed to operate on 12 V DC, NEGATIVE ground
electrical systems. If your vehicle does not have this system, a
voltage inverter is required, which can be purchased at JVC car audio
dealers.
WARNINGS
DO NOT install any unit or wire any cable in a location where;
it may obstruct the steering wheel and gearshift lever operations,
as this may result in a traffic accident.
it may obstruct the operation of safety devices such as air bags, as
this may result in a fatal accident.
it may obstruct visibility.
DO NOT operate any unit while manipulating the steering wheel, as
this may result in a traffic accident.
The driver must not watch the monitor while driving. It may lead to
carelessness and cause an accident.
If you need to operate the unit while driving, be sure to look around
carefully or you may be involved in a traffic accident.
If the parking brake is not engaged, “Parking Brake” flashes on the
monitor, and no playback picture will be shown.
This warning appears only when the parking brake wire is
connected to the parking brake system built in the car.
Notes on electrical connections:
Replace the fuse with one of the specified rating. If the fuse blows
frequently, consult your JVC car audio dealer.
It is recommended to connect speakers with a maximum power
of more than 50 W (both at the rear and at the front, with an
impedance of 4 Ω to 8 Ω).
If the maximum power is less than 50 W, change “Amplifier Gain”
setting to prevent the speakers from being damaged (see page 58 of
the INSTRUCTIONS).
To prevent short circuits, cover the terminals of the UNUSED leads
with insulating tape.
The heat sink becomes very hot after use. Be careful not to touch it
when removing this unit.
Plate for use with a Nissan car
·ؠ୕ԆԾڄ
·ºËπ”À√—∫„™È°—∫√∂π‘—π
Monitor panel and soft case
᜼Ε዇ࡒػ֜௟ୢ
·ºßÀπÈ“®Õ·≈–°√–‡ªÎ“„Ë·∫∫πÿË¡
AV I/O cord
ࡖᏁඁᏁ᎔ʈ᎔ྐង
“¬ AV I/O
ˁ
ʹጅ෮՟·ڈޠ12 V é࠸๩ોϚڅྑກԧ஁éϨس઱ڄԾቩ
ԅЉ௠ɾྐ຀Ԧ஀ç۱ᄔ࠱ɾࡴྐᏫ᜵ಗ዇çϚ
JVCԆԾ
ࡖᛏ˜ኀளකռé
ᙲѿ
˝ˡϚʓт໯ϯ༫ʹጅ׻௤૊ྐង;
঻๡Ҟᗉዬѕώᇟ֜᜵௥૛ᐑଁڄт໯Ѵ۱঻˺ചΟ
௢Ֆݭé
঻๡Ҟᗉዬѕϯη༫໯çϨϯηெമڄт໯çѴ۱঻
˺ചࠓ֡ڄΟ௢Ֆݭé
঻๡Ҟᗉඁ௴ڄт໯é
˝ˡϚዬѕώᇟڄཫദˀዬѕʹጅçѴ۱঻˺ചΟ௢Ֆݭé
ኢአçኢአ࢜˝ˡႌԠ᜼Ε዇é௠঻๡዗ࠓ୚׬Փ˺ചՖ
ݭé
Ϛኢአཫദˀࠜᄔ࠱ዬѕʹጅç˝৩࠱ં˝ٌำۮçѴ۱
঻˺ചΟ௢Ֆݭé
ࠜ˾۫ԾͶ⽂ϐç“Parking Brake” ϪᆟϚ᜼Ε዇ʕᖼç೷
ٗᆑ؞࿌é
෮ະ˾۫Ծ዗ለႩԆԾ˖໯ڄ˾۫ԾԦ஀ߟ௤૊ЏᙱѾۑ
ࣥʼ๡୏é
඲нྑཕ௥ોٍิ:
ӕۘᎳീӦಗ޴ᖃ׆࠷மࡩڄۘᎳീéϨسۘᎳീ໩ગጛᖢç
ቁώJVC ԆԾࡖᛏ˜ኀ༿é
݈໯֜ۮ໯ಙᑵ዇ڄఛʨ᎔ʈ୊ᏻʨؠ50 Wçմۇӏ޴
4 Ωü8 Ωé
Ϩسఛʨ୊ʮؠ 50 Wçቁቆ
“Amplifier Gain”
௎׆ࡩç
Վಙᑵ዇๑ᖢé
(
ኌ՟·იاڄ୶58ࡗ
)
é
޴Վྐ຀ഠཔçቁ·ഽሇઘу͵՟·ྐለڄၷʪé
ʹጅ՟·݈çಞᇊ๡݃ᇊéϕЏçϚ୰ʹጅçʮ˻ʿ࠱
᙮ညಞᇊé
‰∑¬
™ÿ¥ª√–°Õ∫π’ȉ¥È√—∫°“√ÕÕ°·∫∫¡“‡æ◊ËÕ„™Èß“π°—∫√–∫∫ °√–·‰øøÈ““¬¥‘π¢—È«≈∫°√–
·µ√ß
12 ‚«≈∑Ï À“°√∂¬πµÏ¢Õß§ÿ≥‰¡Ë‰¥È„™È√–∫∫π’È µÈÕß„™È‡§√◊ËÕß·ª≈ß°√–
·‰ø™Ë«¬ ´÷Ëß“¡“√∂À“´◊ÈÕ‰¥È®“°√È“π¢“¬‡§√◊ËÕ߇’¬ß√∂¬πµÏ
JVC
§”‡µ◊Õπ
լ˓µ‘¥µ—È߇§√◊ËÕ߇≈ËπÀ√◊Õ‡¥‘π“¬‰ø„πµ”·ÀπËß∑’Ë;
Õ“®°’¥¢«“ß°“√∑”ß“π¢Õßæ«ß¡“≈—¬·≈–§—π‡°’¬√Ï ‡æ√“–Õ“®°ËÕ„Àȇ°‘¥Õÿ∫—µ‡Àµÿ¢÷È
Õ“®°’¥¢«“ß°“√∑”ß“π¢ÕßÕÿª°√≥ϪÈÕß°—π§«“ª≈Õ¥¿—¬ ‡™Ëπ ·Õ√Ï·∫§ ‡æ√“–
Õ“®°ËÕ„Àȇ°‘¥Õ—πµ√“¬√È“¬·√ß∂÷ß™’«‘µ¢÷Èπ‰¥È
Õ“®°’¥¢«“ß“¬µ“
լ˓„™Èß“π¢≥–¢—∫¢’Ë ‡æ√“–Õ“®°ËÕ„Àȇ°‘¥Õÿ∫— µ ‘‡Àµÿ¢÷Èπ‰¥È
ºŸÈ¢—∫µÈÕ߉¡Ë¡Õß∑’ˮաÕ𑇵Õ√Ï¢≥–¢—∫¢’Ë ‡æ√“–Õ“®π”‰ªŸË§«“¡ª√–¡“∑‡≈‘π‡≈ËÕ·≈–
°ËÕ„Àȇ°‘¥Õÿ∫— µ ‘‡Àµÿ‰¥È
À“°µÈÕß°“√„™Èß“π‡§√◊ËÕߢ≥–¢—∫¢’Ë µÈÕß·πË„®«Ë“‰¥È„™È§«“¡√–¡—¥√–«—ßլ˓ߥ’
‡æ◊ËÕÀ≈’°‡≈’ˬ߰“√‡°‘¥Õÿ∫— µ ‘‘‡Àµÿ
À“°‰¡Ë‰¥È„ˇ∫√°¡◊Õ ¢ÈÕ§«“¡ “Parking Brake” ®–°–æ√‘∫∑’ËÀπÈ“®Õ ·≈–®–
‰¡Ë¡’¿“æ·¥ß¢÷Èπ¡“
§”‡µ◊Õππ’È®–ª√“°Ø¢÷Èπ‡©æ“–‡¡◊ËÕµËÕ“¬‡∫√°°—∫√–∫∫‡∫√°„π√∂¬πµÏ‰«È‡∑Ë“π—Èπ
¡ÈÕπŸ≈„π°“√•ËÕ√–∫∫‰ø:
„™Èæ‘°—¥®”‡æ“–·∑πøî«À“°øî«Ï¢“¥∫ËÕ¬ „ÀȪ √÷°…“√È“ π¢“¬‡§√◊ËÕ߇’¬ß√∂¬πµÏ JVC
¢Õ·π–π”„ÀȵËÕ≈”‚æß ∑’Ë¡’°”≈—ߢ—∫ßÿ¥‡°‘π°«Ë
50 W
(∑—ÈߥȓπÀπÈ“·≈–¥È“πÀ≈—ß
¡’§Ë“§«“¡µÈ“π∑“π
4 Ω ∂÷ß 8 Ω)
∂È“°”≈—ߢ—∫µË”°«Ë“
50 W „Àȇª≈’ˬπ§Ë“Amplifier Gain” ‡æ◊ËÕªÈÕß°—
π‰¡Ë„ÀÈ≈”‚æß™”√ÿ¥
(¥ŸÀπÈ“
58
§”·π–π”)
°“√ªÈÕß°—π°“√≈—¥«ß®√ ®–µÈÕßæ—π¢—È«“¬µ–°—Ë« ∑’ˉ¡Ë„™È·≈È«¥È«¬‡∑ ªæ—π“¬‰ø
·ºËπ√–∫“¬§«“¡√ÈÕπ®–√ÈÕπ¡“°À≈—ß®“°„™È √–¡—¥√–«—ßլ˓‰ª —¡º—‡¡◊ËÕ∂Õ¥™ÿ¥ª√–°Õ∫π’È
Έءϰ༬֝௥ોڅྒྷέଢశ
ʹጅకʓྒάé
ࠜച୏থ˲έщɾάྒάçቁѮոᑷു઱ڄ˜ኀé
√“¬°“√Ë«πª√–°Õ∫”À√—∫µ‘¥µ—Èß·≈–‡™◊ËÕ¡µËÕ°—π
Ë«πª√–°Õ∫µËÕ‰ªπ’È„ÀÈ¡“°—∫™ÿ¥ª√–°Õ∫π’È À“°¡’‘Ëß„¥‰¡Ë§√∫ °√ÿ≥“µ‘¥µËÕµ—
«·∑π®”ÀπË“¬‚¥¬∑—π∑’
1-3_AVX810[U_UT]007A.indd 11-3_AVX810[U_UT]007A.indd 1 1/28/08 7:30:00 PM1/28/08 7:30:00 PM

Other manuals for JVC KW-AVX815

Question and Answer IconNeed help?

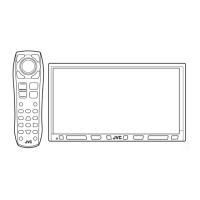
Do you have a question about the JVC KW-AVX815 and is the answer not in the manual?

JVC KW-AVX815 Specifications

General IconGeneral
DVD PlaybackYes
CD PlaybackYes
USB PortYes
BluetoothYes
Built-in AmplifierYes
Radio TunerAM/FM
Preamp Outputs3 pairs
Video OutputYes
Steering Wheel ControlYes
iPod/iPhone ControlYes
Audio Formats SupportedMP3, WMA, AAC
iPod CompatibilityYes
Resolution800 x 480
InputsAV Input (Rear), Rear View Camera Input
Video Formats SupportedDivX

Summary

General Safety Warnings

Installation Obstruction Warnings

Warnings about installing the unit where it may obstruct operations, safety devices, or visibility.

Driving Operation Warnings

Warning against operating the unit while manipulating the steering wheel.

Monitor Usage While Driving Warning

Prohibits drivers from watching the monitor while driving to prevent accidents.

Parking Brake System Warning

Alerts when the parking brake is not engaged and no playback picture is shown.

Electrical Connection Notes

Fuse Replacement

Instructions on replacing the fuse with the specified rating and consulting a dealer if it blows frequently.

Speaker Connection Recommendations

Recommendations for connecting speakers with specific power and impedance ratings.

Preventing Short Circuits

Guidance on preventing short circuits by insulating unused leads.

Heat Sink Caution

Warning about the heat sink becoming hot after use and caution when touching it.

In-Dash Mounting Installation

Pre-Installation Checks

Important checks and precautions before proceeding with the unit installation.

Installation Steps

Step-by-step guide for installing the unit into the dashboard, including bracket and monitor attachment.

Fitting Selection

Guidance on selecting the correct fitting for the audio system space.

Nissan Car Installation Specifics

Specific instructions for installing the unit in a Nissan car.

Installation Angle Caution

Advice on installing the unit at an angle to accommodate monitor ejection.

Electrical Connections

Power and Speaker Connection Precautions

Crucial precautions for connecting power supply and speakers to prevent damage.

Pre-Connection Wiring Check

Importance of carefully checking vehicle wiring before making connections.

Connection Procedure

Step-by-step guide for connecting power, antenna, and wiring harness.

Speaker Wiring

Details on connecting the front and rear speakers, and subwoofer wiring.

Parking Brake Lead Connection

AV I;O Cord and External Amplifiers

Connecting External Amplifiers

Guide to connecting external amplifiers for upgraded surround sound systems.

Amplifier Power Connection

How to supply power to amplifiers using the unit's remote leads.

Speaker Connection to Amplifier

Instructions for disconnecting unit speakers and connecting them to external amplifiers.

Internal Amplifier Control

Option to disable the internal amplifier for clearer audio and reduced heat.

AV I;O Cord - Other Connections

Camera Input Connection

Instructions for connecting a rear view camera to the CAMERA IN plug.

Reverse Lamp Connection

Guidance on connecting the reverse lamp lead for reverse gear signal.

Troubleshooting

Fuse Blown Issues

Checks for blown fuses related to power and connections.

No Power or Sound Issues

Troubleshooting steps for issues with power not turning on or no sound from speakers.

Sound Distortion and Noise

Diagnosing and resolving issues with distorted sound or noise interference.

Unit Overheating

Addressing the issue of the unit becoming hot.

Unit Not Working

Guidance on resetting the unit if it does not work at all.

Connecting External Components

Component Connection Precautions

Cautionary notes before connecting external components.

Connecting JVC Components

Information on connecting JVC components like CD changers and Bluetooth devices.

Connecting iPod to USB Terminal

Instructions for connecting an iPod to the unit's USB terminal for audio and video playback.
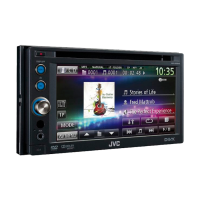
Related product manuals