1
KW-XR416
Installation/Connection Manual
安裝/連接手冊
ENGLISH / 中文
0110DTSMDTJEIN
EN, CT
© 2010 Victor Company of Japan, Limited
GET0656-006A
[U/UT]
• To prevent short circuits:
– Disconnect the battery’s negative terminal and make all electrical connections before installing the unit.
– Cover the terminals of the UNUSED leads with insulating tape.
• Be sure to ground this unit to the car’s chassis again after installation.
• Replace the fuse with one of the specified rating.
• Connect speakers with a maximum power of more than 50 W (impedance of 4 Ω to 8 Ω). Otherwise,
change the <AMP GAIN> setting. (See page 16 of the INSTRUCTIONS.)
• The heat sink becomes very hot after use. Be careful not to touch it when removing this unit.
•
為防止短路:
- 在安裝本機之前,拔開電池的負極端子,並把所有電路都連接好。
- 請用絕緣帶包住未使用導線的端子。
•
安裝完畢後務必將本機的地線重新接至車身。
•
將保險絲更換為額定負荷值的保險絲。
•
連接最大功率大於 50 W 的揚聲器(阻抗為 4 Ω – 8 Ω)。 否則,請切換 <AMP GAIN> 設定。 (參閱使用
說明書的第 16 頁。)
•
本機使用後,散熱片會很熱。因此,在移出本機時,小心不要觸摸散熱片。
12 V DC, NEGATIVE ground /
直流 12 V,負極接地
To the car system /
接至汽車系統
You need the installation kits which corresponds to your car. /
您需要與您的汽車相配套的安裝元件。
Check the battery system in your car /
查看汽車的電池系統
WARNINGS / 警告
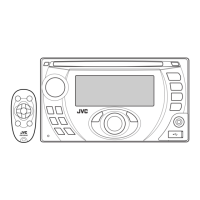
Heat sink
/ 散熱片
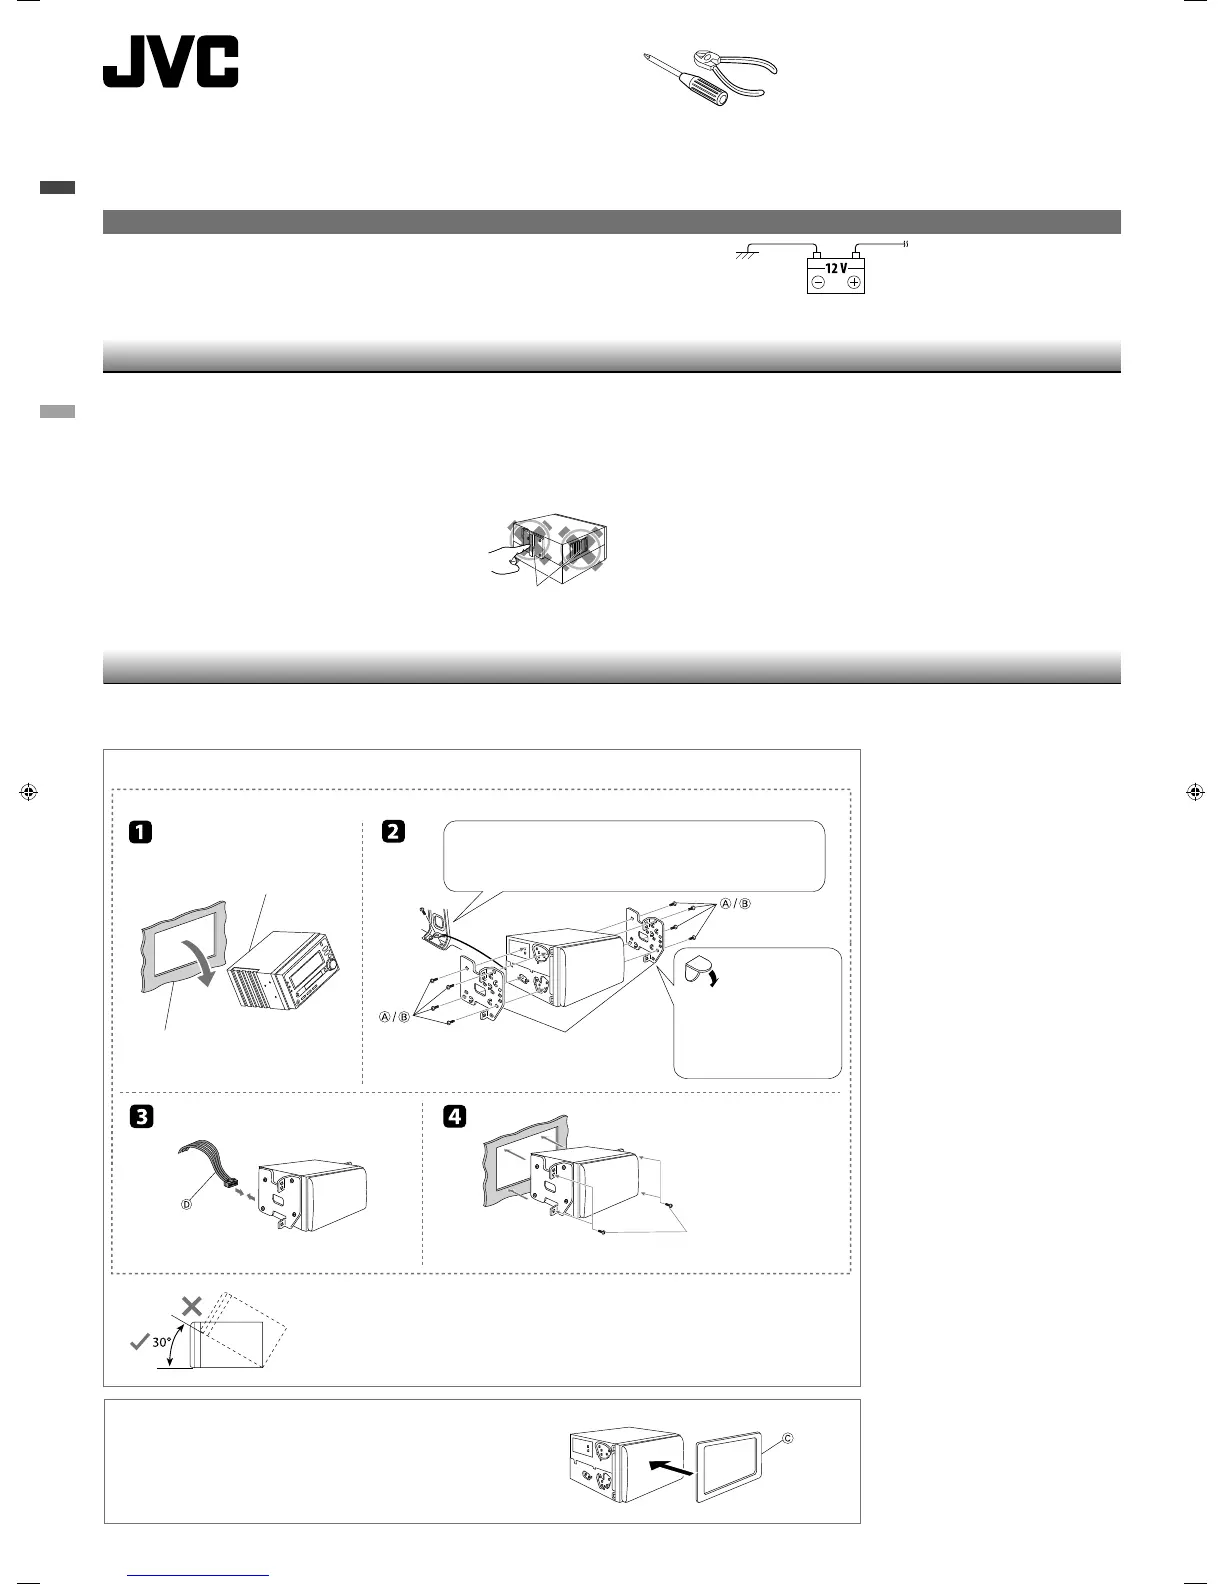
下面的圖解表示了典型的安裝程序。如果您有問題,或需要有關配套元件的資料,請向
JVC
汽車音響分銷商或
配套元件供應公司詢問。
In-dash mounting /
裝設、固定在儀表板內
Audio system originally
installed in the car / 汽車
內原裝的音響系統
Car dashboard / 汽車儀表盤
If there is an interfering tab on
the mounting bracket, bent it
flat. /
如果安裝托座上有一個金屬
片干擾了安裝,將其壓平。
Screw removed from the car /
從汽車上卸下的螺絲
Mounting bracket removed from the car /
從汽車上卸下的安裝托座
Firmly attach the ground wire to the metallic body of the car using the screw
originally fixed to the metallic body of the car. / 使用固定至金屬車體的原裝螺
絲將地線與金屬車體緊密連接。
Installing with the mounting brackets from the car / 使用汽車的安裝托座進行安裝
Part list / 零件清單
A Flat countersunk screws—M5 × 8 mm / 平沉頭螺
絲
—M5 × 8 mm (×8)
B Round head screws—M5 × 8 mm / 圓頭螺
絲
—M5 × 8 mm (×8)
C Plate for use with a Nissan car / 用於日產汽車的框
(×1)
D Power cord / 電路連接用的配線束 (×1)
When installating the unit in a Nissan car / 當安裝本機於
日產汽車時
Fix the supplied plate as illutrated. / 如圖所示固定附帶的框。
INSTALLATION / 安裝
The following illustration shows a typical installation. If you have any questions or require information
regarding installation kits, consult your JVC car audio dealer or a company supplying kits.
Install the unit at an angle of less than 30˚.
將本機安裝在少於 30° 的角度。

 Loading...