MX-DVB10
1-13
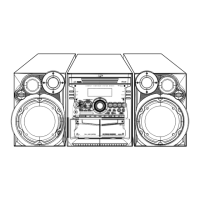
<Front panel assembly>
Prior to performing the following procedures, remove
the metal cover, the DVD changer mechanism
assembly and front panel assembly.
Fig.29
Head amplifier
& mechanism control board
CN306
O
O
O
O
O
Cassette mechanism
assembly
Fig.30
Fig.31
Fig.32
P
P
Display & system control board
Stay bracket
Q
Q
Q
Q
CN881
FW915
(Solders)
Q
Display & system control board
FW915
FW915
DVD eject board
CN870
Display & system
control board
CN870
CN316
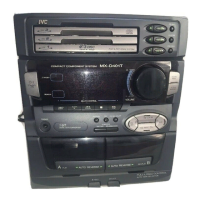
Removing the display & system control
board (See Fig.30 to 32)
Remove the four screws marked P attaching the
stay bracket.
Remove the seven screws marked Q attaching the
d
isplay & system control board
.
Disconnect the card wires from the connector
CN316 and CN881 on the display & system control
board.
Disconnect the connector CN870 on the
display &
system control board
from the p
reset / tuning switch
board
.
If necessary, disconnect the wire from the
connector CN870 on the front side of the display &
system control board and unsolder FW915.
1.
2.
3.
4.
5.
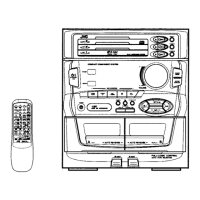
Removing the cassette mechanism
assembly (See Fig.29)
Disconnect the card wire from the connector
CN306 on the head amplifier & mechanism control
board.
Remove the seven screws marked O attaching the
cassette mechanism assembly.
1.
2.