MX-GA3V
1-12
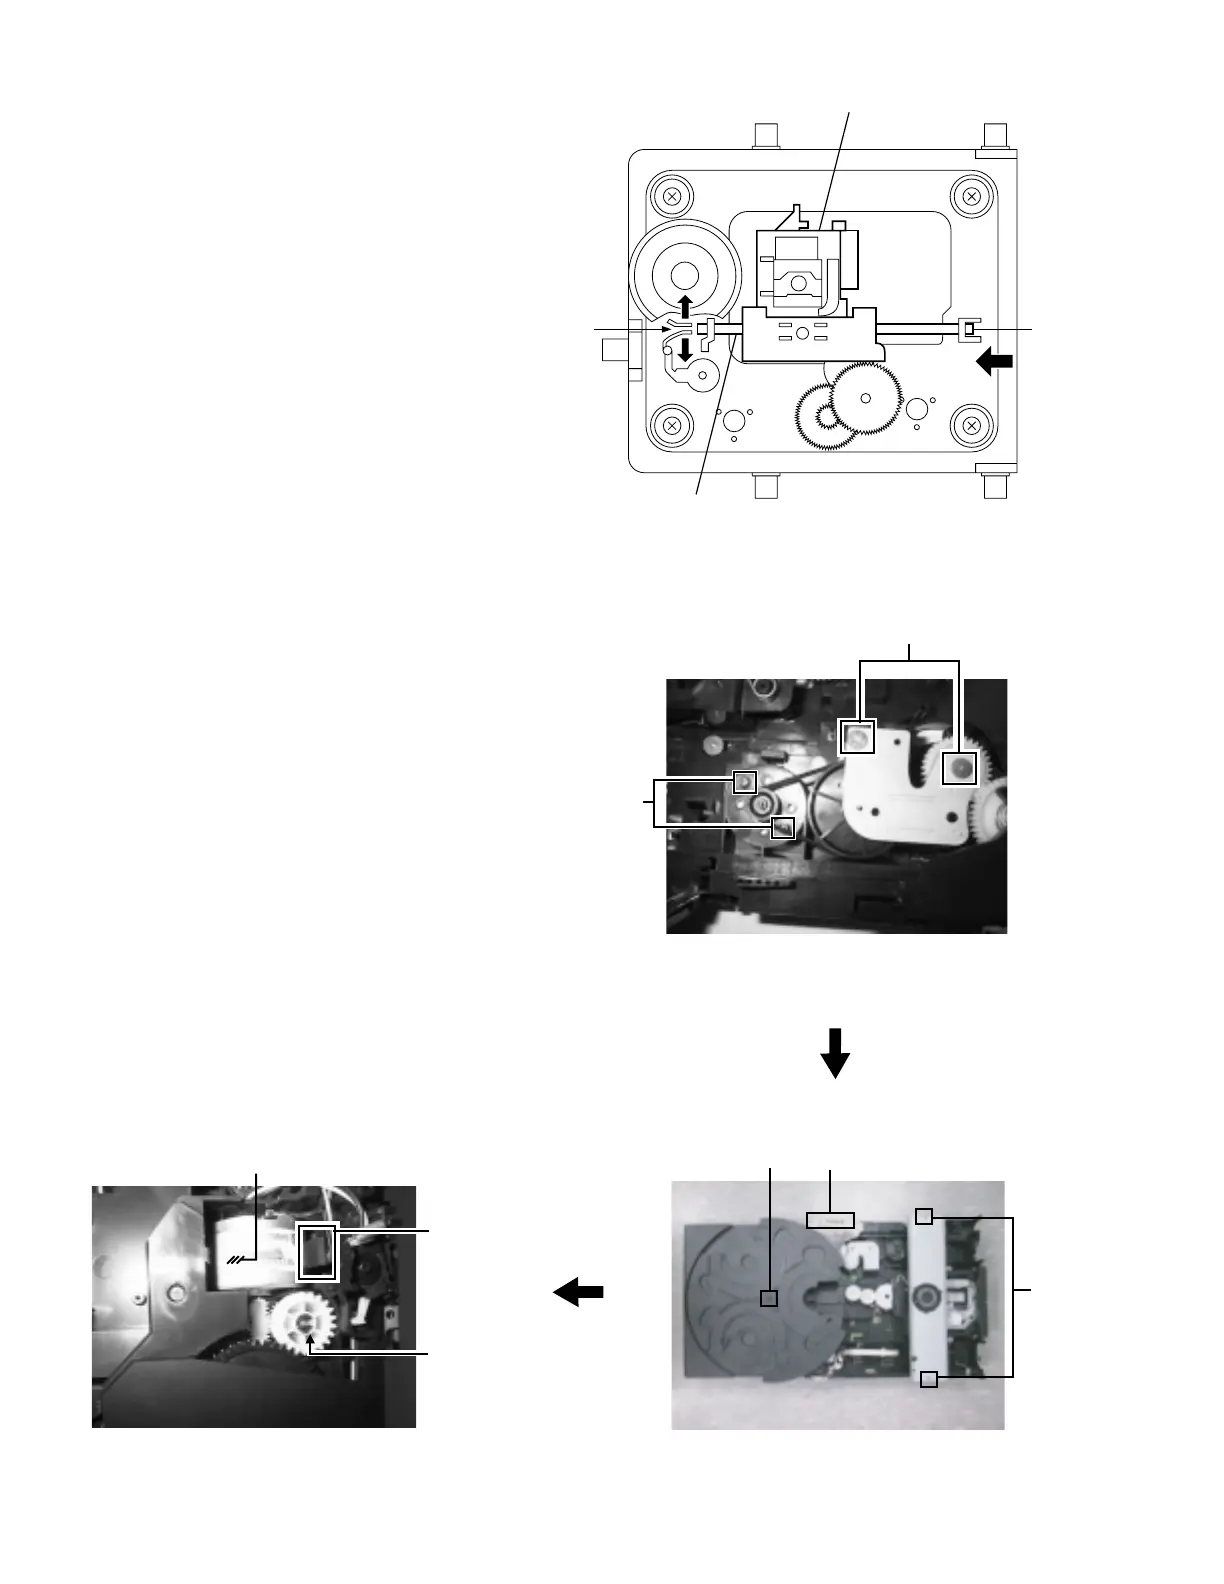
Fig.17
GF
CD pic
kup
Shaft
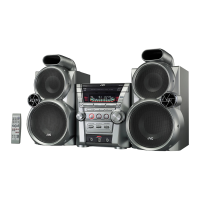
Fig.19
D
NO
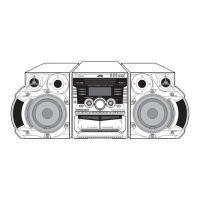
Fig.18
M
L
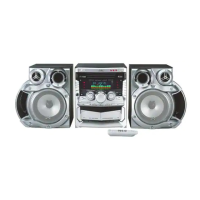
Fig.20
Motor locker
Turn table motor
Obligue gear
Removing the CD pickup (See Fig.17)
Prior to performing the following procedures, remove
the top cover and both sides board.
Also remove the CD changer unit.
Also remove the CD changer mechanism.
1. Widen the section
F
.
2. While keeping the section
F
wide open, push the
section
G
in the direction of the arrow to remove
the shaft, and then remove the CD pickup.
Replacing the loading motor and rotor
belt of the CD changer (See Fig .18)
Prior to performing the following procedures, remove
the top cover.
Also open the CD changer tray.
1.
Remove two screws
L
retaining the CD changer
tray loading motor.
2. Remove two screws
M
retaining the gear plate
and take it out, after remove the rotor belt from
the pulley.
Replacing the CD turn table and remov-
ing the motor (See Fig. 19 and 20 )
Prior to performing the following procedures, remove
the top cover.
Also remove the CD changer unit.
1. Remove one screws
N
retaining the CD (Turn table).
2. Remove two screws
O
retaining the stopper brackets
on both sides of the CD changer unit.
3. Remove the stopper brackets from both sides of the
CD changer unit.
4. Pull out the CD tray from the CD changer unit, all
the way and lift the tray (u/~ ward) to remove.
5. Remove the gear and after push out the tray motor
locker and pull out the tray motor from the CD tray.