(No.MB664<Rev.002>)1-11
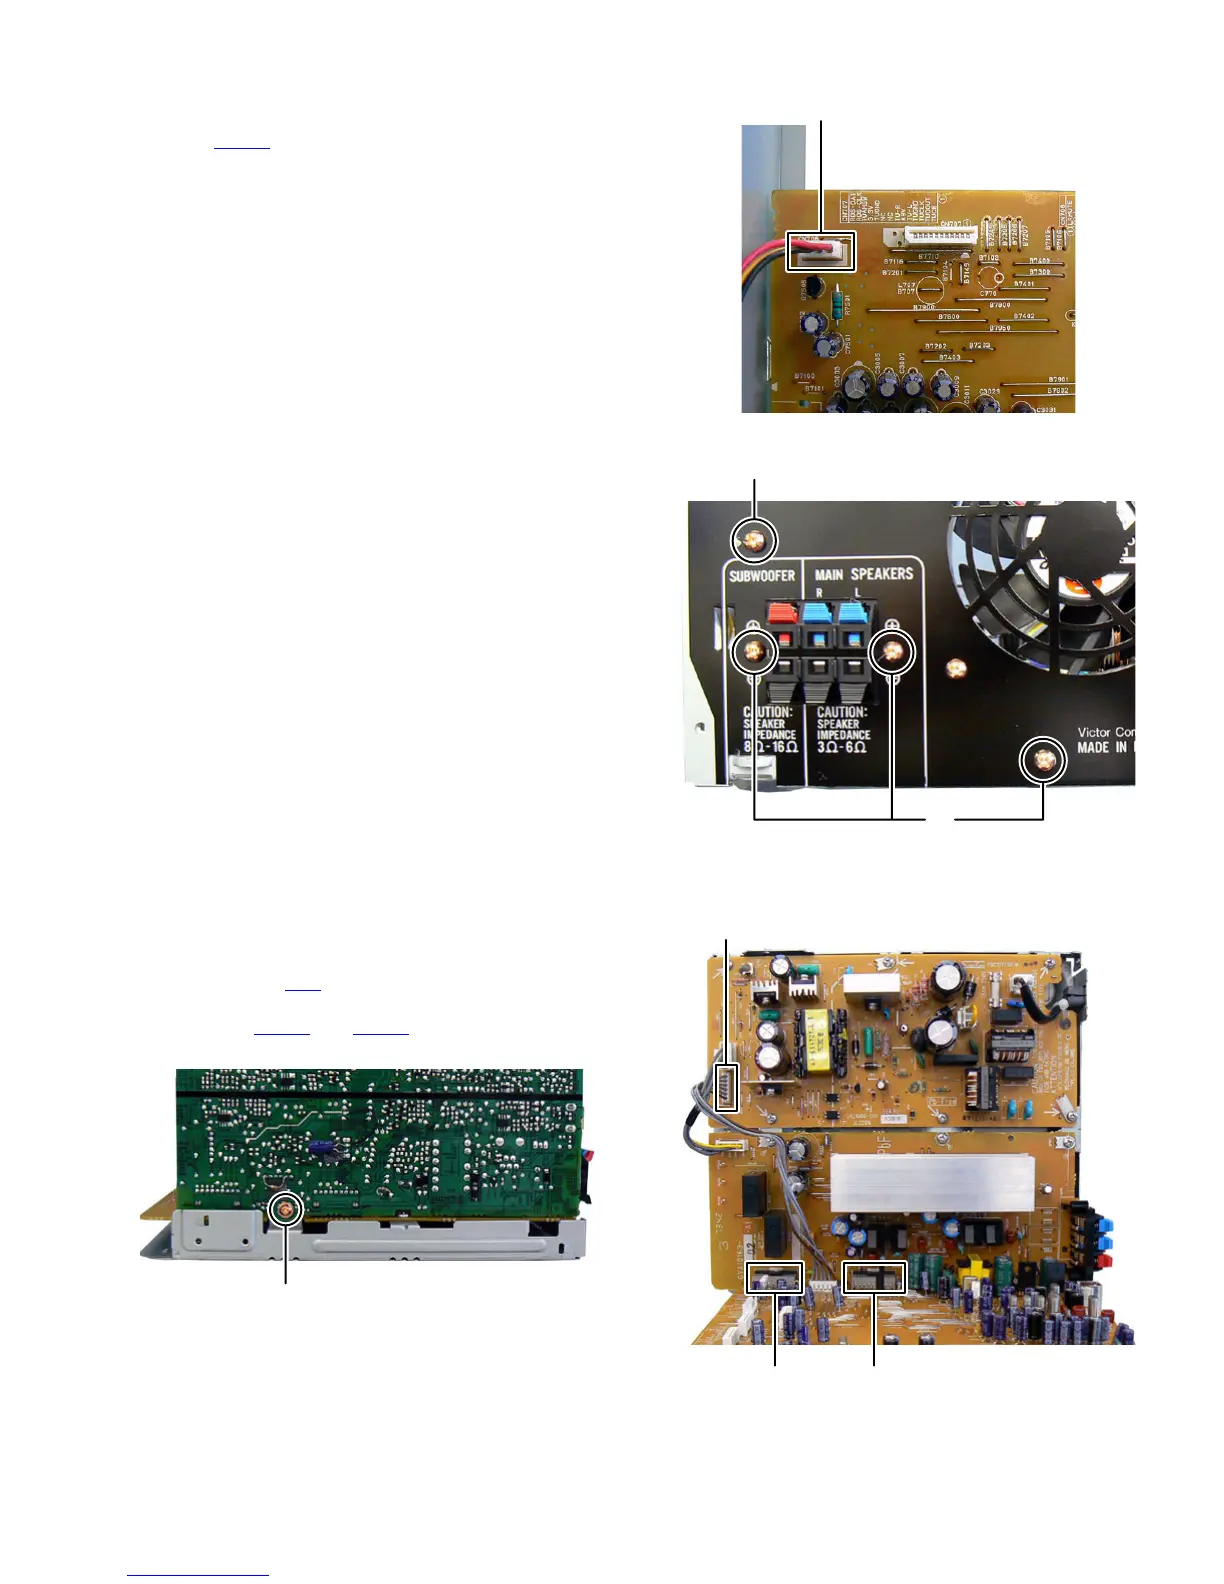
3.1.6 Removing the Rear panel (See Fig.12, 13)
(1) Disconnect the connector wire from Fan connected to con-
nector CN706
of the Micom board. (See Fig.12)
(2) Remove the four screws H attaching the Rear panel. (See
Fig.13)
Fig.12
Fig.13
3.1.7 Removing the Micom board (See Fig.14, 15)
(1) Remove the one screw J attaching the Micom board. (See
Fig.14)
(2) Disconnect the connector wire from Micom board connect-
ed to connector CN3
of the Power supply unit. (See Fig.15)
(3) Disconnect the board to board connectors connected to
connectors CN501 and CN502 of the Power amp board.
(See Fig.15)
Fig.14
Fig.15
CN706
H
H
J
CN501 CN502
CN3