Digital connections
This receiver is equipped with two DIGITAL IN terminals one
digital coaxial terminal and one digital optical terminah
You can connect any component to one of the digital terminals using
a digital coaxial cable (not supplied) or digital optical cable (not
supplied).
iMPORTANT:
• When connecting the DVD player or digital TV broadcast tuner using
the digital terminal, you also need to connect it to the video jack on
the rear. Without connecting it to the video jack, you can view no
playback picture.
• After connecting the components using the DIGITAL IN terminals,
set the following correctly if necessary.
- Set the digital input (DIGITAL IN) terminal setting correctly. For
details, see "Digital Input (DIGITAL IN)Terminal Setting" on page
I4.
- Select the digital input mode correctly. For details, see "Selecting
the Analog or Digital Input Mode" on page I4.
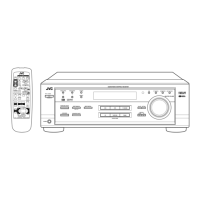
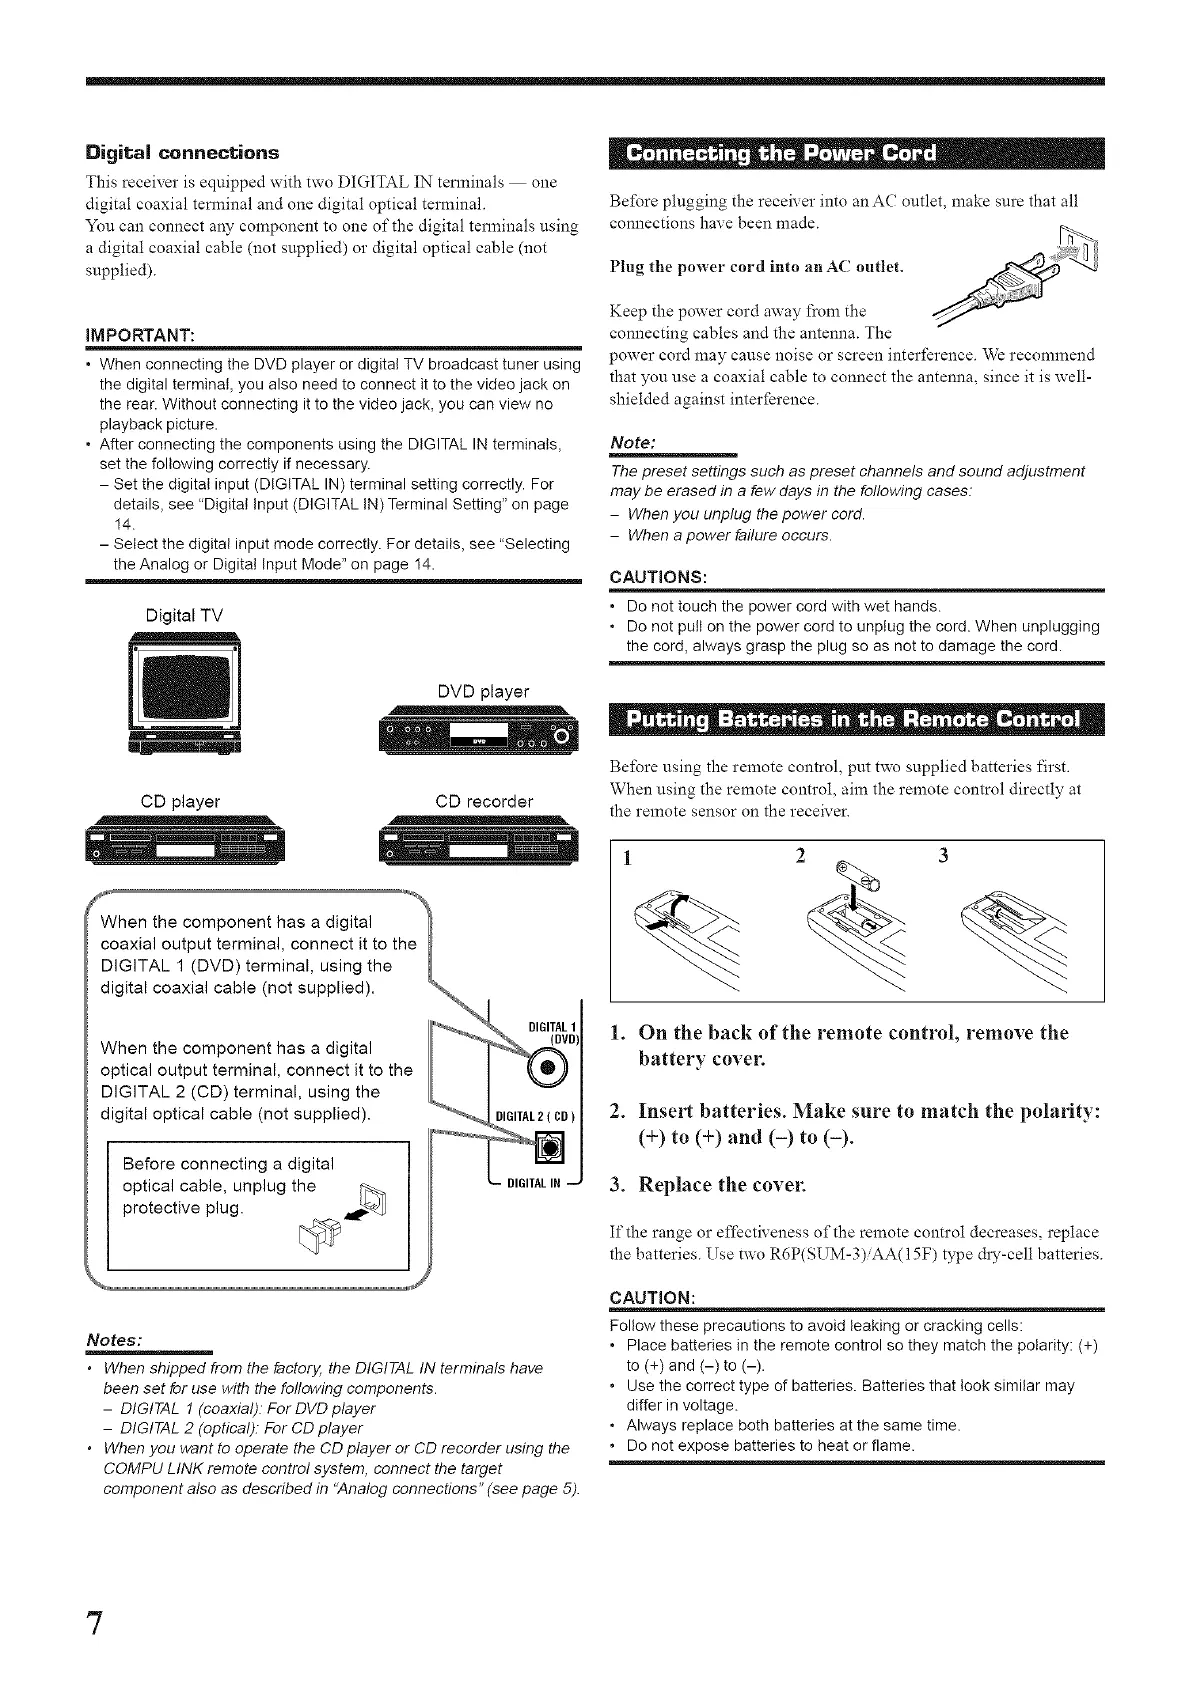
Digital TV
qmmmmmj|
DVD player
CD recorder
_ mmmm
CD player
When the component has a digital
coaxial output terminal, connect it to the
DIGITAL 1 (DVD) terminal, using the {
digital coaxial cable (not supplied).
When the component has a digital
optical output terminal, connect it to the
DIGITAL 2 (CD) terminal, using the
digital optical cable (not supplied).
DIGITAL 1
Before connecting a digital
optical cable, unplug the
protective plug. [_ _A_'_'_A
DIGITAL IN
Notes:
• When shipped from the factory, the DIGITAL IN terminals have
been set for use with the foilowing components.
- DIGITAL 1 (coaxial). For DVD player
- DIGITAL 2 (optical): For CD player
• When you want to operate the CD player or CD recorder using the
COMPU LINK remote control system, connect the target
component also as described in "Analog connections" (see page 5).
Before plugging the receix er into anAC outlet, make sure that all
connections haxe been made.
Plug the power cord into an AC outlet.
Keep the power cord away from the
connecting cables and the antenna. The
power cord may cause noise or screen interfkrence. We recommend
that you use a coaxial cable to connect the antenna, since it is well-
shielded against interfkrence.
Note:
The preset settings such as preset channels and sound adjustment
may be erased in a few days in the following cases:
- When you unplug the power cord.
- When a power failure occurs.
CAUTIONS:
• Do not touch the power cord with wet hands.
• Do not pull on the power cord to unplug the cord. When unplugging
the cord, always grasp the plug so as not to damage the cord.
Before using the remote control, put two supplied batteries first.
When using the remote control, aim the remote control directly at
the remote sensor on the receiver.
1 2 3
1. On the back of the remote control, remove the
battery cover.
2. Insert batteries. Make sure to match the polarity:
(+) to (+) and (-) to (-).
3. Replace the cover.
If the range or effcetix eness of the remote control decreases, replace
the batteries. Use two R6P(SUM-3) AA(15F) type &T-cell batteries.
CAUTION:
Follow these precautions to avoid leaking or cracking cells:
• Place batteries in the remote control so they match the polarity: (+)
to (+) and (-) to (-).
• Use the correct type of batteries. Batteries that took similar may
differ in voltage.
• Always replace both batteries at the same time.
• Do not expose batteries to heat or flame.
7

 Loading...