Filename [SR-MV40U_10Editing.fm]
Masterpage:Left0
68 EN
Page 68 March 13, 2006 11:41 am
SYSTEM CONNECTIONS
These instructions enable you to connect your unit to a Dolby
Digital decoder or an amplifier with built-in DTS.
1 Connect the unit and a Dolby Digital decoder or an amplifier
with built-in DTS using either an optional optical cable or an
optional coaxial cable.
NOTES:
● For Dolby Digital sound, set “DIGITAL AUDIO OUT” to “DOLBY
DIGITAL/PCM”. (墌 pg. 69)
● For DTS sound, set “DIGITAL AUDIO OUT” to “STREAM/PCM”.
(墌 pg. 69)
CAUTIONS:
● This unit has a dynamic range of more than 110 dB with regards to its
Hi-Fi audio capability. It is recommended that you check the
maximum level if you are going to listen to the Hi-Fi audio signals
through a stereo amplifier. A sudden surge in the input level to the
speakers may damage them.
● Some speakers and televisions are specially shielded to prevent
television interference. If both are of the non-shielded type, do not
place the speakers adjacent to the TV set as this can adversely affect
the playback picture.
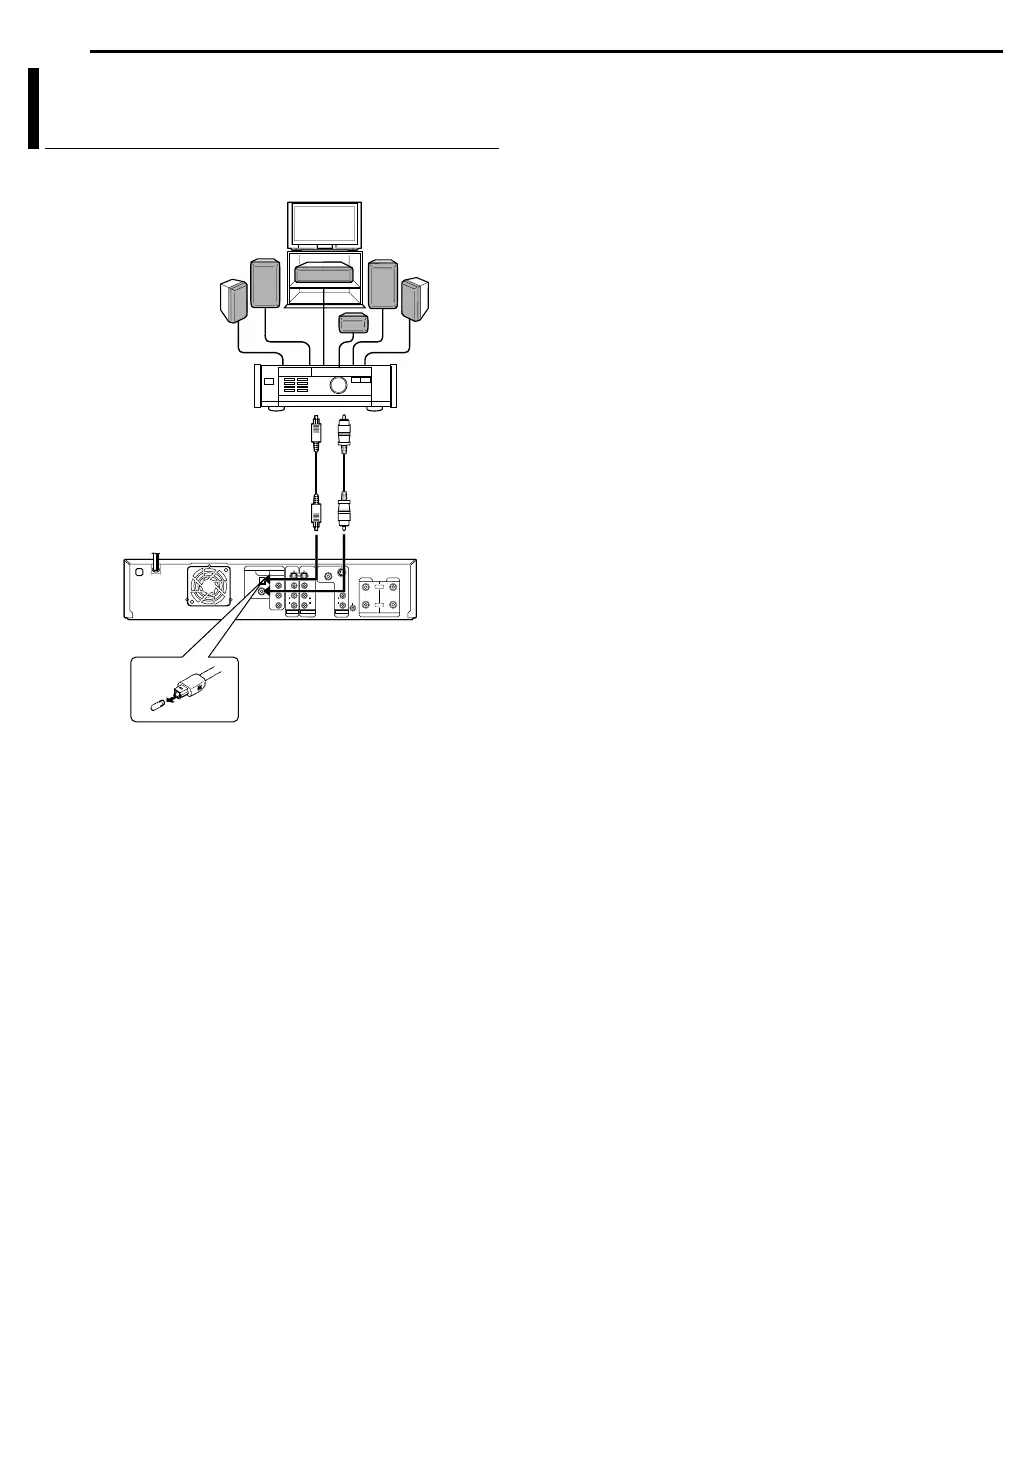
Connecting To A Dolby Digital Decoder
Or An Amplifier With Built-in DTS
.
Note for connection:
Remove the protection cap from the cable.
Optical cable
(not supplied)
Dolby Digital Decoder or
amplifier with built-in DTS
To DIGITAL AUDIO input
Coaxial cable
(not supplied)
To [DIGITAL AUDIO OUT (OPTICAL)]
To [DIGITAL AUDIO
OUT (COAXIAL)]
SR-MV40US.book Page 68 Monday, March 13, 2006 11:41 AM