

H
Holly TorresAug 20, 2025
Why is my JVC DVD VCR Combo remote not working?
- PPeter ParksAug 20, 2025
If your JVC DVD VCR Combo remote is not working, the batteries may be dead. Replace them with new ones.
Why is my JVC DVD VCR Combo remote not working?
If your JVC DVD VCR Combo remote is not working, the batteries may be dead. Replace them with new ones.
Why won't my JVC HR-XVC33U DVD VCR Combo play the disc?
There are several reasons why your JVC DVD VCR Combo might not play a disc: * The disc's region number might not match the unit. Try using discs with region numbers that include "ALL" or "1". * The disc type might be unplayable. Refer to the "Unplayable Discs" information. * The disc might not be placed correctly. Remove the disc and reinsert it properly into the tray. * The Parental Lock might be engaged at a level higher than the disc's rating. Either temporarily release the Parental Lock or adjust the set level.
How to fix timer recording not working on JVC DVD VCR Combo?
If timer recording is not working on your JVC DVD VCR Combo, it could be due to: 1. Incorrect clock or timer settings. Double-check and reset these settings. 2. The timer not being engaged. Press the TIMER button and ensure that the “#” symbol is displayed on the front panel.
What to do if recording cannot be started on JVC HR-XVC33U DVD VCR Combo?
If you cannot start recording on your JVC DVD VCR Combo, make sure that a cassette is loaded and that the record safety tab has not been removed. If the tab is removed, insert a new cassette, or using adhesive tape, cover the hole where the tab was removed.
What does it mean when '#', '' and '$' are blinking on my JVC HR-XVC33U?
If you see “#”, “”, and “$” blinking on the front display panel of your JVC DVD VCR Combo, it could mean one of two things: * The loaded cassette has had its record safety tab removed. Remove the cassette and cover the hole with adhesive tape, or insert a cassette with the record safety tab intact. * The end of the tape was reached during timer recording, so the program may not have been recorded in its entirety. Next time make sure you have enough time on the tape to record the entire program.
How to fix JVC HR-XVC33U when it has no power?
If your JVC DVD VCR Combo is not getting any power, the AC power cord might be disconnected. Make sure to connect the AC power cord.
Why can't I operate the VCR deck on my JVC HR-XVC33U DVD VCR Combo?
If you cannot operate the VCR deck on your JVC DVD VCR Combo, the VCR deck may not be selected. To select the VCR deck: - On the unit, press VCR/DVD repeatedly until the VCR indicator lights up. - On the Remote, press VCR so that the VCR indicator lights up.
Why is there no playback picture on my JVC HR-XVC33U DVD VCR Combo?
If you're not getting a playback picture on your JVC DVD VCR Combo while the tape is running: - If using an RF connection: Ensure the TV receiver’s channel selector is set to the VCR channel and that the unit’s VCR channel has been correctly set. - If using AV, S-VIDEO, or Component Video connection: Ensure the TV receiver is set to the AV mode.
How to fix noise during playback on JVC HR-XVC33U DVD VCR Combo?
If noise appears during normal playback on your JVC DVD VCR Combo, the automatic tracking mode may be engaged. Try manual tracking. (pg. 32)
Why are there breaks in the Hi-Fi soundtrack on my JVC DVD VCR Combo?
If you notice breaks in the Hi-Fi soundtrack on your JVC DVD VCR Combo, the automatic tracking mode may be engaged. Try manual tracking. (pg. 32)
Covers warnings about electrical shock, moisture, laser, and general usage.
FCC compliance and regulatory information for the product.
Essential safety rules for installation, use, and servicing.
Covers grounding, power sources, ventilation, and wall mounting.
Guidelines for outdoor antenna grounding and lightning protection.
Connecting the unit to the TV and power source.
Connecting the DVD deck using S-Video for improved picture quality.
Connecting the DVD deck via Component Video for high-quality pictures.
Automatic clock and tuner channel setup process.
Selecting the appropriate monitor type for the TV.
Setting the on-screen message language for the VCR deck.
Manual procedure for setting the unit's clock.
Procedure for setting up channels, including auto channel scan.
Loading, playing, pausing, and stopping a video cassette.
Still picture, slow motion, and variable speed search.
Navigating recorded content using skip and index search.
Repeating playback and adjusting tracking manually.
Steps for starting and stopping a recording.
Recording while watching another program, Instant Timer Recording.
Setting up timed recordings for programs.
Automatically recording satellite broadcasts.
Loading and playing DVD, CD, MP3, JPEG discs.
PBC, DVD menus, angle, subtitle, and audio selection.
Repeat playback modes and time/chapter search.
Setting playback restrictions based on content rating.
Playing MP3, WMA, and JPEG files from discs.
Recording from camcorder and dubbing between devices.
Dubbing audio from DVD/CD to external devices.
Connecting to Dolby Digital/DTS decoders or amplifiers.
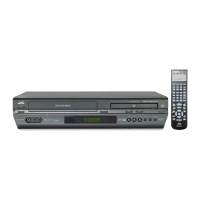
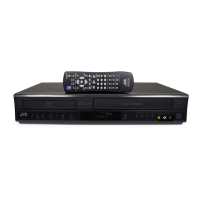
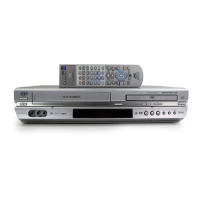
Overview of remote buttons and code switching.
Using the remote to control TV functions.
VCR modes, S-VHS ET, Video Calibration, Picture Control.
DVD modes, monitor type, source, screen saver, audio output.
Disabling unit operation and setting scan mode.
Resolving problems with power, VCR, DVD, recording, and timer functions.
Answers to common questions about playback and recording.
Detailed technical data for the unit's components.
Alphabetical list defining technical terms used in the manual.
Contact information for authorized service centers.
Details of the product's warranty terms and conditions.
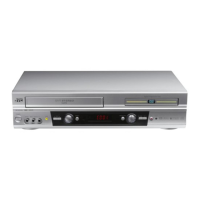
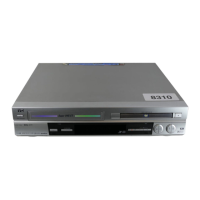
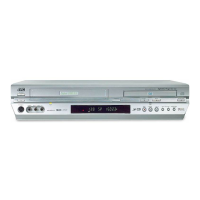
| Type | DVD VCR Combo |
|---|---|
| Brand | JVC |
| Model | HR-XVC33U |
| Video Format | NTSC |
| VHS Playback | Yes |
| VHS Recording | Yes |
| DVD Playback | Yes |
| DVD Recording | Yes |
| Remote Control | Yes |
| Recording Format | VHS |
| Playback Formats | VHS, DVD |
| Playable Disk Types | DVD, CD |
| Connectors | Composite video, S-Video, RF |
| Tuner | Built-in |
| Inputs | Composite video, S-Video, RF |
| Outputs | Composite video, S-Video |