1-16
UX-L40R/UX-L30R
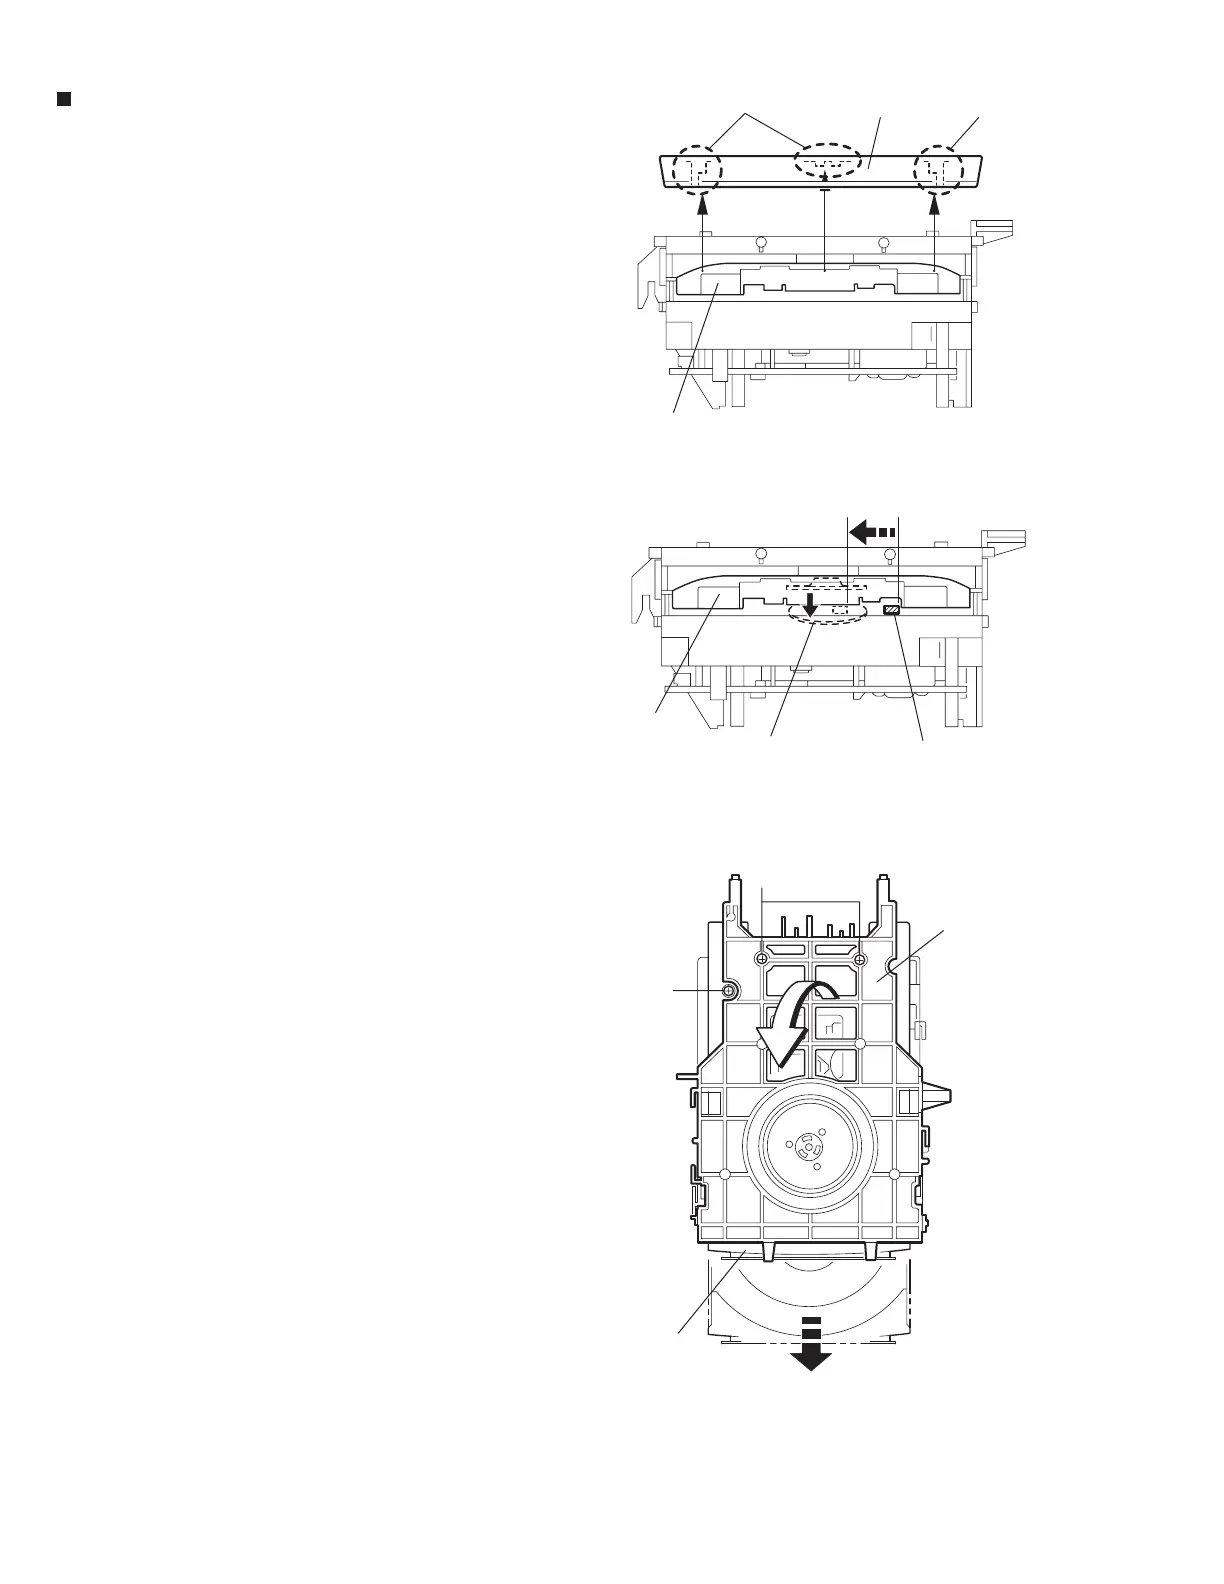
Bring up the fitting in the direction of the arrow to
release the three joints a.
On the front side of the body, move the cam plate
lever to the center.
Remove the stopper screw B and pull out the tray
toward the front.
Remove the two screws C attaching the clamper
base.
From the rear side, remove the clamper base
upward.
1.
2.
3.
4.
5.
Removing the clamper base / tray
(See Fig.3 ~ 5)
Fig.3
Fig.5
Fig.4
Tray
Tray
Joint a
Joint a
Fitting
Clamper
Cam plate
(Lever)
Tray
Clamper base
B
C
 Loading...