EasyManua.ls Logo

Kaadas K7 - User Manual

Kaadas K7
29 pages
Print Icon
To Next Page IconTo Next Page
Loading...
Le� Handle Door Open, Pull Out
PULL OUT
Outside Door Inside Door
Arrow always
show UP
direc�on
Screw on
marked area
Adjust the turn
piece to
VERTICAL
posi�on
INSTALLATION GUIDE
K7
FRONT
DOOR
BACK
DOOR
Screw at face inside door
Question and Answer IconNeed help?

Do you have a question about the Kaadas K7 and is the answer not in the manual?

Summary

Kaadas K7 Installation Guide

Left Handle Door Open, Pull Out

Instructions for opening a left-handled door and pulling it outwards, showing screw locations and vertical adjustment.

Left Handle Door Open, Push In

Instructions for opening a left-handled door and pushing it inwards, showing screw locations and vertical adjustment.

Right Handle Door Open, Pull Out

Instructions for opening a right-handled door and pulling it outwards, showing screw locations and vertical adjustment.

Right Handle Door Open, Push In

Instructions for opening a right-handled door and pushing it inwards, showing screw locations and vertical adjustment.

Kaadas K8 Installation Guide

Left Handle Door Open, Pull Out

Details on opening a left-handled door and pulling it out, including screw points and vertical adjustment.

Left Handle Door Open, Push In

Details on opening a left-handled door and pushing it in, including screw points and vertical adjustment.

Right Handle Door Open, Pull Out

Details on opening a right-handled door and pulling it out, including screw points and vertical adjustment.

Right Handle Door Open, Push In

Details on opening a right-handled door and pushing it in, including screw points and vertical adjustment.

Kaadas K9 Installation Guide

Left Handle Door Open, Pull Out

Instructions for left-handle door, pull out operation, showing arrow direction and screw points.

Left Handle Door Open, Push In

Instructions for left-handle door, push in operation, showing arrow direction and screw points.

Right Handle Door Open, Pull Out

Instructions for right-handle door, pull out operation, showing arrow direction and screw points.

Right Handle Door Open, Push In

Instructions for right-handle door, push in operation, showing arrow direction and screw points.

Kaadas KX Installation Guide

Left Handle Door Open, Pull Out

Guide for left-handle door, pull out action, with arrow and screw indicators.

Left Handle Door Open, Push In

Guide for left-handle door, push in action, with arrow and screw indicators.

Right Handle Door Open, Pull Out

Guide for right-handle door, pull out action, with arrow and screw indicators.

Right Handle Door Open, Push In

Guide for right-handle door, push in action, with arrow and screw indicators.

Kaadas LAMBO Installation Guide

Left Handle Door Open, Pull Out

Instructions for LAMBO, left-handle door, pull out, showing rotation and screw points.

Left Handle Door Open, Push In

Instructions for LAMBO, left-handle door, push in, showing rotation and screw points.

Right Handle Door Open, Pull Out

Instructions for LAMBO, right-handle door, pull out, showing rotation and screw points.

Right Handle Door Open, Push In

Instructions for LAMBO, right-handle door, push in, showing rotation and screw points.

Kaadas L7 Installation Guide

Left Handle Door Open, Pull Out

L7 guide for left-handle door, pull out, showing latch adjustment and square bar insertion.

Left Handle Door Open, Push In

L7 guide for left-handle door, push in, showing latch adjustment and square bar insertion.

Right Handle Door Open, Pull Out

L7 guide for right-handle door, pull out, showing latch adjustment and square bar insertion.

Right Handle Door Open, Push In

L7 guide for right-handle door, push in, showing latch adjustment and square bar insertion.

Lever Handle Direction Adjustment

Detailed step-by-step instructions for adjusting the lever handle direction on the L7 lock.

Mortise Latch Direction Adjustment

Detailed step-by-step instructions for adjusting the mortise latch direction on the L7 lock.

Overview

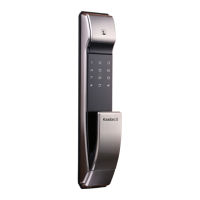
This document provides installation guides for Kaadas K7, K8, K9, KX, Lambo, and L7 smart door locks, focusing on handle and mortise latch direction adjustments for various door opening configurations (left/right handle, pull out/push in).

Function Description:

The Kaadas smart door locks are designed to provide secure access to properties, featuring adjustable handle and latch orientations to accommodate different door types and opening directions. The installation guides detail how to configure the lock for left-handle pull-out, left-handle push-in, right-handle pull-out, and right-handle push-in door operations. This flexibility ensures compatibility with a wide range of residential and commercial doors. The locks integrate a mechanical key override, and the installation process emphasizes proper alignment of internal components for optimal functionality.

Important Technical Specifications (Inferred from images and text):

  • Handle Mechanism: Features a square shaft system for handle rotation. The handle direction is adjustable to suit left or right-handed door configurations.
  • Mortise Latch: The mortise latch bolt direction is adjustable (e.g., for left-hand or right-hand doors) by manipulating a latch bolt switcher and rotating the latch bolt 180 degrees.
  • Mounting Plate: Requires secure installation with screws, and a specific screw guide must be inserted into the lock case.
  • Cylinder Key Tailpiece: The tailpiece needs to be adjusted to a vertical position during installation for proper mechanical key operation. For K7, K8, and KX models, there's a specific procedure involving turning the mechanical key 360 degrees to ensure the tailpiece reaches the correct position.
  • Positional Component (L7 model): A key internal component that needs to be correctly oriented and fastened with screws during handle direction adjustment. It has a "GAP" that must be located at the cable side.
  • Electrical Wiring: The L7 model shows internal wiring, indicating electronic functionalities (e.g., keypad, fingerprint reader, smart home integration), though specific electrical specifications are not detailed. The cable needs to be pulled to the correct side during handle rotation.
  • Quality Control (QC) Mark: Visible on the back door components, indicating adherence to quality standards.
  • Serial Numbers: Some images show serial numbers (e.g., D9A191105A4056517 for K8, W908502008150DA2598602 for Lambo), suggesting traceability and unique identification for each unit.

Usage Features:

  • Versatile Door Compatibility: The primary usage feature is the ability to adapt to various door opening directions (left/right, pull/push) by adjusting the handle and mortise latch. This makes the locks suitable for diverse architectural designs.
  • Mechanical Key Override: The presence of a cylinder key tailpiece and instructions for its adjustment confirm that the locks support mechanical key access, providing a backup entry method.
  • Clear Installation Instructions: The guides use visual aids (arrows, circles, dashed lines) and step-by-step instructions to facilitate DIY installation or professional setup.
  • Handle Direction Adjustment (L7 specific): The L7 model offers a detailed procedure for changing the lever handle direction, involving removing a square shaft, screws, a positional component, and a shield sleeve, then rotating the handle and reassembling.
  • Mortise Latch Direction Adjustment (L7 specific): The L7 guide provides a clear sequence for adjusting the mortise latch, including checking the current direction, pushing a switcher, pushing in the latch bolt, turning it 180 degrees, ejecting it, and pushing down the switcher to finalize the change.

Maintenance Features (Inferred):

  • Installation as a Form of Initial Maintenance/Setup: The detailed installation guides themselves serve as a critical first step in ensuring the long-term functionality and reliability of the lock. Correct initial setup prevents future issues.
  • Component-Based Adjustments: The modular design, allowing for individual adjustment of the handle and mortise latch components, suggests that specific parts can be serviced or replaced if needed, rather than requiring a full lock replacement for minor issues.
  • "CAUTION" Warnings: The warnings about installing mounting plate screw guides tightly and straightly, and ensuring the lock works after installation, highlight critical points for preventing malfunctions and ensuring durability.
  • Pre-Installation Checks: For K7, K8, and KX models, there are instructions to test the mechanical key and cylinder tailpiece before full installation, which acts as a pre-emptive check to ensure proper operation. This can be considered a form of preventative maintenance during setup.
  • Cable Management (L7): Instructions to "pull the wire to the other side" and "make sure to put the cable stay in one side of the cable hole" during handle adjustment indicate attention to internal cable routing, which is crucial for preventing damage and ensuring electrical continuity over time.

Kaadas K7 Specifications

General IconGeneral
BrandKaadas
ModelK7
CategoryDoor locks
LanguageEnglish

Related product manuals