EasyManua.ls Logo

Kaco blueplanet 105 TL3 User Manual

Kaco blueplanet 105 TL3
118 pages
To Next Page IconTo Next Page
Page #1 background imageLoading...
Page #1 background image
Manual
nEnglish translation of German original
KACO blueplanet 87.0 TL3
KACO blueplanet 92.0 TL3
KACO blueplanet 105 TL3
KACO blueplanet 110 TL3
KACO blueplanet 125 TL3
KACO blueplanet 137 TL3
KACO blueplanet 150 TL3
KACO blueplanet 155 TL3
KACO blueplanet 165 TL3
These instructions form part of the product and must be carefully read, observed and stored in a place which is freely accessible
at all times.
Authorised electrician
Important safety instructions

Table of Contents

Other manuals for Kaco blueplanet 105 TL3

Question and Answer IconNeed help?

Do you have a question about the Kaco blueplanet 105 TL3 and is the answer not in the manual?

Kaco blueplanet 105 TL3 Specifications

General IconGeneral
Modelblueplanet 105 TL3
Maximum Output Power105 kW
Max. apparent AC power105 kVA
Max. DC voltage1000 V
Maximum DC Input Voltage1000 V
Maximum Efficiency98.5%
Number of MPPTs1
AC voltage range160 V to 280 V per phase
Nominal AC Frequency50 / 60 Hz
Weight95 kg
Protection ClassI
Operating Temperature Range-25°C to +60°C
Maximum DC Input Power157.5 kW
MPP voltage range580 V to 850 V
MPPT Voltage Range580 V to 850 V
AC Nominal Voltage400 V
Communication InterfacesEthernet
Grid ConnectionThree-phase
CoolingTemperature-controlled fan cooling
Cooling MethodTemperature-controlled fan cooling

Summary

English translation of German original

Important safety instructions

General safety instructions for device operation.

Legal provisions

KACO warranty

Information and download link for warranty conditions.

1 General information

1.1 About this document

Provides information about the manual's purpose and warnings.

1.3 Layout of Instructions

1.3.1 Symbols used

Defines symbols for hazards, electrical voltage, and earthing.

1.3.2 Guide to safety instructions

Details danger, warning, and caution levels for safety.

1.4 Identification

1.6 Target group

2 Safety

2.1 Intended use

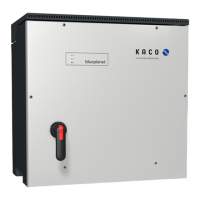
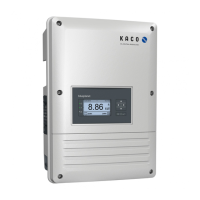
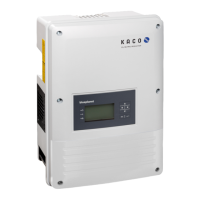
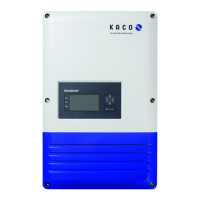
Describes the device as a transformerless PV inverter for grid feed-in.

2.2 Protection features

3 Device description

3.1 Function

Explains the device's role in converting DC to AC and feeding it to the grid.

3.2 Structure of the device

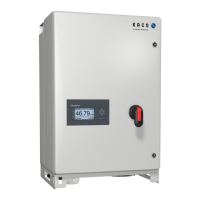
Details the physical components and diagrams of the device.

3.2.3 Interfaces

3.3 Plant layout

4 Technical data

4.1 Electrical data

Provides detailed electrical specifications for various KACO blueplanet models.

4.2 General data

4.4 Accessories

5 Transportation and Delivery

5.1 Scope of delivery

Lists the items included in the inverter package.

5.2 Transporting the unit

Provides instructions and cautions for safe transportation of the device.

6 Installation and preparation

6.1 Selecting an installation location

Covers safety (fire/explosion) and environmental considerations for location selection.

6.2 Unpacking the unit

6.3 Fastening the mount

6.4 Installing and securing the device

7 Installation

7.1 General

Reiterates safety warnings for electrical connections and handling.

7.2 Opening the device

Explains how to safely open the device for installation.

7.4 Making the electrical connections

7.5 Connecting the device to the mains supply

7.5.1 Preparing the grid connection

Covers connecting AC leads, cable fittings, and grounding.

7.5.2 Making the grid connection

7.6 Connecting the PV generator to the device

7.6.1 Checking the PV generator for a ground fault

Details procedures to check for ground faults before connecting the PV generator.

7.6.2 Configuring the PV generator

7.6.3 Connecting the PV generator

7.7 Inserting the overvoltage protection

7.8 Creating equipotential bonding

7.9 Connecting the interfaces

7.9.1 Overview

Lists all available interfaces on the communication circuit board.

7.9.2 Insert and lay the cables

7.9.3 Connecting via Ethernet

7.9.4 Connecting the RS485 bus

7.9.5 Connecting external grid protection components

7.9.6 Connecting "Inverter Off"

8 Start-up

8.1 Conditions

Safety warnings and prerequisites for starting up the device.

8.3 Network topologies

Segmentation of the system

Explains different network segments and component connections.

8.4 Start-up options

Step 1: Language selection

First step in the installation wizard for selecting the interface language.

Step 2: Country configuration

Step 3: Network parameters

Step 6: ModBus

Step 7: String collector

8.4.1 Start-up via WIFI

8.4.2 Start-up via cable connection

8.4.3 Start-up via a USB memory stick

8.4.4 Starting up a network without Segment Controller

8.4.5 Starting up a plant segment

8.4.6 Starting up an entire plant

9 Configuration and operation

9.1 Initial start-up

Notes on DC power supply requirement and configuration assistant.

9.2 Control elements

Explains the meaning of the device's status LEDs during operation.

9.3 User interface

User Interface Areas

9.4 Menu structure

9.4.1 Yield via web user interface

How to view daily, weekly, and monthly yield data through the web interface.

9.4.2 Configuration via web user interface

9.5 Monitoring the device

9.6 Carry out firmware update

9.7 Access via Modbus

9.8 Multi-function button

10 Specifications

10.1 Reactive power control

Explains how reactive power is used for voltage stability and control.

10.1.1 Operating power range depending on grid voltage

Shows operating ranges and maximum apparent power based on grid voltage.

10.1.3 Reactive power functions

10.2 Regulating active power

10.2.1 Active power limitation

Explains P set and P limit functions for managing infeed power.

10.2.2 Voltage-dependent power reduction P(U)

10.2.3 P(f) Active power response to overfrequence

10.3 FRT

10.3.1 Dynamic grid support by way of immunity to interference

Details immunity to voltage drops and spikes.

10.4 Other grid support functions effective on active power

10.4.1 Permanent power gradient limitation

Setting limits on power change rates for plant load management.

10.4.2 Soft start-up / Power rampup

Function to prevent grid impact by gradual increase of feed-in power.

10.5 Advanced islanding detection

11 Maintenance and troubleshooting

11.1 Visual inspection

Inspecting for external damage and noting operating status.

11.2 Cleaning

Instructions for cleaning the device housing and ventilation inlets.

11.3 Replacing the fans

11.4 Replacing overvoltage protection

11.5 Shutting down for maintenance / troubleshooting

11.6 Disconnecting the connections

11.6.1 AC connection

Steps to disconnect AC cables safely.

11.6.2 DC connection

Steps to disconnect DC cables safely.

11.7 Faults

11.7.1 Procedure

General procedure for handling faults and safety warnings.

11.7.2 Rectifying faults

11.8 Fault messages

11.9 Troubleshooting

11.9.1 Irregular errors

12 Decommissioning and removal

12.1 Switching off the device

Safety warnings and steps for safely shutting down the device.

12.2 Uninstalling the device

Procedures for safely uninstalling the device from its mount.

12.3 Removing the device

12.4 Packaging the device

12.5 Storing the device

13 Disposal

14 Service and warranty

15 Appendix

15.1 Scope of certification from third-party suppliers

Lists certifications related to safety, EMC, and grid codes.

Related product manuals