13
Service and Repair Manual
Model 900/950/990
DISMANTLING
360
249
362
251
359
248
363
252
Important! Before carrying out any repairs the hammer should be checked for electrical safety and for mechanical
performance. For electrical safety the hammer should be placed on a non-conductive surface which is
either of a wooden construction (with the mains supply disconnected) which contains no metal parts or a
bench which is insulated by a rubber mat. The hammer should then be checked by high voltage flash
testing. On completion of dismantling procedure all electrical components should then be checked for
electrical safety. The hammer should ONLY be checked for hammer performance if the unit passes the
electrical safety test.
Note: In the disassembly instructions numbers
starting 200 are Model 900, numbers starting
with 300 are Model 950, numbers starting
with 400 are Model 990, numbers starting
with 500 are Model 900M in both text and
illustrations.
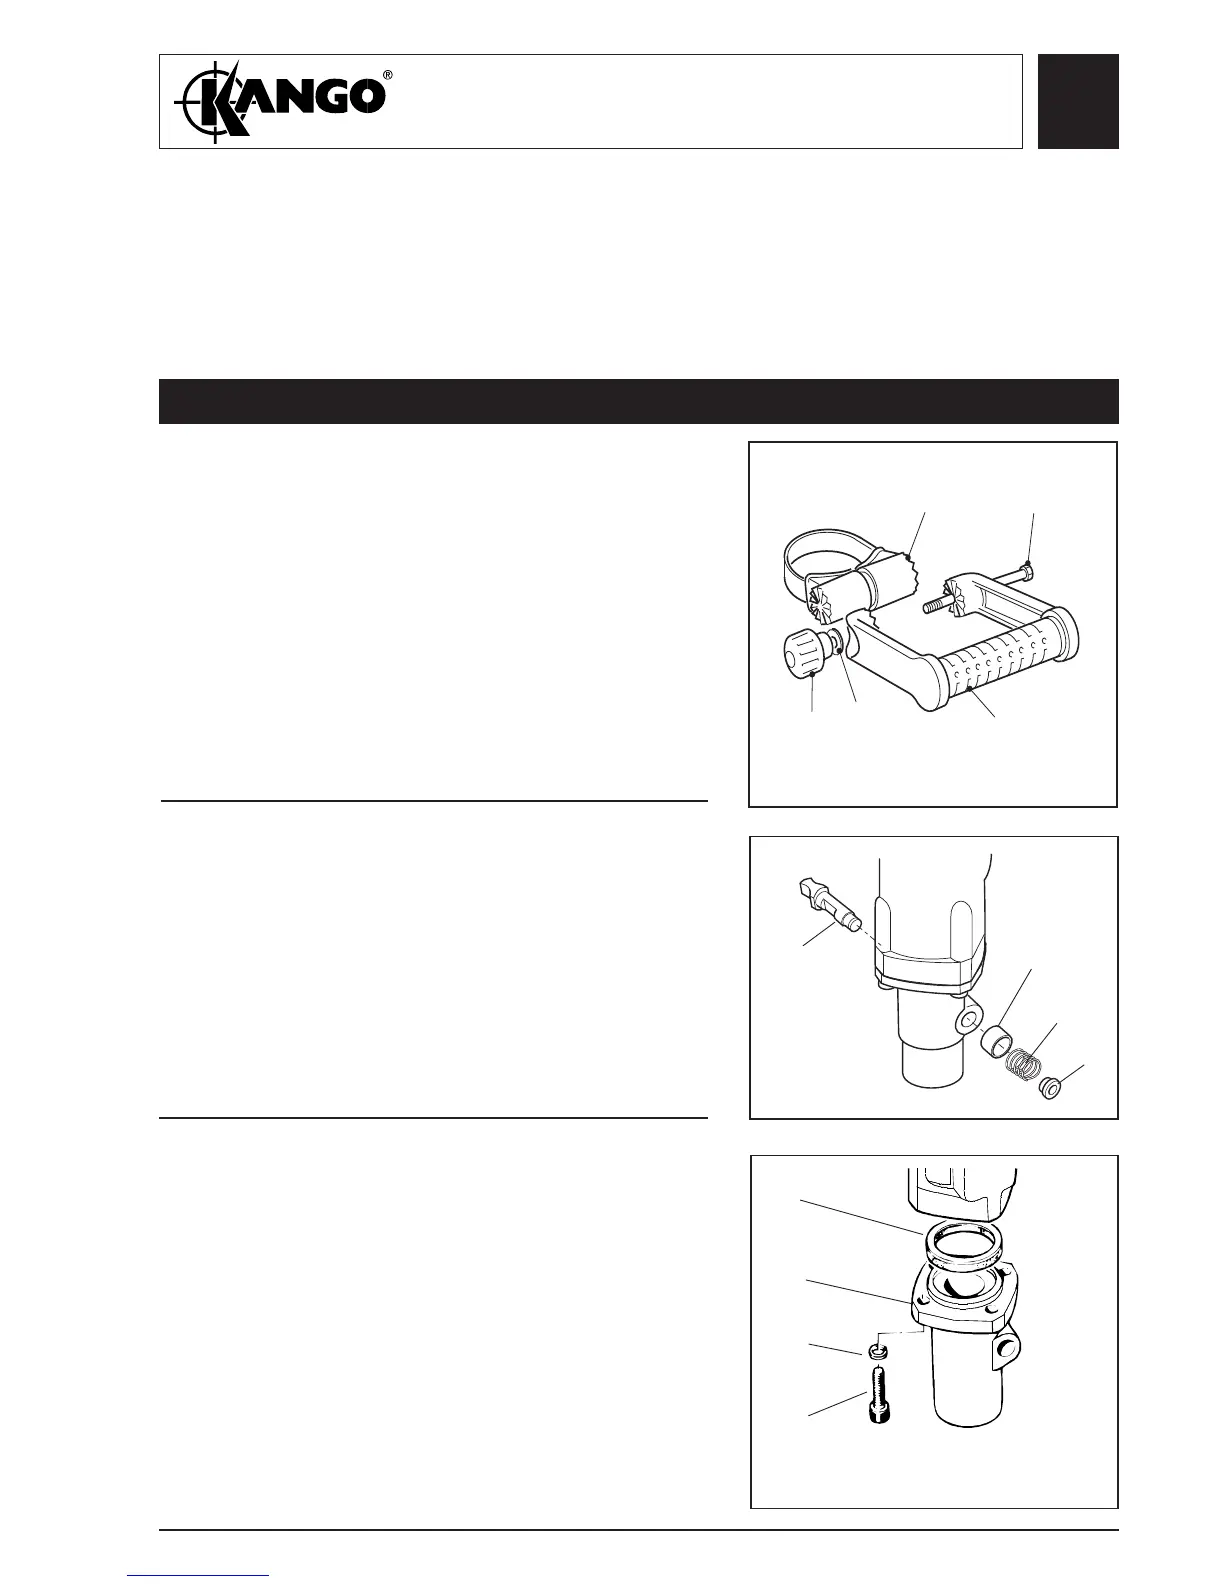
1. Remove knob (460), washer (459) and bolt (457).
2. Remove handle (458) and strap casing (456).
Removing
the forward
handle
(All models,
950 shown)
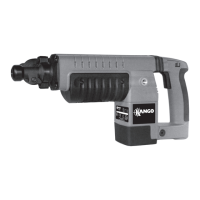
1. Using a suitable drift on the latch bar remove the
latch retainer (360, 245,), latch spring (363, 252),
latch spring cover (362, 251) and latch bar (359,
248).
Removing the
latch bar
mechanism.
(All models -
950S shown
except 900M)
Fig. 2
Fig. 1
Removing the
nosepiece.
(All models -
950S shown
except 900M)
1. Remove the four screws (365, 246, 443) and four
spring washers (366, 245, 442) from nosepiece
(367, 247, 444). Note that the screws are secured
by Loctite.
2. Remove the nosepiece (367, 247, 444) and driver
sealing felt (368) or compression ring (244, 441)
- (Model 900 & 990 only).
368
244
441
367
247
444
366
245
442
365
246
443
Fig. 3
460
459
458
456
457