© Copyright 2017 KE2 Therm Solutions, Inc., Washington, Missouri 63090 © Copyright 2017 KE2 Therm Solutions, Inc., Washington, Missouri 63090
KE2 LowTemp
Quick Start Guide
KE2 LowTemp
Quick Start Guide
Q.3.29 (Q.1.29) May 2017
Page 11
20
20
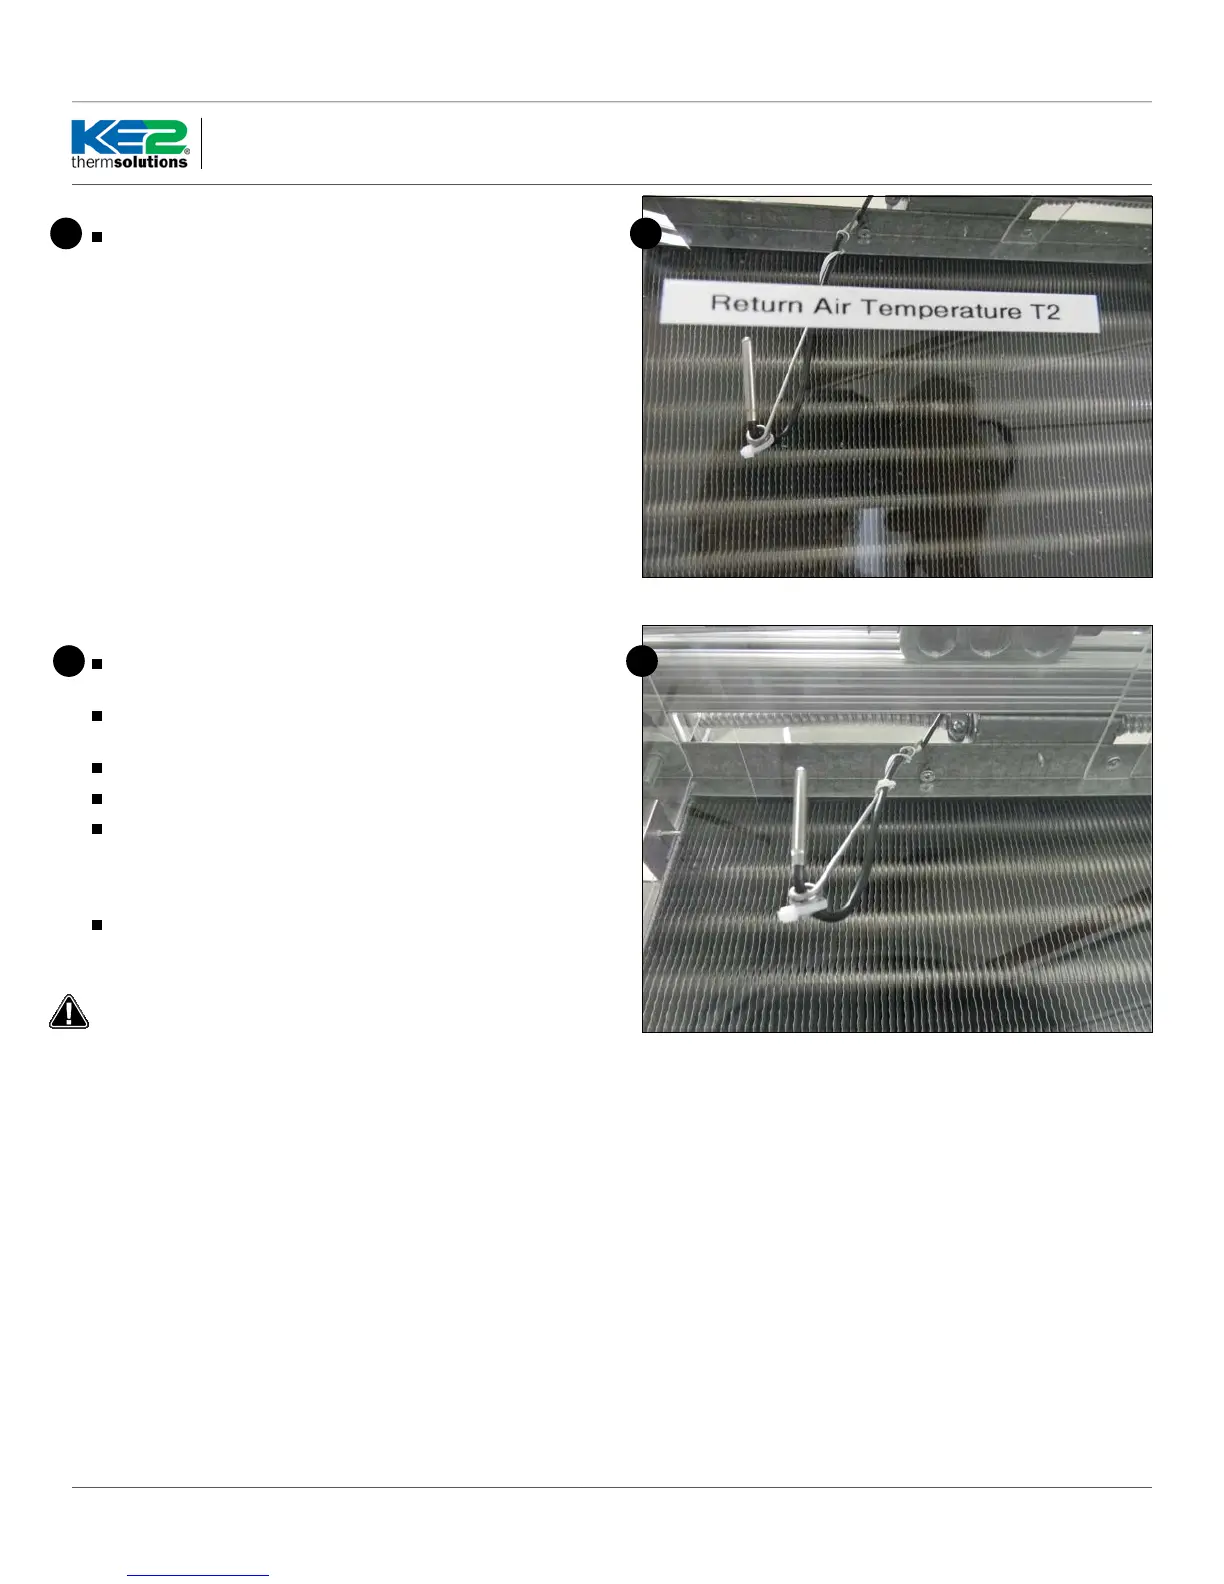
Installing the sensors
Although not required, sensors should be labeled with their func-
tion. This will eliminate confusion when connecting the sensors to
the controller.
The KE2Low Temp is ordinarily supplied with black sensors, however,
color sensors are available in a 3-pack (blue, yellow, green) .
The colors are used for identication only, every sensor can be used
for any purpose. If colored sensors are used, the suggested code is
Yellow and Green for coil and Blue for air.
Air Sensor Bracket
Install the Air Temperature Sensor using the Stainless Steel self-
piercing screw and bracket from the accessory kit.
The end with the single loop is designed to be mounted with the
screw included.
The end with multiple loops is designed to hold the sensor.
Locate the best place to install the sensor.
The sensor should be located between 6 and 12 inches away from
the face of the evaporator. This distance prevents the sensor from
sensing heat from the heating elements during the defrost cycle, but
close enough to accurately sense the return air temperature.
The sensor bracket may be bent as necessary to locate the sensor
in the proper position.
WARNING!
Do not allow the metal portion of the air sensor to touch any-
thing other than air. It should not touch the bracket, nylon cable
tie, or any other solid surface.
21 21
 Loading...