Vantage + Service Manual
2415
-P-
7011
Page
9
Issue
A 07/07/2008
4.
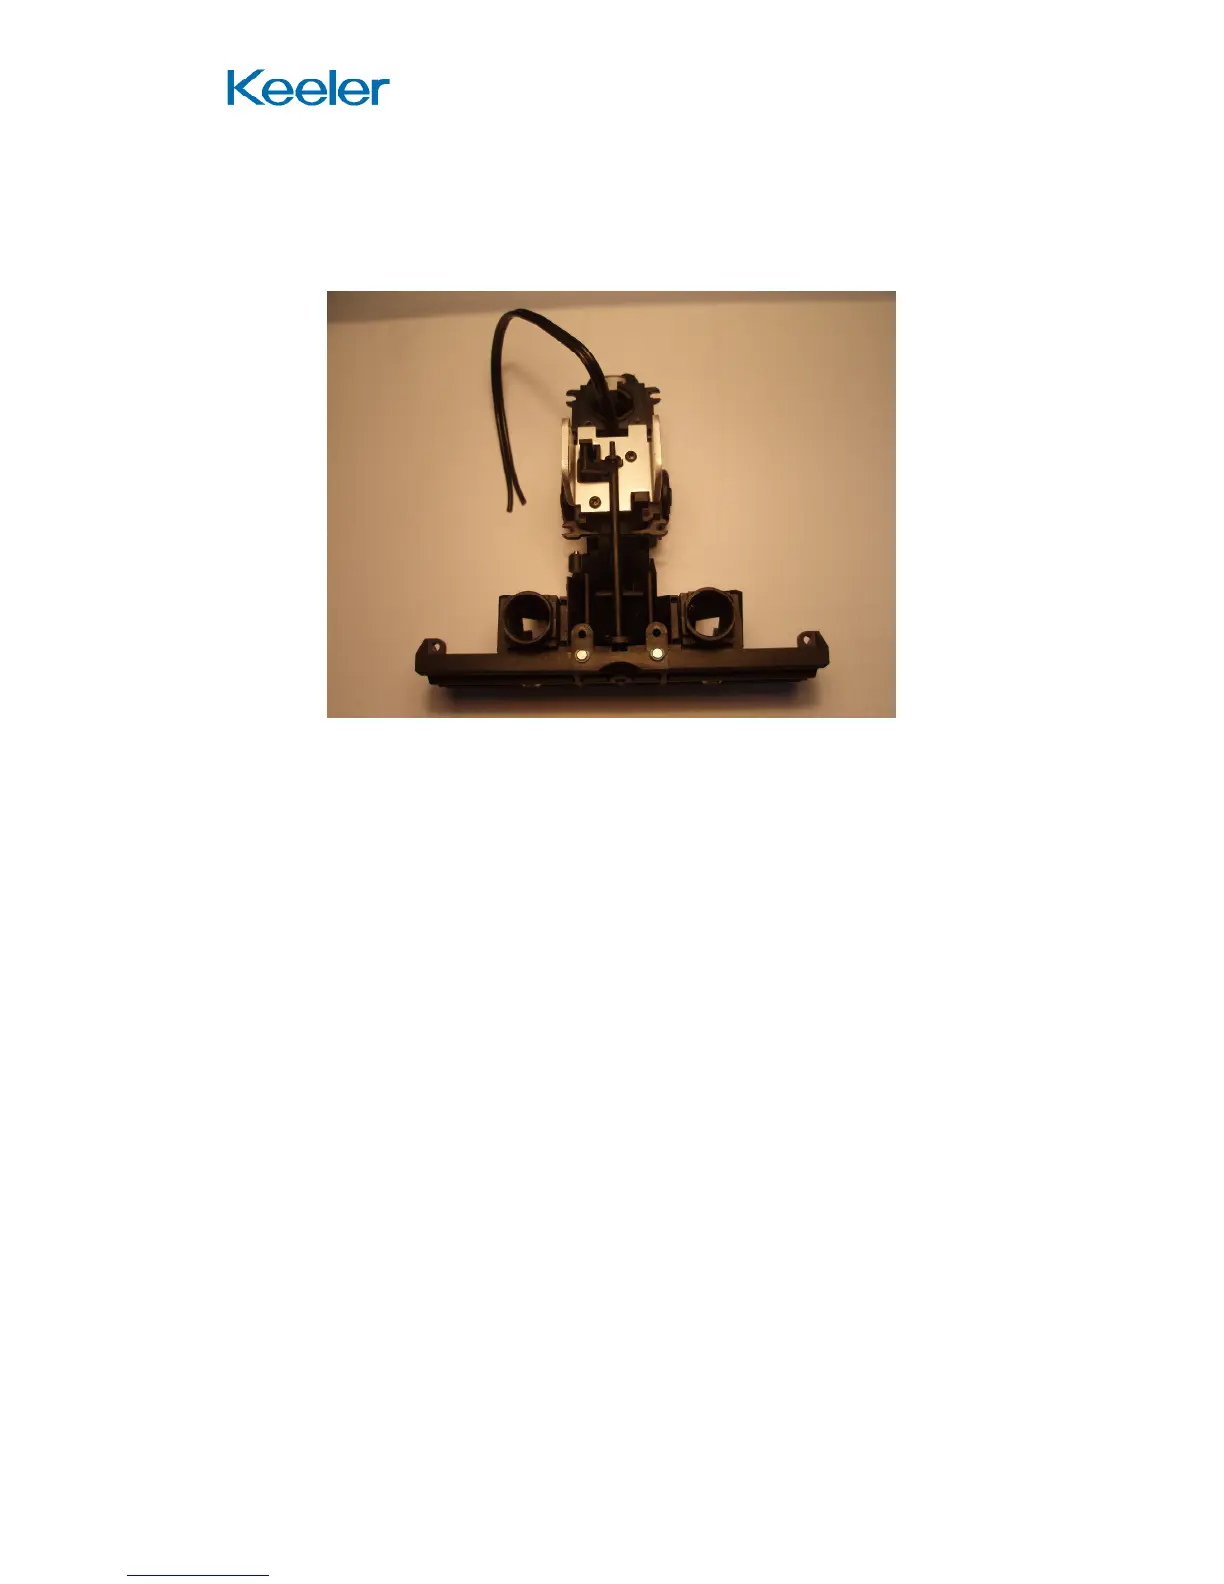
Lay the Viewing and Illumination Assemblies together as shown below
ensuring that the Centre Spindle remains engaged at bo
th ends.
5.
Carefully thread the cable from the Illumination Assy up through the Rear
Cover Moulding ensuring that the cable is not twisted.
6.
Align the Browbar Mount with the slots on the Rear Cover Moulding and
carefully locate the Rear Cover Moulding ov
er the Viewing and Illumination
Assemblies.
Refer to figure 3
7.
Place 2 off P D Slider (18) over the Eyepieces
8.
Carefully fit 2 off Eyepiece Locking Ring (21) using
TD351 Lock Ring Key.
9.
Fit 2 off +2D Eye Lens (2) into the Eyepieces.
10.
Secure these in place with
2 off Eye Cap (3).
11.
Turn the unit over onto the Browbar Mount.
12.
Operate the Graticule Wheel and ensure that the Mirror Block on the
Viewing Assy moves to and fro. If not, return to 3 above removing the
items fitted to the Eyepieces first.
Refer to figure 4
13.
Fit 2 off M2 x 8 Csk PT Screws (13) to retain the Viewing Assy.
14. Fit 4 off M2 x 8 Csk PT Screws (13) to retain the Illumination Assy.
Refer to figure 2
15.
Refit the Mirror Spindle (29) under the Mirror, ensuring that the cam is to
the right of the Mirror and
that it engages in the Rear Cover Moulding.
16.
Rotate the Mirror Spindle to lift the Mirror to its Highest point.