Vantage + Service Manual
2415
-P-
7011
Page
10
Issue
A 07/07/2008
17.
Carefully fit the Light Shield (12) over the 2 pins in the Viewing Assy
ensuring that it fits under the Mirror.
18.
Carefully blow out any dust in th
e unit.
19.
Offer the Front Cover Assy over the main assembly ensuring that the Light
Shield (12) fits into the slots behind the window. It will be necessary to
gently spring the Front Cover to clear the Graticule and Filter Wheels.
20.
Turn the unit over and sli
de the Eyepieces together.
21.
Fit 4 off M2 x 8 Csk PT Screws
2 on the Viewing Assy and 2 above the
Illumination Assy.
22. Fit 2 off Control Knob (17) to the Graticule / Filter Wheels using 2 off
M2 x
8 Csk PT Screws. Hold the Control Knob whilst tightening the
screws.
23.
Fit 2 off self
-adhesive Control Knob Label (21) to the Control Knobs.
24. Fit 2 off Spindle Knob (25) to the Mirror Spindle ensuring that the D
shaped hole mates with the D shape on the Spindle.
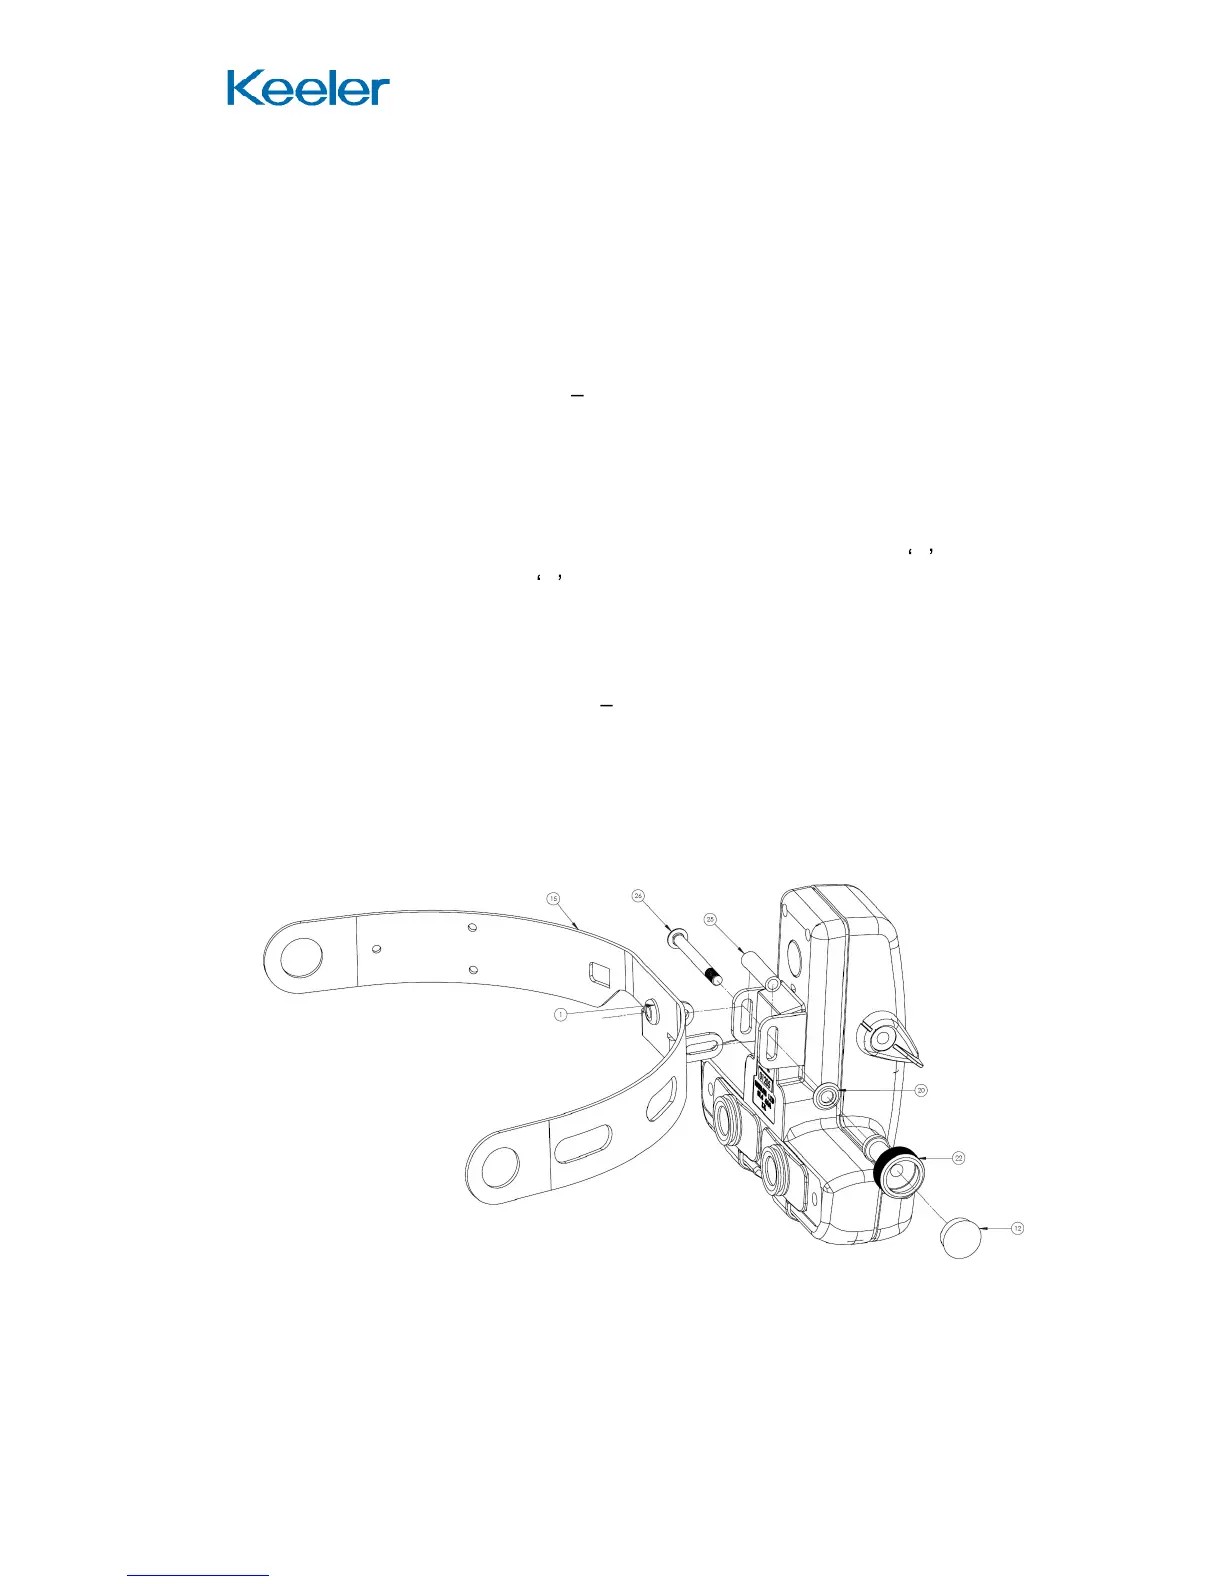
Refit to Browbar
1.
Note the positions of the Washers
a White PTFE washer (32 in Parts
List) should be placed under the head of the Hinge Pin (26) and under the
Black Plastic washer(9).
2.
Thread the cable through the grommet in the Browbar