Vantage + Service Manual
2415
-P-
7011
Page
4
Issue
A 07/07/2008
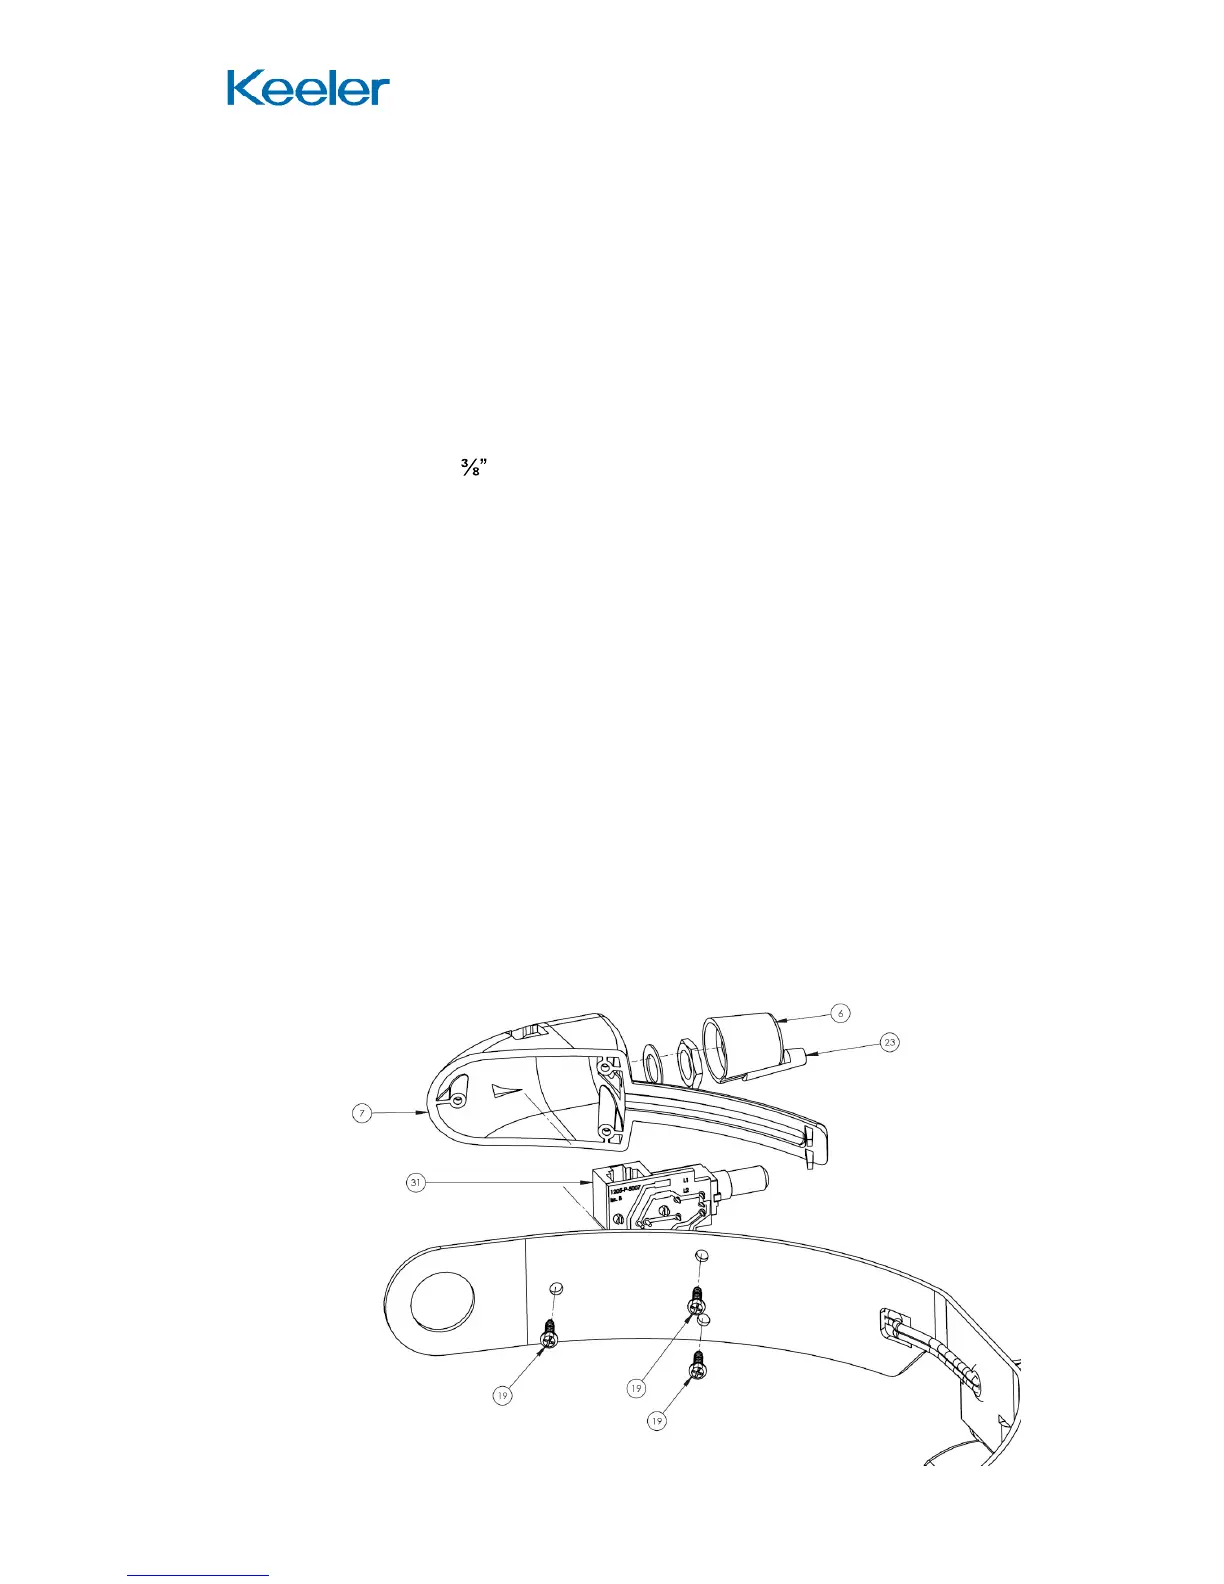
Disassembly
Virtually all repairs inside the head unit except changing the Centre Mirror
involve removing both the Viewing Optics Assy and the Illumination Assy from
the Rear Cover. This i
nvolves removing the whole Optics Assy from the
Browbar.
Remove the Optics Head from the Browbar
1.
Unplug the power supply from the Dimmer Block.
2.
Remove the Browbar from the Headband by undoing the knobs.
3.
Remove 3 off No2 x PT screws (19) holding the Dimmer Block to the
Browbar.
4.
Carefully unsolder the 2 wires from the PCB (31). It may be easier to
remove the PCB Assy from the Dimmer Housing (7).
4.1.
Slide the Blue Indicator Pin (23) out of the Control Knob (6).
4.2.
Slacken the A
llen Screw holding the Knob to the Dimmer Control and
remove the Knob.
4.3.
Undo the Nut on the Dimmer Control
4.4.
Remove the Dimmer PCB Assy.
Note that these wires will need to be re
-
soldered after the repair is
completed and there is insufficient spare length to
strip the wires again.
5.
Undo the Hinge Clamp from the Hinge Pin and remove the Hinge Pin
taking care not to lose the Spacer or the 2 washers under the Hinge
Clamp.
6.
The Optics Head can now be separated from the Browbar.