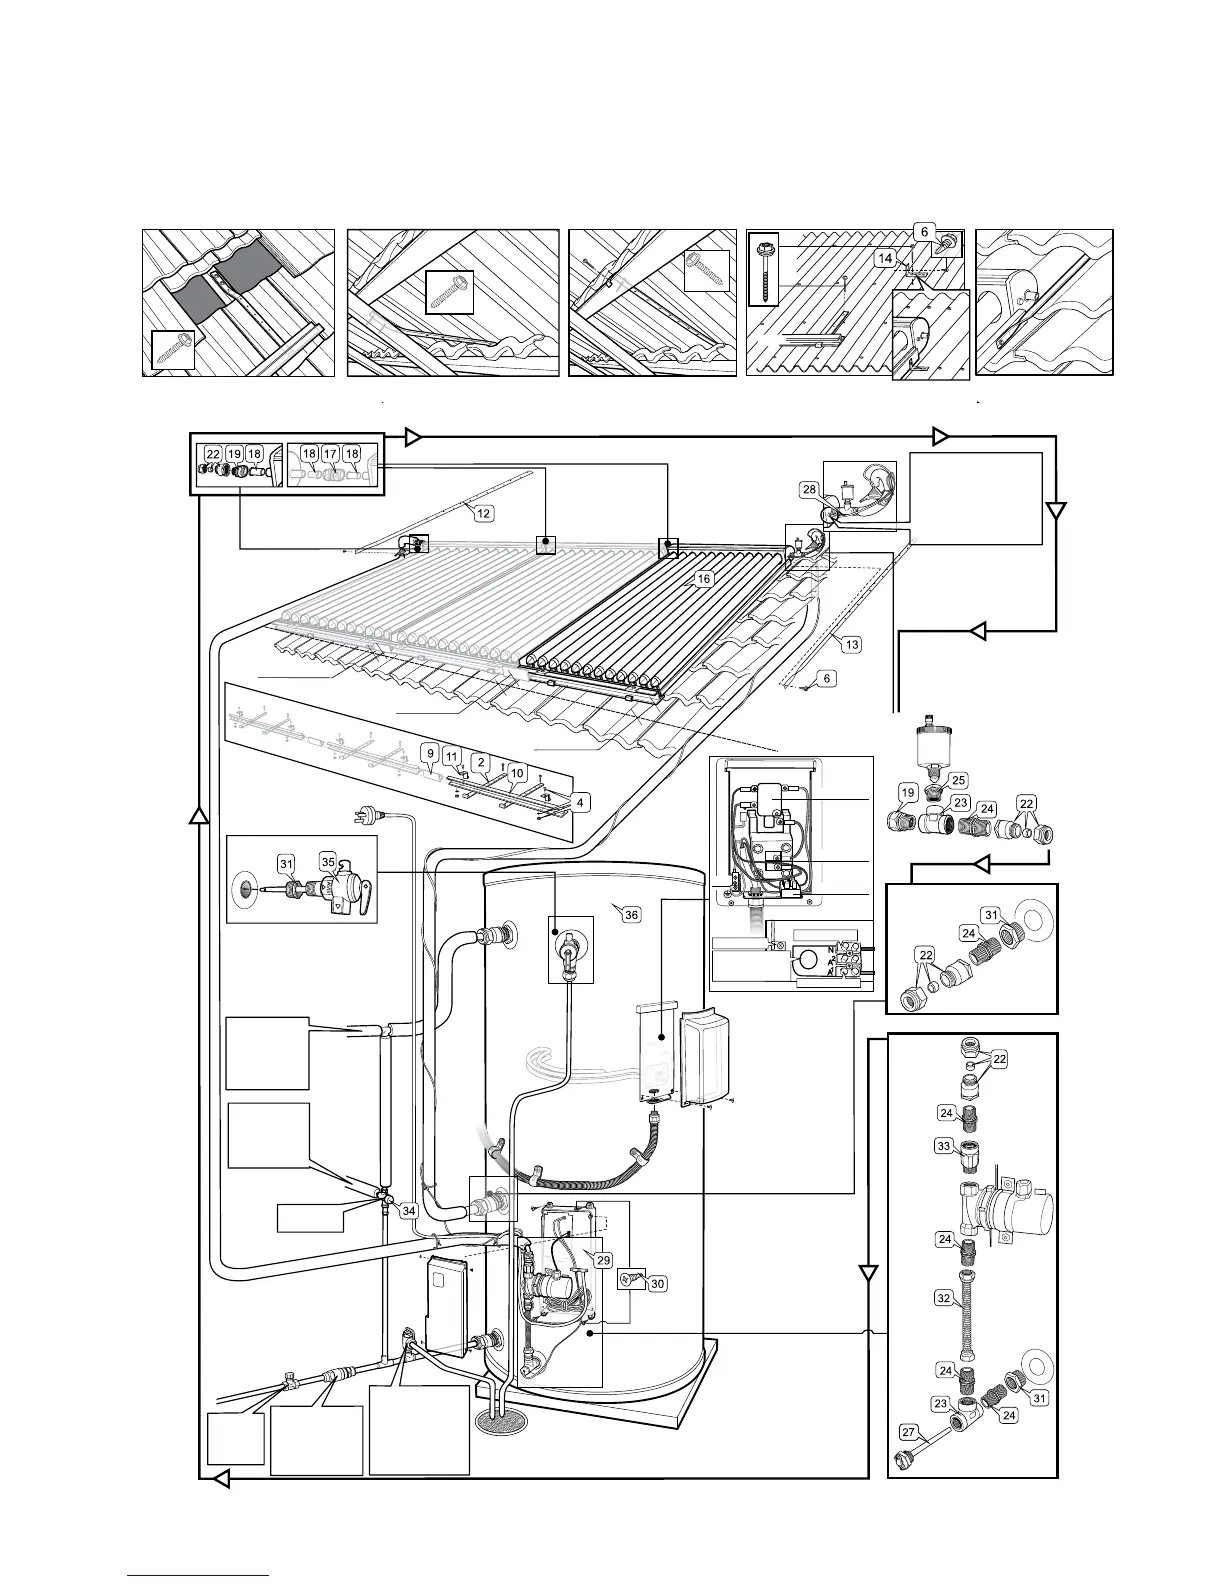
Kelvinator solar hot water systems installation diagram – electric boosted evacuated tube collectors 17
Installation diagram – electric boosted evacuated tube collectors
Tiled roof – preferred method: Connect roof straps from bottom rail and
top edge of collectors to vertical roof beams. Secure with 2 screws at top
of beams. Connect roof straps from bottom rail and top of collectors to
horizontal beams if vertical beams are not accessible.
All numbered items are supplied with the hot water system. Please refer to the Components list for details. Items which are not numbered are not supplied and
need to be supplied by the installer in accordance with local plumbing requirements. Installation of this hot water system must be completed by an authorised and
licensed person in accordance with all local regulations, including AS3500 plumbing and drainage requirements and AS3000 electrical wiring standards.
Bottom rail connection viewed
from above
10 -15mm
from horizontal
bottom rail
assembly
1.5m
relief valve
uncontrolled
hot water
outlet
(kitchen,
laundry)
tempered
(50°C) hot
water outlet
(bathrooms)
tempering
valve
20-30mm
from horizontal
30-45mm
from horizontal
Connecting strap viewed from
roof cavity
Components shown in grey are only used in 2 and 3 collector panel connections
Secure with screws on top
and back edge of beam
Iron roof: Connect bottom
rail and top edge of
collectors to iron roof.
Connecting top of
collectors to tiled
roof using twisted
metal straps.
isolating
and non
return
valve
pressure limiting
valve (600kPa)
may be required
if pressure
exceeds 600kPa
pressure relief
valve (700kPa)
may be required
refer to local
plumbing
guidelines
drain
cold
inlet
flow
Ø20mm
conduit
relief
valve
from
solar
return
horizontal
insert sensor here then
apply silicone to seal.
Cable tie the sensor
wire to outside of the
pipe insulation, ensuring
that the wire does not
touch the hot pipe.
outlet
earth terminal
earth
neutral terminal
wiring terminal
block
element
thermostat
active terminal
conduit adaptor
goes in here and
locking ring holds it
1/2"nipple
 Loading...